License Agreement
PLEASE
READ THIS LICENSE CAREFULLY. By
using the software supplied with this licence (the “Software”) you agree
to be bound by the terms of this licence.
License & Limited Warranty
This is a license, this product is not sold.
THIS IS A NON TRANSFERABLE LICENSE, granted
to the end user, by GENESIS PTY LTD Registration (hereinafter called
GENESIS) with its mailing address at PO Box 199, Patong, Phuket. Thailand.
83150. The software marketed as AUTO EASY ULTIMATE is licensed to you
as the user. It is not sold.
I. COPYRIGHT INFORMATION
Australian copyright laws and international
copyright treaties protect this software program, and any documentation.
By using this software, you acknowledge that you have read, understood,
and agree to be bound by the provisions of this license.
II. LICENSE, COPY AND USE RESTRICTIONS
GENESIS licenses (not sells) the AUTO EASY
software to the end user, for use on any computer for which the software
was designed This means that GENESIS allows you to use the software on
a single machine. You may not use the software in a multiple computer,
multi-user, or network arrangement without prior consent from GENESIS.
You may not remove the GENESIS copyright
notices from any manuals or software provided. All copies, together with
the original, must be kept in control of the location it is provided to.
You may not make any changes or modifications
to the software, you may not delete any of the files contained in the
software, and you may not decompile, disassemble, or otherwise reverse
engineer the software. The software is not for sale. You are not to sublicense,
rent, lend, lease, donate, sell, loan, pledge, transfer, or distribute
copies.
III LIMITED WARRANTY
1.0
GENESIS warrants that the media on which the software is recorded and
the documentation provided with it are free from defects in materials
and workmanship under normal use. GENESIS warrants that the software itself
will perform substantially in accordance with the specifications set forth
in the documentation provided with it.
1.1
The above express warranties are made for a period of 3 months from the
date the software is delivered to you as the user.
Obligations of GENESIS during the warranty
period:
1.2
GENESIS will replace any media, which proves defective in materials or
workmanship, without additional charge or on an exchange basis.
1.3
GENESIS will either replace or repair without additional charge, any software
that does not perform in substantial accordance with the specification
in the documentation. Delivering to you a corrected copy of the software
or corrective code will do this.
1.4
If GENESIS is unable to replace defective documentation or defective media
or if GENESIS is unable to provide a corrected copy of the software or
documentation within a reasonable time, GENESIS will refund the license
fees paid for use of the software.
Exclusion and Disclaimer of Other Warranties:
1.5
GENESIS does not warrant that the functions contained in the software
will meet your requirements or that the operation of the software will
be uninterrupted or error free. The warranty does not cover any media
or documentation, which has been subject to damage, or abuse by you. The
software warranty does not cover any copy of the software, which has been
altered or changed in any way by you or others. GENESIS is not responsible
for problems caused by changes in the operating characteristics of the
computer hardware or operating system, which are made after the delivery
of the software.
1.6
EXCEPT AS SPECIFICALLY PROVIDED HEREIN, GENESIS MAKES NO EXPRESS OR IMPLIED
WARRANTIES WHATSOEVER, AND EXPRESSLY DISCLAIMS THE IMPLIED WARRANTIES
OF MERCHANT ABILITY AND FITNESS FOR A PARTICULAR PURPOSE.
IN THE CASE OF A USER OF THE SOFTWARE WHO
IS A CONSUMER WITHIN THE MEANING OF THE TRADE PRACTICES ACT:
(i) Except for any other conditions or warranties
issued in writing by GENESIS and except for those conditions and warranties
implied by the Trade Practices Act or other sale of goods or consumer
protection legislation which may not be excluded you agree that there
are no additional implied conditions or warranties herein or collateral
contracts herewith (except such as may be in writing and signed by a duly
authorised representative of GENESIS);
(ii) to the extent that the goods
or services the subject of these provisions are goods or services of a
kind not ordinarily acquired for personal, domestic or household use or
consumption (within the meaning of the Trade Practices Act) the liability
of GENESIS to you for breach of warranty or condition (other than a warranty
or condition implied by section 69 of the Trade Practices Act) or for
breach of any duty of care shall in all cases be limited at the option
of GENESIS in the case of goods to any one or more of the replacement
of the goods or the supply of equivalent goods, the repair of goods, the
payment of the cost of replacing the goods or of acquiring equivalent
goods or the payment of having goods repaired and in the case of services
to the supplying of services again or the payment of the cost of having
the services supplied again and (without limiting the foregoing) shall
not include any liability in respect of or arising out of or in connection
with any special consequential direct or indirect loss, damage, harm or
injury suffered or incurred as a result of such breach.
Your obligations under the Warranties:
1.7 You must call GENESIS’s
support line for an authorisation to return any defective item during
the warranty period. If GENESIS's customer service representative is unable
to correct your problem by telephone, you will be provided with a return
authorisation number and an address for returning the defective item for
warranty service or replacement. You must insure any defective item being
returned because GENESIS does not assume the risk of loss or damage while
in transit.
Other Conditions:
1.8
The warranties set forth above are in lieu of all other express and implied
warranties, whether oral, written, or implied, and the remedies set forth
above are your sole and exclusive remedies. Only an officer of GENESIS
may make modifications to this warranty, or additional warranties binding
to GENESIS. Accordingly, additional statements such as advertising or
presentations, whether oral or written, do not constitute warranties by
GENESIS and should not be relied upon as such. This warranty gives you
specific legal rights, and you may also have additional rights, which
may vary from country to country.
IV. LIMITATION OF LIABILITY
TO THE MAXIMUM EXTENT PERMITTED BY APPLICABLE
LAW GENESIS AND ITS SUPPLIERS SHALL NOT, IN ANY EVENT, BE LIABLE FOR SPECIAL,
INCIDENTAL, CONSEQUENTIAL, INDIRECT, OR OTHER SIMILAR DAMAGES, EVEN IF
GENESIS OR ITS SUPPLIERS HAS BEEN ADVISED OF THE POSSIBILITY OF SUCH DAMAGES.
In no event shall GENESIS’s liability exceed the license fees paid for
the right to use the licensed software.
V. INTEGRATION
This license including the full text of
the Limited Warranty and the Limitation of Liability, constitutes the
entire agreement and understanding between the parties and supersedes
any prior license or understanding whether oral or written, relating to
the subject of this license. This license may only be modified by a written
agreement signed by Genesis Pty Ltd.
You may use the software as long as you
like provided you do not violate the copyright and you follow the above
rules.
Title to the software, related documentation,
and any copies are retained by GENESIS PTY LTD.
Copyright © 2002 Genesis Pty Ltd. All rights
reserved
Genesis Pty Ltd
PO Box 1484
Fremantle
Western Australia 6959
Chart
Of Accounts
When you keep books for a business or organisation, you
want to track where your income comes from, where you put it, what your
expenses are for, and what you use to pay them. You track this flow of
money through a list of accounts called the chart of accounts. Accounts
include the follwing:
¨
Balance sheet accounts
¨
Income accounts
¨
Expense accounts
¨
Cost of goods sold accounts
¨
Non-posting accounts (includes
purchase orders and estimates and does not appear on your balance sheet)
Some of these accounts are created for you automatically
for example, the first time you create an invoice or statement charge,
Auto Easy automatically creates an accounts receivable (A/R) account.
Other accounts you'll add, at any time you can create and modify your
accounts as needed.
Types of accounts
Balance
sheet accounts
Your chart of accounts includes balance sheet accounts.
These accounts track the following:
¨
What you have (assets)
¨
What people owe you (accounts
receivable)
¨
What your company owes
to other people (accounts payable and other liabilities)
¨
The net worth of your company
(equity)
¨
Retained Earnings (profit
carried forward from previous tax years)
The following table describes the various types of Auto
Easy balance sheet accounts.
|
Balance sheet
account type |
Auto Easy
account type |
Use to track |
|
Asset |
|
What you have and what is owed to you |
|
|
Bank |
Transactions in cheque or savings accounts. Add
one bank account for each account your business operates. You can also
use this type of account for cash purchases. |
|
|
Accounts Receivable (AR) |
Transactions between you and your customers, including
invoices, payments from customers, deposits of customer payments, refunds,
and credits. Accounts receivable is automatically created. |
|
|
Other Current Asset |
Assets that are likely to be converted to cash
or used within a year, such as the value of your stock on hand. |
|
|
Fixed Asset |
Represents the depreciable assets your business
owns that aren’t liquid such as equipment, furniture or a building. |
|
|
Other Asset |
Any asset that is neither a current or fixed asset |
|
|
|
|
|
Liability |
|
What your company owes |
|
|
Accounts Payable (AP) |
Comprises of outstanding bills. When you first
enter a bill, Auto Easy creates an AP account |
|
|
Credit Card |
Credit card transactions for your business purchases
or expenses |
|
|
Other Current Liability |
Liabilities that are scheduled to be paid within
the next 12 months, such as GST, payroll liabilities and short-term loans. |
|
|
Long Term Liabilities |
Liabilities such as loans or mortgages scheduled
to be paid over periods longer than 12 months. |
|
|
|
|
|
Equity |
|
Net worth of your business |
|
|
Equity |
Comprises of the following:
v
Investment of capital in
the business by the owners
v
Net profit from operating
the business during the current financial year that have not been distributed
to the owners
v
Retained earnings, or net
profits from earlier periods that have been carried forward into the current
financial year. |
Balances for balance sheet accounts
The Chart of Accounts window shows a balance
for each balance sheet account (except for the special equity account,
Retained Earnings). In Auto Easy, each balance sheet account has its own
register, just like your bank account register. The register shows every
transaction for that account, as well as the account balance.
Income and expense accounts
Income and expense accounts track the sources of your
income and the purpose of each expense. When you record transactions in
one of your balance sheet accounts, you usually assign the amount of the
transaction to one or more income or expense accounts. For example, not
only do you record that you took money out of your current account, but
also you keep track of what you spent the money on.
There are no registers for income and expense accounts,
but your can create reports to show totals for these accounts over a period
of lime.
Cost
of goods sold (COGS) account
The account type "cost of goods sold" (or
COGS or cost of sales) is grouped with income and expense accounts even
though it is a separate account type. Many businesses have one cost of
goods sold account, which is similar to an expense account. COGS contain
all expenses that are direct costs of your sales, such as items for a
job or inventory. When you use inventory items to track purchases and
sales of inventory, Auto Easy automatically calculates the cost of goods
sold every time you sell an item.
Accounting
Reports
The value and performance of your company can be summarised
by two reports: The balance sheet and profit and loss statement. How you
set up your chart of accounts will greatly influence the level of detail
you record on these reports
Your Business’s Balance Sheet
A balance sheet is a financial snapshot of your company
on a selected date basis. This report is useful when applying for a business
loan or at year-end to get an accounting of your business’s equity, assets
and liabilities.
Your
Business’s Profit & Loss Statement
The income statement
shows the performance of a business over a period of time. Income is reported
for a month, quarter, year or some other period of time. The income statement
lists your income, cost of sales, and expense accounts. (Cost of sales
and expense accounts are very similar. Businesses use the two different
account types to discriminate between costs directly related to sales
and the costs of running a business) Cost of sales and expenses are subtracted
from income to calculate the profit (or loss) for the period. this is
why the income statement is also called a profit & Loss Statement.
Where the Profit & Loss Statement meets the Income Statement There
is one link between the two financial statements It is an important link
and a key concept The net profit or loss of the Income statement is automatically
posted to the equity section of the balance sheet.
Double-Entry
Accounting
Double-entry accounting is the accepted method of accounting
worldwide. Double-entry accounting, as the name suggests, requires two
entries for every financial event, but what is an entry? An entry is made
when you assign an amount to an account.
If you were to put $100 in the company cheque account,
the entry would look like this:
Account
Amount
Company Cheque
$100.00
However, this entry reflects only one side of the transaction.
It doesn't tell you where the money came from. If this $100 originated
from the sale of a tyre, the entry would look like this:
Account
Amount
Tyre Sale
$100.00
These two entries when put together, make up one double-entry
that looks like this:
Account
Amount
Company Cheque $100.00
Tyre Sale
$100.00
As you can see, you now have a double entry,
reflecting where the money came from and where it went. This is the basic
function of double-entry accounting.
Debits
& Credits
Once you’ve mastered the different account types and
the two financial statements. The next concept to learn is debits and
credits. In double-entry accounting, every dollar amount is categorised
as either a debit amount or a credit amount. And each of the six account
types - asset, liability, equity, income, cost of sales, and expense -is
classified as either a debit account or a credit account. Asset and expense
accounts are called debit accounts because their balances are usually
debit amounts. The other four account types are credit accounts because
their balances are usually credit amounts.
A good working knowledge of credits and debits is helpful,
but not required to use Auto Easy Ultimate. In almost every transaction,
Auto Easy calculates the correct debit and credit amounts for you
Because debits and credits do not follow any obvious
rule, it is difficult to remember which accounts normally have a credit
balance and which normally have a debit balance. If you remember that
assets are debits it will follow that liabilities and equity are credits.
If you remember that sales are credits it will follow that cost of sales
and expenses are debits
On the balance sheet, assets - things you own-are good
and are debits. Liabilities - things you owe are bad and are credits.
On the income statement, income accounts – money in - are good and are
credits Expense accounts - money out - are bad and are debits, The following
chart shows the accounts and the sign they carry
|
Account |
Normal Sign |
Description |
|
Assets |
Debit |
All the things a business owns |
|
Liabilities |
Credit |
All the things a business owes |
|
Equity |
Credit |
The difference between what is owned and what is owed |
|
Income |
Credit |
The money charged for products and / or services |
|
Cost Of Sales |
Debit |
The direct cost of products and / or services sold |
|
Expenses |
Debit |
The money charged to operate the business |
Conclusion
As you might have guessed double entry accounting can
and has caused a great deal of confusion. A single entry appears simple
but as different types of entries are added to the business’s books, the
system gets more difficult and complex to understand. Auto Easy Ultimate
has been designed to minimise the complexities of double entry accounting,
however it is still helpful to have a basic understanding of the principles
applied.
Tax
Reporting –
Cash & Accrual Accounting Methods
An accounting method is a set of rules that determines
when and how you report your income and expenses for tax purposes.
Cash basis
Many small businesses track income at the time they
receive the money, and expenses when they pay the bills, This method is
known as bookkeeping on a cash basis If you've been recording deposits
of your customers' payments but have not been including the money customers
owe you as part of your income, you've been using cash basis. Similarly,
if you've been tracking expenses at the time you pay them, rather than
at the time you first receive the bills, you've been using cash basis.
Accrual basis
In bookkeeping on an accrual basis, you record income
at the time of the sale, not at the time you receive the payment. Similarly,
you enter expenses when you receive the bill, not when you pay it. Accountants
usually recommend accrual basis because it gives you a better picture
of how your business is doing.
The choice is yours
Auto Easy makes bookkeeping really simple by enabling
you to enter transactions the same way no matter which method you use
for taxes. At any time you can create tax reports that follow either method,
so you are not "stuck" with one method.
Hardware
& Software Requirements
To run Auto Easy Ultimate, you need the following equipment
and software:
v
IBM OR 100% compatible
computer running a Pentium 1GHz Processor (or higher).
v
Minimum of 512MB (megabytes)
of RAM (random access memory).
v
Hard disk dive with a minimum
of 500MB free space
v
CD-ROM Drive minimum 10
speed
v
SVGA monitor or better;
capable of displaying a minimum of 256 colours and 1024 x 768 resolution.
v
56k Modem, ISDN, ADSL or
satellite connection
v
Windows 2000, ME, Windows
XP, Vista or Windows 7including Internet Explorer 6.0 (or higher) or
Netscape for
accessing Internet services.
v
Microsoft Word 6.0 (or
later version) & Excel 97 (or later version) if you plan to export
data to
Microsoft applications
v
Printer, including specified
driver loaded with defaults set to A4 page size
Network
requirements
Auto Easy Ultimate network requirements are the same
whether you are sharing a company file or printing to a network printer:
v
Windows Server or Terminal
Server to share the company file
or
v
Peer-to-Peer network using
Windows XP or Vista
Additional Sever Requirements for Multi-User Network
v
Pentium 1Ghz Processor
(or higher)
v
512MB RAM (Random Access
Memory)
v
Hard disk with 500MB free
space
Multi-User
Installation Requirements
Auto Easy Ultimate for multiple users must be licensed
for each machine. You must have a copy of Auto Easy Ultimate loaded on
each of the computers you plan to network. Each user should have read/write
access and create/delete rights to the directory where the company file
is stored. Check your network software for instructions on how to get
your computers networked and how to give each user read/write access.
If your Auto Easy Ultimate CD is mounted on a server or shared CD-ROM
drive, you can install from the mounted CD, but you cannot install across
the network to a remote computer. That is, you must be sitting at the
computer you're installing to, but you should store the company file on
the shared resource.
For peer-to-peer network users
Peer-to-peer networks are networks that do not use a
dedicated file server. This means that all the computers on the network
have the option to share their resources. There is not one machine that
is used only to allow other computers to share files. An example of a
peer-to-peer network would be two or more connected computers running
Window 95, Windows 98, Widows 2000, Windows NT 4.0 or ME.
It is important that each computer use a unique copy
of Auto Easy Ultimate installed with a unique unlock code; these can be
obtained from Genesis Pty Ltd.
It is important that yon choose one location for your
company file. The location you choose should be accessible from all of
the computers that need to use Auto Easy Ultimate. Yon may want to put
the company file on the computer of the person who uses Auto Easy Ultimate
the most. This allows that person to have the fastest access to the Auto
Easy company file.
For client-server network users
Client-server networks are networks in which there
is at least one computer dedicated to sharing files, printers, or other
resources. This computer is usually not used by individuals to do their
daily work.
In a client-server network, you will most likely put
the company file on the server in a location that is accessible by all
of the computers that need to use Auto Easy Ultimate. Each computer, except
for the file server, must have a copy of Auto Easy Ultimate installed
with a unique Unlock code unless you are using a terminal server in which
case only one unlock key is required.
Loading
The Software
Installation Procedure
Insert the CD into your drive, the install program
will execute automatically. Select install when prompted – The default
directory is C:\Program Files\Auto Easy Ultimate, if you wish to copy
the files to a different location select the change directory option during
the install.
When all the files have been copied, you maybe requested
to restart your computer. Please select restart before attempting o run
Auto Easy Ultimate.
To open the program select the desktop icon Auto
Easy Ultimate or start / programs / Auto Easy Ultimate.
Either selection will start the program for the first
time; You will need to create a new database or open the existing training
file AA Automotives, To open the training data select open existing database
and select AA Automotives from the file selection. To create new databases
enter a numeric site id. (max 8 characters – (DO NOT USE ALPHAS).
Next enter your site name and de-select the default parts, services,
categories and chart of account options if you do not want to use them.
Note
Windows Vista Installs – Version
2.5.2 or higher prompts the user to select a modified installation process
when loading Auto Easy Ultimate onto Windows Vista. Please note it is
not possible with this operating system to maintain the integrity of our
program when updates are provided if Auto Easy is loaded in the Program
Files folder
|
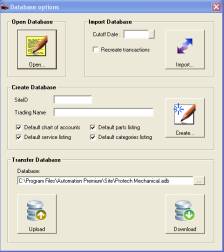
Fig 2.01 Selecting Database On Opening |
A registration box is displayed before the opening
screen. The registration can be bypassed; however the product will only
run for 30 days after which you will have to contact Genesis Pty. Ltd.
for a registration code.
If you wish to send communications to your clients
you will need to install a copy of Word for Windows 2000 or later to perform
mail merge functions. Auto Easy through the database extract function
has links to this Microsoft product
If you wish to create a new site enter a four digit
number into the site id field (no alphas) followed by the business name
in the trading name. You can also choose to load the default databases.
|
A registration box is displayed before the opening
screen. The registration can be bypassed; however the product will only
run for 30 days after which you will have to contact Genesis Pty. Ltd.
for a registration code.
If you wish to send letters you will need to install
a copy of Word for Windows95 or later to perform mail merge functions.
Auto Easy through the database extract function has links to this Microsoft
product.
Importing Data
It is possible to import data from Auto Easy 2000
(© Genesis Australasia) directly into Auto Easy Ultimate. There are 2
options available:
1)
No Transactions: Enter the cut-off date (usually the current
date), do not select the recreate transaction option, and select the import
button. You will need to choose the directory that you are importing data
from although this will default to the C:\Workshop directory if this exists
on your machine. Messages will be displayed as the data is converted to
Auto Easy Ultimate Format.
The no transaction option will import your databases
from Auto Easy 2000 into Auto Easy Ultimate; there will however be no
transaction history, debtors opening balances will have been converted
and any receipts will have been deposited to a suspense account (Bank).
2)
Import Transactions:
To import databases and
associated transactions select the recreate transactions option, the cut-off
date when choosing this option should be the date up to which you have
paid your creditors and banked receipts. These values will be credited
and debited to a suspense account. There will be some editing required
when opening your data for the first time. It is suggested you contact
Genesis for advice on how to do this as it will vary according to each
import.
Registering
Auto Easy Ultimate
Firstly you will need to Provide Genesis with the
16 alpha / numeric program code generated on installation. Genesis will
provide you with a unique unlock code for the program plus additional
codes for bar code scanning and fleet management if required. On receiving
the unlock codes there are 2 ways to register your program:
1)
From the registration box
that is displayed as an unregistered copy is loaded – Enter the unlock
code provided into the appropriate field
2)
From the opening screen
select File / Registration – The registration box is displayed a red cross
at the end of a line indicates that the program or module is not registered.
A green tick indicates a successful registration
To save your registration key select OK at the bottom
of the registration display.
|
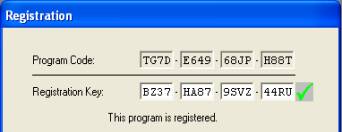
Fig
2.02 Program code & Registration key |
Registration keys are unique and apply ONLY to
the computer the program is installed on, if for any reason you need to
reload the program contact Genesis for a new set of registration keys.
If you are operating on a network each machine will require a separate
registration key. Please ensure you retain these codes in a safe place
for future reference.
|
Site Set- Up
Printer
Settings: Select Site /
Printer Settings from the drop down menu, you have the option to print
to two machines. The report printer will print job cards and all other
reports, the invoice printer will only print invoices (suggested if you
use letterhead stationery). The report and invoice printers can be the
same if multiple units are not in use.
|
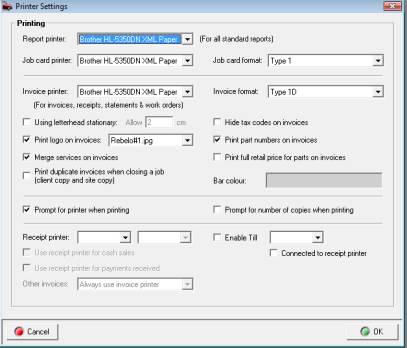
Fig 2.03 Printer Settings |
Printer
Selection: Auto Easy allows
you to connect three standard and one receipt printer. Select the required
printer by clicking on the arrow to the right of the report printer field.
Highlight the device and double click the details are displayed. Perform
the same process for the invoice and job card printer.
Job
Card & Invoice Format: There
are 3 types of job card and 7 types of invoice formats it is suggested
that you select each type and test print to determine which layout you
wish to use.
Using
Letterhead Stationery: Selecting
will not print the site / location address and phone details on the invoice.
The header spacing can also be adjusted by entering values into the
allow field.
|
Print
Logos On Invoice: If you wish
to customise the display convert your logo into a JPEG or BMP file and
copy into the Working directory\logos folder. To select the logo flag
the print logos on invoice selection, the drop down list will be displayed.
Point to the required file and double mouse click, the file name is displayed
in the logos field.
Merge
Services On Invoice: When selected
does not define fixed price & mechanical services.
Duplicate
Invoices: Allows the operator to automatically print
two copies of the invoice with sign-off text being printed on the client’s
copy. To enter the text required access Messages / Invoice Sign-Off Text.
Hide
Tax Codes: Set this to true
if you don not want the tax codes displayed against each line item on
the invoice.
Print
Part Numbers: Select if you
wish to print these on your invoice
Print
Full Retail Price: Select
if you wish to print these on your invoice
Prompt
For Number Of Copies: If
you wish to be prompted to print more than one copy of a form select the
prompt
Bar
Colour: Auto Easy allows
you to customise the invoice header bar colour, to select point and click
on the colour field and select from the displayed grid.
Prompt
For Printer When Printing: Selecting
this option will allow the operator to select another printer other than
the default.
Receipt
Printer: Auto Easy allows
you to attach a slip printer to a designated com port, select the down
arrow to the right of the receipt printer field, point and click on your
selection. A print job will be sent to the slip printer when a cash sale
is performed or a payment is received. To initialise these functions point
and click in the appropriate check box at the bottom of the printer settings
form.
|
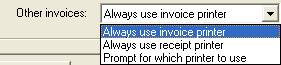
Other
Invoices: It is possible
to print invoice to the receipt printer – no work description or vehicle
faults are printed when selecting this option. Select from the option
your preference. |
|
Once your site is created and your printer settings
have been customised you need to configure the site settings, the following
notes guide you through the process
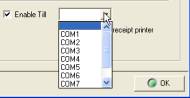
Till Draw
Auto Easy Ultimate allows you to attach a serial
till draw that needs to be connected to a coms port on the local machine
(if you are running a LAN). To set-up a till draw perform the following:
|
Connect a serial till draw to a coms port on your
computer
1) Open settings from the file menu, select printer
settings
2) Point and click in the enable till check box
3) Select the port your till draw is connected
to from the menu
4) Save the settings with OK (F12)
5) Test the till draw operation by pressing the
F9 key |
|
Till
Draw, Opening: When the till
function is enabled a second OK function is added to the payment receipt
form, if you wish to open the till draw as you finalise a sale select
the till draw icon or press the F9 key.
Site Setup Procedure
Settings,
Accessing:
You will need to set your
site preferences before using the program, from the opening screen select
file / settings. The display is tabulated with six choices:
v
Site Details
v
Database Settings
v
Accounts
v
Local Settings
v
Online Settings
Site Details
|
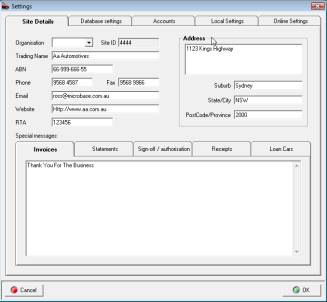
Fig 2.04 Settings
/ Site Details |
Trading
Details: Enter your trading
details including email address into the fields provided. Enter your suburb
and press the enter key, your postcode and state will automatically be
inserted into the appropriate fields.
RTA
#: If you have a registration
number that needs to be printed on the invoice enter details into the
RTA field.
Text
Messages: Auto Easy allows
you to enter four text messages that are printed at the bottom of the
invoice, client statement, sign off / authorisation and receipts. A fifth
option tab is available to enter terms and conditions for the loan car
contractTo enter messages click on the tab type your text into the appropriate
field. On printing the text lines are automatically centered on the form.
Save your changes by selecting OK (F12).
|
Database Settings
|
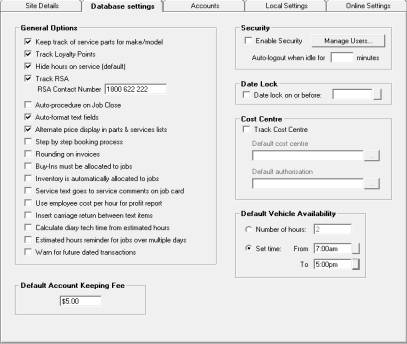
Fig 2.05 Program Options |
Customising:
Selecting Database
Settings allow you to customise various features of Auto Easy by pointing
and clicking in the checkbox next to listed feature.
The selections are categorized into the following:
General Options
Cost Centre
Security
Date Lock
The notes in this section will describe the use
of each feature.
|
General Options
Keep
Track OF FP Service Parts For Make/Model: Will
display parts on the invoice based on make / model and service for previously
performed services
Track
Loyalty Points:
If you are operating a loyalty program mouse click in the appropriate
field. When using the loyalty program member’s invoices display a statement
of points to date.
Hide
Hours On Service (Default)
– When this option is selected the hours for each service are not printed
on the clients invoice.
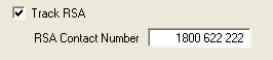
Track
RSA: This feature allows
you to issue roadside assistance to your clients if you intend using support
services.
RSA
Contact Number: If you are
issuing roadside assistance to your client base type in the contact number,
which will be printed on the invoice. If you are using support services
the number will be supplied to you. RSA issue details are printed on the
invoice if this feature is selected.
Auto
Procedure On Job Close: If
selected will automatically lead the operator through Hours allocation
& Service Reminders. Service reminders and labour allocation can be
selected manually if required.
Auto-
Format Text: Capitalises
the first letter of each word regardless of the cap locks setting.
Alternative
Price Display In Parts & Services Lists: Displays MRRP, retail, wholesale, trade
and recommended retail prices including GST.
Step
By Step Booking Process: Initialises
the automated booking process from the diary screen.
Rounding
On Invoices: Selecting rounding on invoice, rounds
the invoice value to the nearest zero or five cents. The adjustment is
posted to an other income account; it is displayed in the financial summary
of the job card and printed on the final invoice
Buy-
Ins Must Be Allocated To Jobs: Selection
ensures that all buy-ins (items specifically for jobs) are allocated to
an open job card. When this option is selected it will no longer be possible
to enter buy-ins onto a supplier invoice without a job allocation.
Service
Text Goes To Service Comments On Job Card:
This feature allows you to further customise your invoice layout by placing
text attached to services into the service comments field so it is printed
below the service rather than in the work done field.
Use
Employee Cost Per Hour For Profit Report: Auto Easy automatically calculates the cost
per hour for technicians by dividing the total value of hours sold for
the past 90 days into the total payroll for technicians over the same
period. If you wish to overwrite this feature select this option it is
now possible to enter a manually calculated labour cost per hour against
each employee from the employee form, this value is applied when running
a profit report from the job card.
Insert
Carriage Return Between Text Lines:
Selecting this option will place a carriage return between the lines of
text when selections are made from the work done or vehicle faults data.
Calculate
Diary Tech Time From Estimated Hours:
Select this option if you wish the diary hours available table to calculate
from estimated time rather than technicians allocated times.
Estimated
Hours Reminder For Jobs Over Multiple Days: Selection will remind the operator to edit
estimated job times for the day based on jobs carried forward from previous
periods
Warn
For Future Dated Transactions: If
this option is set to true when a future dated transaction is entered
you will be prompted whether you wish to continue or not,.
|
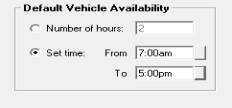
Adjusting
Default Booking Hours – To
adjust the default booking hours (set at 2) open File settings select
the database settings tab. From the bottom of the form select the method
you wish to use as a default booking time. There are two options hours
or time, save your changes by selecting OK (F12) from settings.
|
 |
Security
Security
Overview: Auto
Easy Ultimate allows you to set different access permissions for each
user; on first installation the security feature is inactive. This feature
is used in two ways.
Firstly, as a way of securing sensitive information
ie: you may not wish your technicians to be able to view your chart of
accounts, banking functions or financial reports. You would however give
permission to your office staff to perform bill payments, make deposits
and create client credits. Auto Easy allows you to set the permissions
for each employee, who is then assigned a unique log in and password.
When operating on a network it is possible to have different users logged
onto the terminals with only the permissions for the terminal operator
being applied.
Secondly, as a management tool for the in built task
manager, using security allows you to set-up appointments and tasks by
user or user group. When logged in a user will only be able to view that
individual’s appointments and tasks. Security permissions also allow you
to establish whether the user is able to enter tasks or appointments for
other users.
If you wish to use the security function it
will have to be enabled from the configuration screen.
|

|
Security,
Enabling:
Point and click on the enable option positioned above the manage users
button. Next you need to enter the user’s name (this will be their unique
log in), set the user type, establish the permissions and enter a password.
The password can be in text, numbers or a combination; the password field
is case sensitive so if you enter a letter in capitals it must be typed
in the same way for the user to be logged on. Note that when entering
your password you are asked to confirm by re-typing, if the combination
does not match the original entry a message is displayed. Simply re-key
correctly
|
|
|
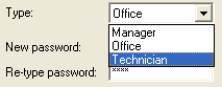
To select the user type point and click on the down
arrow situated on the right hand side of the type field. There are three
user types Manager – Usually would have full access, Office – Access to
limited administration functions, Technician – Access to jobs and the
accompanying functions only with no access to administrative tasks
|
|


|
The allow all and block all function is a quick way
to set or secure access to all functions, you can use this as a short
cut, then simply edit the selections you wish to change. |
|
|
|
|
|
|
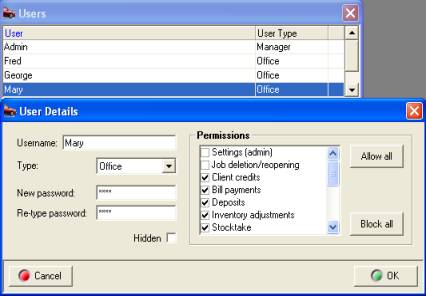
Fig 2.06 Setting User Defaults |
Security,
User Default: To
setup a new user select manage users from the configuration screen, select
new, the user details form is displayed. Enter the user name, select the
user type, enter the password (remember this is case sensitive), confirm
by retyping in the re-type password field.
Next point and click on each function you wish to
give the user access to. Remember that if you want this user to be able
to add appointments and tasks for other users tick the option at the bottom
of the list.
|
Note: It is important that you retain your password
in a SAFE place as loss can cause operational problems. It is also suggested
that you limit your password to a maximum of 6 characters so it is easy
to remember.
Security,
Log On:
Once security is set you
will need to log on to use the program, on start up a log in message is
displayed, type the user name or select from the drop down list, enter
the password and press enter or select OK.
|
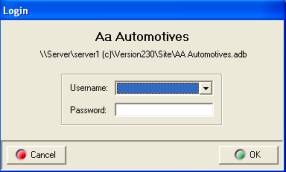
Fig 2.07 Log In Display |
If a user attempts to access functions that have
not been selected in the security profile an access denied message is
displayed. It is however possible to change a users access at anytime
by selecting File / Settings / Configuration / Manage Users. It is of
course suggested that only the manager has access to the setting option
to prevent unauthorized use of the program.
|
|
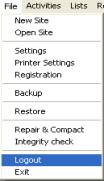
Fig 2.08Log Out |
Security,
Log Out:
To log out of Auto Easy
select file / logout, this procedure will log you out of the program displaying
the log in message for the next user to sign back in. If security is a
concern it is suggested that you log out whenever you leave the terminal
and log back in when you return.
Auto
Log Out When Idle: This options
allows the operator to set an auto log out period when the terminal is
inactive. Enter the minute value into the field provided, once this period
is exceeded you will be required to log back into the system.

|
Date
Lock
Provides the operator with the ability to lock
records prior to a nominated date, to enable point and click in the check
box then select the button to the right of the date field, from the calendar
select the lock date by double clicking in the grid, save your settings,
you will not be able to edit any records prior to the selected date. It
is however possible to change your settings or disable the feature at
anytime
Cost Centre
Track
Cost Centre: Allows you
to select a cost center and default authorisation for purchases and track
via the purchase transaction report. To set-up cost centres you will need
to add an entry to the list and also have at least one user setup.
Accounts
|
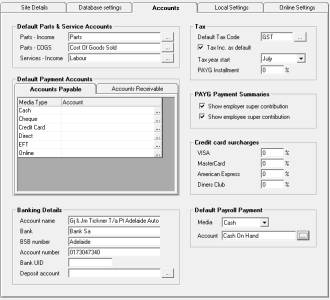
Fig 2.09 Accounts |
Customising:
The accounts tab allows
you to setup various accounting functions within Auto Easy; these are
categorized in the following way:
Default Parts & Service Accounts
Default Payment Accounts
Banking Details
Tax
Credit Card Surcharges
Default Payroll Payment
The notes below describe the use of the options
available |
Default Parts & Service Accounts
Default
Accounts: Parts – Income,
Parts – COGS, Services – Income, select the accounts you wish to apply
as the default. Clicking on the button to the right of the field will
display the chart of accounts, highlight the record you wish display by
selecting OK (F12) from the bottom of the account list.
Default Payment Accounts
Auto Easy allows you to attach default accounts to
receipt and payment media selections. You may wish for all your cash and
cheque receipts to be posted to undeposited funds, EFT and credit cards
to a clearing account. Accounts can also be selected for payment types
ie: Cheques can be attached to your main trading account, cash to cash
on hand or undeposited funds.
To setup select Accounts Payable or Accounts Receivable
tab, point and click on the button to the right of the account field a
list of your payment / receipt accounts is displayed. Select the account
you wish the transaction to be posted to finalise with OK (F12), the name
of the account is displayed in the account column.
Default Payroll Payment: To record a default wage account open settings
from the file menu click on the accounts tab. Select the payment media
and account from the drop down menu. Save your settings by exiting via
OK or F12
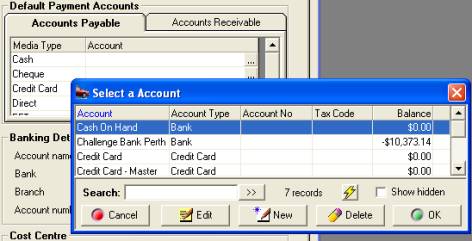
Fig
2.10 Default Payment Accounts
Banking
Options allow you to set up your bank details to
print on deposit slips. Nominate a default bank account (this is normally
your main trading account).
Tax
Auto Easy Ultimate allows you to store multiple tax
codes, which can include varying rates of tax or exemptions. You can also
select a code to be your default in most cases this will be GST.
Tax
Codes, Selecting: To
view tax codes or select a new default code mouse click on the button
to the right of the default tax code field:
|
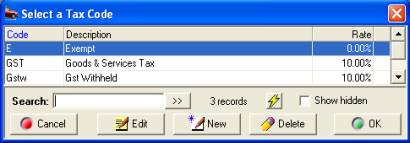
Fig 2.11 Selecting or creating a new tax code |
Auto Easy allows you to set up multiple tax codes
that apply varying rates of tax to specified items. Highlight the tax
code you wish to make the default and select OK the code will display
in the default tax code field. The default CAP Tax code when selected
will post purchases to G10 – Capital purchases on your BAS. |
Tax
Codes, Creating: Select
new from the bottom of the display the tax details display consists of
the following fields:
v
Tax Code: Insert a unique code for the tax
v
Rate: Record the rate of tax to two decimal places
(do not enter a % sign, this inserts automatically)
v
Description: Include a description for the tax ie: Wholesale,
GST, Exempt
v
Account: Allows you to allocate the tax to a sub
account of tax payable, you may wish to separate the various taxes that
apply to your business. If you wish to apply a tax in this way you will
need to set up the sub account in the chart of accounts.
|
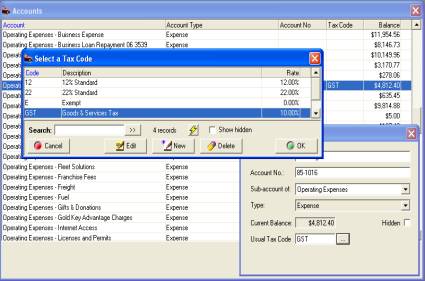
Fig 2.12 Creating tax codes |
You can apply different tax codes to parts, services
and expenses. The taxes can be allocated to one account ie: Tax Payable
/ GST or you can create individual tax accounts. Auto Easy gives you the
option to view values over a date range by tax code.
This option is helpful if you handle the liability
differently to your default tax code. An example is private vehicle use
that may not be tax deductible any expenses that you apply to a unique
tax code can easily be tracked |
Tax
Included As Default: Select
this option if you wish the cost and retail prices to default to tax included,
leave blank if you wish the default to be ex. Tax.
Tax
Year Start: Enter the start
month of your tax year, if you are starting to use Auto Easy Ultimate
during the tax year you still need to enter the tax start month in this
field. If this is not entered correctly it will impact on your financial
reports.
PAYG
Installments: If you are
liable for PAYGI enter the % rate into this field, PAYGI is calculated
on sales excluding GST and is visible as a total in Tax Payable / PAYG
Installments posting in the chart of accounts.
Credit
Card Surcharge
|

|
Auto Easy allows you to setup different percentage
surcharges for four credit card types. When a value is entered and you
choose to process a client payment via credit card a selection field is
displayed, simply select the credit card type and the percentage is added
to the total payment when printing a receipt – Note the receipt is titled
tax invoice for taxation purposes. The surcharge is also recorded in the
payments section of the client card. |
Local Settings
|
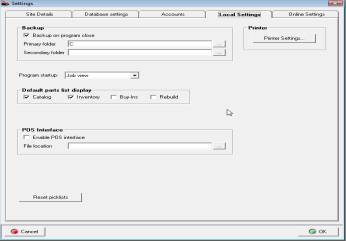
Fig 2.13 Settings / Local Settings |
Customising:
Local settings allows for
further customisation
To the following functions:
Backup
Printer
Default Parts List Display
Diary Job Screen Sorting
Reset Picklists
The following notes describe how set each function
|
Back-Up On Program Closes
The option allows you to select two drives for the
backup purposes. This is usually a directory on the hard drive plus a
removable drive ie: USB Flash Disk or CD ROM. To chose the backup locations
select the button to the right of the field; from the navigation window
select the drive you wish to write to and click on OK (F12). Perform the
same for the second location, when backing up to removable media you must
ensure the drive is available before exiting the program.
Printer
Settings
Selecting this option will open the printer settings
– see printer settings for details.
Default
Parts Display
Allows you to select which part type you wish to
set as a default
Diary
Screen Job Sorting
Select whether you wish the order of jobs on the
diary screen to be by job number or client.
POS Interface
Genesis in conjunction with Computer Vision have
developed a basic link to the Quick Fuel POS system, if you have this
application installed and wish to link with Auto Easy select the checkbox
and search for the Quick Fuel company file by clicking on the button to
the right of the file location field, this action will allow you to navigate
your PC.
Reset Picklists
Option allows you to set you list configuration to
the optimum for your chosen resolution – please not you will have to exit
the program and re-enter for the settings to be visible
Online Settings
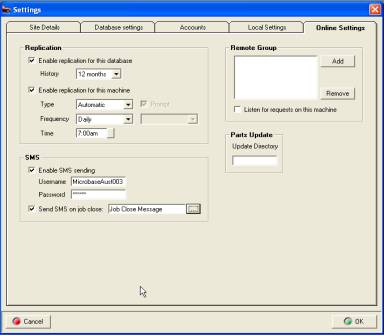
Fig 2.14 Online Settings
|
Customising: The online settings option is configured in the following way:
Replication
SMS
Remote Group
Parts Update
The following notes describe how to use each function.
|
Replication
Overview: Replication is used to transfer data to a central server for data analysis (organisation dependant) and or central database marketing (generation of client communications & roadside assistance). Before data can be transferred the replication process has to be set, plus you will also need the machine to have access to the Internet via dial-up or broadband. You will also need to set your browser to always dial your default ISP (For dial up connections only).
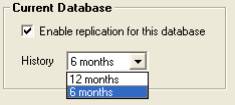
Replication, Settings: Select the replication tab at the top of the display – point and click in the enable replication for this database option.
|
Next you need to choose whether you wish to send 12 or 6 months data (6 months is sufficient unless notified by Genesis). You will now be able to select the 6 month option by pointing and clicking on the arrow to the right of the history field.
|
|
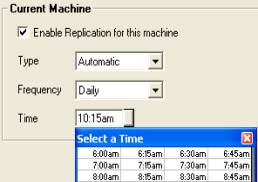
The next step is to select enable replication for this machine (For a site running a network this option should only be selected on one machine which has access to the internet). This will display the auto / manual options, frequency and replication time. It is suggested that the replication is performed on a daily basis, select a time which is suitable if operating on broadband select Automatic from the type field, for dial up users select manual, this option will display a message at the appropriate time reminding you to replicate – to initialize select yes from the message box. Select weekly or daily from the frequency field, time can be chosen from the table by pointing and double clicking. Save your settings
|
Replication, The First Connection: The first replication for sites that have 6 months of data will take a considerable time (faster on broadband) do not be alarmed by this as it is a “one off” process, once the first replication has completed the process should take no longer that a couple of minutes a day (dial up connections faster on broadband).
|
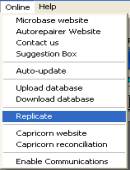
It is suggested that you manually initiate your first replication by selecting the on-line option from the top of your screen, point and click on the replication option. This will connect you to the server and start to replicate your records (10 passes in total). You will see a progress monitor in the form of a pink bar as the data is transferred.
On completion a message box (for dial-up users) will prompt to disconnect from the internet, select Yes if you wish to work off line. No message is displayed if you are using broadband.
|
SMS Messaging
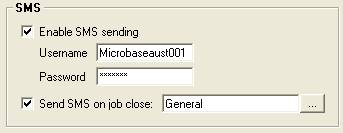
Auto Easy allows the user to send SMS messages to
single or multiple clients, for this feature to work you must have an
internet connection plus an account and password from Genesis Australasia.
Enter the account details into the fields provided.
|
|
If you wish to send a default text message to your
clients on job card close select the Send SMS on job close option, point
and click on the button to the right of the field, a list of SMS messages
is displayed, select the one you wish to send and confirm by selecting
the OK (F12) option at the bottom of the list. |
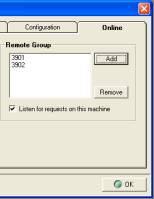
Remote Sites Parts Inquiry
|
The right hand side of the online screen allows the operator to setup single or multiple sites to contact to check stock on hand.
Before adding sites ensure that the remote and local site/s have replicated with the Genesis server. This only needs to be performed once to record the site id., if you do not intend to send any further data to the server turn the replication feature off after the initial replication.
Select add to enter a new site, type the site id. Into the field provided, save with OK (F12). Repeat the process for any other sites in the group. o finalise the setting select listen for requests on this machine, only one machine that has access to the internet on the network needs to have this option selected. Save your settings with OK (F12)
|
Parts
Update
|

|
Enter the folder name for data uploads and price
file updates, the software provider will assist you with these settings.
|
Accounting
System Overview
One of the main advantages to using Auto Easy is
that as you create invoices, write cheques, and produce purchases orders;
Auto Easy is literally you doing your bookkeeping. To make it easy to
perform regular tasks, Auto Easy saves information on various lists so
you don’t have to retype it each time you need it. For example, in the
client list, you can save addresses, phone numbers, and payment terms
that apply to a customer.
It is not essential for the operator to have a full
understanding of the accounting processes as Auto Easy is programmed to
allocate certain transactions to specified accounts, an example is parts
and labour these are linked to an income account so there is no need to
set the posting account. Likewise inventory purchases are posted to accounts
payable and inventory asset accounts. It is however necessary for you
to customise your chart of accounts to allow for specific postings. A
standard chart of accounts is included in the data set of Auto Easy, the
chart of accounts can however be changed to suit an individual business.
Accounts can be deleted, edited or added.
You get out only what you put in
If you want to see detail on reports, be sure to
track it somewhere in Auto Easy. For example, if Harry needs to know how
his yearly travel expenses break down by airfare, lodging, and meals,
first he needs to subdivide his expense account for travel expenses into
three sub-accounts. Then he needs to break down his expenses each time
he enters them into Auto Easy.
What you shouldn’t try to track in Auto Easy
There are some things that you should not try to
track in Auto Easy:
v
Personal finances: For tax purposes, it’s usually best to
keep your business income and expenses completely separate from your personal
income and expenses. (If you still want to track personal finances in
Auto Easy, set up a separate site file for them.)
v
Investments in shares
or trusts: If the business
owns these investments, you can track the cost basis as an asset. However,
Auto Easy doesn’t have the investment tracking.
v
Details that are not
specifically related to your business
accounting: For example, John needs to track when subscriptions
expire so he can send reminder notices.
Chart
Of Accounts
You can fine-tune your chart of accounts at any
time by doing the following:
v
Add new accounts or sub-accounts.
You can add sub-accounts to balance sheet accounts (for example, fixed
asset accounts) as well as to income and expense accounts.
v
Delete accounts that have
no transaction history
v
Change the name of an existing
account.
v
Enter an opening balance
for a new account
v
Arrange accounts in order
of account type or name
v
Make one existing account
the sub-account of another
Understanding
The Account Types: Before customising
your accounts it is important to understand what each account type represents:
|
Account Type |
Purpose |
Examples |
|
Accounts Payable |
What you owe suppliers and service providers |
Job parts and inventory purchases, what you owe
for services rendered ie: accounting, window cleaning and consumables |
|
Account Receivable |
What your clients owe you |
Balance owing for jobs performed or parts and
services provided |
|
Bank |
Cash you have available |
Relates to your trading account or cash on hand |
|
Cost Of Goods Sold (COGS) |
The cost of parts or services that you have on
sold |
Includes parts taken from inventory, catalogue
items or parts and services purchased for a specific job |
|
Credit Card |
Allows you track the transactions logged on your
company credit card |
Purchases made for parts and services provided
to your business |
|
Equity |
The net worth of the business |
Auto Easy has 2 standard equity accounts – retained
earnings and opening balance equity. |
|
Expense |
Expenses you incur to run your business |
Examples are bank fees, electricity, rent and
vehicle expenses |
|
Fixed Asset |
Items of plant or buildings your business owns |
Tools, office equipment, shelving or the value
of a property from which you operate your business |
|
Income |
Parts and labour you have sold |
Items and services sold on cash, charge or job
invoices |
|
Other Current Asset |
Other assets that are not registered as a standard
asset |
Examples include stocks & shares, loans made
to other companies or individuals |
|
Other Current Liability |
Liabilities other than purchases from suppliers
and service providers |
Includes tax owing and loans made to your business
|
|
Long Term Liabilities |
Liabilities, such as loans |
Includes non-current liabilities |
|
Other Expense |
Any expense that you decide not to allocate as
an expense |
Examples may include personal expenditure |
|
Other Income |
Income that is generated from activity outside
of selling parts and labour |
Can include items such as rent or interest received
|
Chart
Of Accounts, Accessing: From
the top menu bar select lists / chart of accounts you can now view the
standard chart of accounts and add, edit or delete (only non-system accounts
and accounts that have no transactions applied).
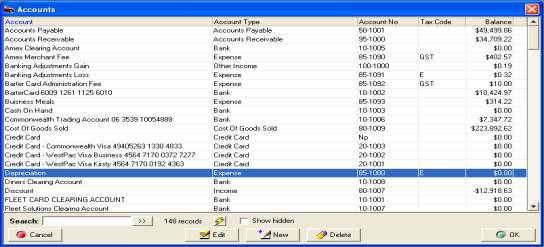
Fig 3.01 Chart Of Accounts
Chart
Of Accounts, Creating New Accounts: From
the bottom of the accounts listing select new, this action opens the account
details form enter the name of the account ie: Office equipment, account
number (if you use these as references). It is possible to group account
numbers by entering a dash in the record. If the account is a non-posting
account (all master accounts should be set as Non- posting) enter NP or
type Non-Posting into the account number field. Do not select non-posting
accounts when processing transactions.
Fig3.02 Creating A New Account
Chart
Of Accounts, Creating Sub Accounts:
If you wish to attach an account to a master select the arrow to the right
of the sub-account field. A list of accounts is displayed, highlight the
account you require and double mouse click. The account will appear in
your chart of accounts as a sub account. Ie Depreciation -- Hoist
You may want to use sub-accounts for two reasons:
v
You want a further breakdown
of amounts for an existing account. To accomplish this, set up sub-accounts
of the existing account. From now on, use the sub-accounts instead of
the parent account. (You may want to edit earlier transactions so the
breakdown shows up on reports covering a period before today.) For example,
suppose you have an Insurance expense. You add sub-accounts for building,
equipment and personal
v
You already have related
accounts that you want to subtotal on reports (Or you may want to find
them more easily). You set up a new parent account and then make the related
accounts sub-accounts of the new parent.
Chart
Of Accounts, Entering Opening Balances: Before
entering your opening balances it is suggested you give some thought to
how you want your chart of accounts to work for your business. If you
require detailed reporting on any account you can set up sub accounts
under a “parent” ie: you may wish to track the individual expenses related
to running a motor vehicle in this situation you can create a parent account
titled workshop utility and attach sub accounts to the “parent” which
can include Fuel & Oil, servicing, insurance and lease payments. Using
this method will allow you to report on each component that makes up the
total running expenses of the workshop utility.
You may also wish to create individual accounts
under fixed assets such as hand tools, hoist, computer system etc. Give
some thought to items such a other liabilities these can include loans
and taxes owing.
If you receive income from any other source that
selling parts and labour set up specific accounts under other income,
maybe you collect rent from a tenant if so this should be allocated to
other income into an account titled rent.
Once you are satisfied with the structure of your
chart of accounts you need to enter the opening balances into Auto Easy.
The standard chart of accounts records a zero balance on all accounts,
it is possible to add an opening balance to an account posting if it falls
into the following:
§
It is a new account
§
A standard account that
has a zero balance
An opening balance can only be entered once, however
if you make a mistake you can adjust with a journal or funds transfer
entry.
Default
Tax Code: Selecting the button
to the right of this field will display your tax code list highlight the
record you wish to attach to the account and select OK (F12) to enter.
You can only add tax codes to expense and fixed asset accounts.
When posting to an account with a default tax code the system checks the
code against the line item, if this does not match a warning message is
displayed.
Tracking Equity Accounts
Your business’s equity comes from two sources:
v
Money invested in your company
(capital investments)
v
Profits of your company
Of course, the owner can also take money out of
the business. Such withdrawals, called owner’s drawings, reduce the company
equity. Auto Easy sets up two equity accounts automatically:
Opening
Balance Equity:
For every balance sheet account you set up with an opening balance, Auto
Easy records the amount of the opening balance in the Opening Balance
Equity account. (Asset account opening balances increase the equity; liability
account opening balances decrease the equity.)
Retained
Earnings:
If you have data for more than one financial year. The Auto Easy balance
sheet has a balance for the Retained Earnings account equal to the net
profit from prior financial years. The balance for the Retained Earnings
account does not display on the chart of accounts.
Some people like to track owner investments, owner’s
drawings, and retained earnings prior to the Auto Easy start date by putting
them in separate equity accounts. If you decide to add additional equity
accounts, Auto Easy still adds the Retained Earnings and Net Income lines
on your balance sheet.
Equity accounts for sole proprietorships/trader
Since all the equity of a sole proprietorship/trader
company belongs to one person, tracking equity can be very simple. As
of your Auto Easy start date, all the equity is in the Opening Balance
Equity account. Keep the equity in this account and perhaps rename the
account to something like “Owner’s Equity.”
Note:
When setting up a new account for owner’s drawings, enter a negative opening
balance to show the total draws prior to the start date. The negative
opening balance indicates that the draws have reduced the company’s equity.
(Or, enter a zero opening balance and record drawings from now on)
Partnerships
Each partner may have invested in the partnership,
and each receives a specified share of profits. Since partners are not
employees, they don’t receive salaries or wages, but they may withdraw
money against their share of profits. As of your Auto Easy start date,
all the equity is in the Opening Balance Equity account. Set up separate
equity accounts for each partner.
If you don’t want to see further detail, the opening
balance for each partner’s equity account should equal the partner’s equity
as of your Auto Easy start date. Since the company’s equity belongs to
the partners, setting up new accounts should reduce the balance of opening
balance equity to zero. Record each partner’s capital investment, drawings,
and share of profits in the partner’s single equity account.
If you want to see further detail by adding sub-accounts,
the opening balance for each partners “parent” equity account should equal
zero.
(Optional) Add sub-accounts to provide the level
of detail you’d like to see on the chart of accounts and on the balance
sheet. For example, add sub-accounts for each partner’s investments, share
of profits, and drawings.
Company
In a company, you’ll usually want to separate the
stockholders investment of capital from the stockholders’ share of earnings.
To track paid-in capital or investments of shareholders, add an equity
account with a name such as “Capital Shares.” Although you do need to
have records of the names and investments of each stockholder, you probably
won’t want to show this detail on your chart of accounts. For the opening
balance, enter the total paid-in capital as of your Auto Easy start date.
After you have set up all your accounts, the amount remaining in Opening
Balance Equity represents retained earnings prior to the start date. You
can rename this account with a name such as “Prior Earnings” or “Pre 1999
Earnings.” Auto Easy automatically tracks the company’s retained earnings
for completed financial years in the Retained Earnings equity account.
After the end of the year, you may distribute some or all of the retained
earnings of the company to stockholders as dividends.
Journal
Entries
Journal
Entries, Overview: During
the course of business over a period of time you will make hundreds or
thousands of accounting entries. To help you manage your accounts Auto
Easy allows you to make journal entries. A journal entry is simply a way
of changing the balances of accounts.
All journal entries are double sided comprising
of a both a credit and debit entry to your accounts the balance of a journal
entry must always equal zero. It a journal does not balance Auto Easy
will not allow you to post the transaction.
|
|
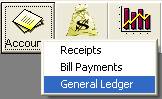
Journal
Entries, Displaying: To display
journal entries click on the accounts icon at the top of the screen and
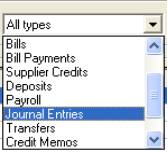
select general ledger. The general ledger transaction journal is displayed.
To view journal entries only select the arrow to the right of the field
at the top of screen displaying All Types – select journals from the drop
down list. |
|
|
|
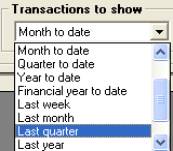
To filter journal
entries by date select the field at the top of the screen-displaying month
to date. Select the arrow to the right of the text. Next highlight the
period you wish to view or alternatively type the from to dates into the
date fields also located at the top of the form – selecting the arrows
on the right hand side allows you to pick from a calendar |
|
To display the details of a journal entry highlight
either the debit or credit entry and double mouse click or select edit
from the lower menu bar this action will display the journal entry form.
The form displays debit and credit entries including the date reference
number and any text memos.
Journal
Entries, Creating: To
create a new journal transaction select the Entry button from the
bottom of the general ledger display or select admin / journal entries
from the top menu bar. Either of these actions will display the journal
form.
|
|
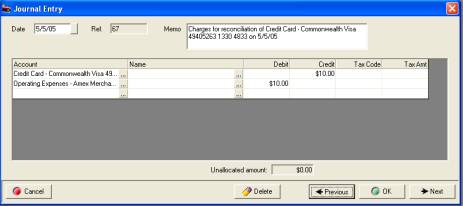
Fig 3.03 Journal Entry Form
To enter transaction details select the button to
the right of the first entry in the account field column.
You will see
a list of accounts, select the account you wish to debit or credit to,
double mouse click the account name is entered into the account field.
Next point at either the debit or credit fields, enter the value. ie:
Trading account enter a credit of say $20.11 (according to the principles
of double entry accounting a credit to your bank account will be logged
as a debit in your chart of accounts). |
|
|
|
|
|
Point at the field below the last account entry
and mouse click, from the account list select the account you wish to
make a debit entry to, we will select bank charges enter $20.11 into the
debit column. The transactions now balance and the unallocated amount
is zero.
Journal
Entries, Using Tax Codes: You
may need to allocate an amount to tax when processing certain journals.
An example would be when adjusting a clients account to write off a bad
debt, say the amount to be written off was $110.00 you would credit the
clients account with $110.00 and split the opposing debit entry between
an expense account ($100.00) and GST ($10.00).
To apply tax to a journal select the tax code field
click on the down arrow, next point and click on the required tax code,
the tax amount is automatically calculated and placed into the tax amount
field. Tax is calculated on the value of the debit or credit entry entered
on the same line.
Journal
Entries, Adjusting Debtor And Creditor Accounts: Auto Easy allows you to adjust individual
accounts assigned to accounts receivable (Debtors) and accounts payable
(Creditors) with a journal entry. The entries are recorded in the bill
payments (creditors) and Receive Payments (Debtors) forms, payments and
receipts can be allocated to these transactions in the same way as process
bills and invoices.
To adjust a debtors account select the button to
the right of the account field, from the chart of accounts select accounts
receivable, the name field can now be accessed, point and click on the
button to the right of the field, from the client list select the client
you wish to raise the adjustment for, select OK from the bottom of the
client listing. The clients name is now displayed in the form.
If you wish to increase the balance of a debtors
account place the value (in tax) into the debit column on the same line
as the client’s name. Next select the account you wish to post to if there
is a tax value enter the excluding tax amount to the debit column on the
same line, to enter the tax value select the tax code and the calculated
value is automatically entered in the tax amount field. Note: That the
tax and debit or credit value can be changed, however the total credits
must always be equal to the total debits for the transaction to be posted.
Journal entries are displayed in the following format
on the bill payment and receive payment forms

Receipts (Debtors)

Bill Payments (Creditors)
Ticking the box at the end of the line allows the
operator to allocate payments or receipts to a journal.
Note:
It is best to view your chart of accounts pre and post when entering journals,
this is an easy way to determine whether the transaction has debited and
credited the correct accounts. Do not worry if you get it wrong Auto Easy
allows for easy editing of journals.
Journal
Entries, Editing:
To edit a journal go to the general ledger by selecting the accounts /
general ledger option from the top menu bar. Search for the entry you
require, highlight and double click on the line item or select edit from
the lower menu bar. You can now alter any of the details except the reference
number.
Journal
Entries, Deleting: Journal
entries can be deleted from the journal form by selecting the delete function
or the general ledger screen. If deleting from the general ledger use
the transaction type filter to display only journal entries, your search
can be further defined by the entering the date or transaction number.
Highlight the transaction you wish to delete and click on the delete icon
at the bottom of the screen. Only journal entries that have not been reconciled
can be deleted.
Journal
Entries, Viewing: Use the previous and next options at the
bottom of the form to locate previous entries, if you wish to create more
that one journal entry using the next option will open a blank transaction
form.
Transferring Funds
Funds
Transfer, Overview: Auto
Easy allows you transfer funds from one account to another using the funds
transfer feature. Fund transfers vary from a journal entry, you can allocate
a media type from this form ie: cheque, cash, credit card or EFT.
Funds
Transfer, Accessing: From
the top menu bar select Admin / Transfer Funds, the transfer form is now
in view. Alternatively transfers can be viewed from the general ledger
screen by using the filter to select transfers. To view the details of
a transfer highlight the line item and double mouse click or select edit
from the bottom menu bar of the general ledger transaction display.
Funds
Transfer, Transferring Between Accounts: You can transfer funds between any two
balance sheet accounts in your chart of accounts. For example, you may
need to transfer funds from a savings account to a current account to
cover your weekly payroll.
1)
From the Admin menu, choose Funds Transfer
2)
Enter the amount you want to transfer
3)
Select a media type from the drop down menu
4)
Select an account to transfer funds from, and an account to transfer funds
to.
5)
Click OK.
Funds
Transfer, Deleting A Transfer: Transfers can be deleted by selecting
the delete option at the bottom of the display or by opening the general
ledger screen highlighting the transfer you wish to remove and select
delete from the bottom menu bar of the display.
Note:
Only transfers that have not been reconciled or allocated on the bill
payment or receipts form can be deleted.
|
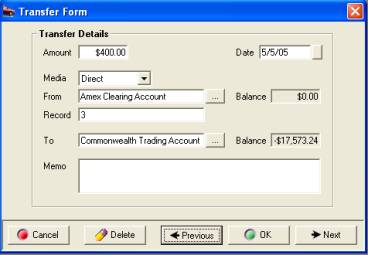
Fig 3.04 Transfer Form |
The funds transfer form allows you to transfer money
between accounts and allocate a media type. To make adjustments between
accounts you should use the journal entry function.
Navigating
Transactions: Use the previous
and next buttons to scroll through transactions. If you wish to enter
more than one transfer completing the transaction with next will open
a blank form.
|
Opening
Balances
Overview:
Auto Easy allows you to
enter opening balances into any account type displayed in the account
list, you will need to access this feature if you wish to transfer closing
balances from your previous accounting system. Accounts payable and receivable
values need to be allocated against each individual supplier and customer
this is done by selecting a “special” entry from the parts listing and
applying to a charge invoice for customers, for suppliers (accounts payable)
create a bill and apply the current outstanding value via the add other
option.
Opening
Balances, Entering Values: To
record an opening balance against an account select lists from the top
menu bar from the menu select chart of accounts, if you wish to record
a value against an existing account point and double click on the line
item or highlight and select edit (F2). At the bottom of the display is
the opening balance field, enter your amount and save with OK (F12).
|

Fig 3.05 Entering Opening Balances To Accounts |
The current balance
field can only be used once to add an opening balance. An opening balance
can’t be applied once transactions have been recorded against the account.
If the current balance field is “grayed out” it is not accessible indicating
that transactions have been recorded. The balancing account is opening
balance equity, the account value will increase / decrease by the amount
entered depending on whether it is a positive or negative balancing. |
Opening
Balances, Debtors:
It is necessary to create charge invoices for clients that owe you money.
Auto Easy has a “special” entry DEBTORS (Part No. Field) displayed in
the parts listing that needs to be applied to the charge invoice. The
amount entered should be the total that the client owes. It is also suggested
that the invoice is closed on the last day of the month the debt was incurred.
To enter a client’s opening balance perform the following:
1)
Select Invoices / Charge
from the top icons (alternatively press F7)
2)
Create the client if not
already entered by selecting new from the bottom of the client listing
entering the relevant details, save the client form by selecting OK (F12).
3)
With the client highlighted
select OK from the bottom of the client listing – A charge invoice is
displayed.
4)
From the charge invoice
screen select add parts, search the listing for an item with the part
number DEBTORS select and select OK from the bottom of the parts list.
5)
Click on the value of the
DEBTOR item at the end of the line and enter the outstanding balance.
(GST applies if you are reporting on a cash basis, with accrual the tax
code should be set to E for exempt – please check this with your accountant
before proceeding).

6)
Select Close from the bottom
of the charge invoice
7)
Change the date on the job
close form to the last day of the previous month and select OK
|
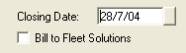
|
The transaction is displayed in your sales screen;
the balancing accounts are Accounts Receivable / Opening Balance Equity. |
Note: Do not change
the balancing account set-up on the DEBTORS item
Opening
Balances, Creditors: On
the opposite site of the ledger you need to enter the value of outstanding
bills against each supplier, again this can be entered as a single value
through purchasing. To enter outstanding values against suppliers perform
the following:
1)
Select the purchasing icon
from the top of the screen
2)
Select new from the bottom
of the display, select your supplier, to make an entry select new from
the bottom of the supplier list complete the details and save with OK
(F12). Highlight the supplier and select OK; you are now in the bill form,
enter OB (opening balance) in the Invoice / Ref # field. Change the date
to the last day of the previous month.
3)
Select the Add Other option
from the body of the screen, highlight the CREDITORS OPENING BALANCES
item and select OK (F12). A new entry is displayed on your bill.

Click on the value of the CREDITOR item
at the end of the line and enter the outstanding balance. (GST applies
if you are reporting on a cash basis, with accrual the tax code should
be set to E for exempt – please check this with your accountant before
proceeding).
Save the transaction by selecting OK (F12) from
the bottom of the bill display – The amount can now be processed in the
normal way. Note: Do not change the balancing account set-up
on the CREDITORS item.
Diary
Functions
Diary,
Overview:
The Auto
Easy diary allows you to view job status and technician labour allocations
on daily or seven day basis. Information includes customer name, job status,
start and finish times. For easy reference the job status field is colour
coded. The diary can be used to log current jobs or future bookings; the
7 day view also displays a grid showing all invoices and cash sales. To
view job, invoice or labour allocation details the operator simply mouse
clicks on the record displayed.
Diary,
Opening:
To open
the diary screen select the diary icon from the top menu bar
 The
diary is accessible from all screens that display the top menu bar
The
diary is accessible from all screens that display the top menu bar
The diary screen can be viewed in 3 modes:
v
Jobs
& bookings – 1 day view
v
Jobs,
bookings and open invoices – 7 day job view
v
Technician
labour allocation – 1 day view
Diary,
View Selection: There are 5 control buttons
on the top left hand bar of the diary screen that allow you to change
the view.
 To
change a view point at the required selection and left hand mouse click
To
change a view point at the required selection and left hand mouse click
1
2 3
4 5
v
1 = 1
day view
v
2 = 7
day jobs & bookings view including open invoices
v
3 = Jobs
& Bookings
v
4 = Technicians
Time Allocations
v
5
= Task
Manager
Select whether you wish to view jobs or technicians
allocations using button 3 for jobs, bookings & invoices or button
4 to view labour allocations, button 5 displays the task manager. Selecting
button 1 displays one day selecting button 2 shows 7 days and open invoices
in all modes.
Diary,
Changing Days:
To the
right of the view selection are your date selection controls, you can
select a date using the button to the right of the date field. From the
calendar point and double click on the date required your selection will
be entered into this field with the diary screen displaying records for
the chosen date. It is also possible to manually enter a date by highlighting
the current day field, selecting delete then typing the date you wish
to move to in a DD/MM/YY format.
 Positioned
to the right of the date field are the date controls
Positioned
to the right of the date field are the date controls
Date Field
1 2 3
4 5
|
v
1 = Back
one week
v
2 = Back
one day
v
3 = Always
selects today
v
4 = Forward
one day
v
5
= Forward one week
|
Refresh
Option: The
diary screen is refreshed each time the screen is closed and re-opened
if you wish to refresh the screen without closing select the refresh option
the to the right of the data selection

|
Multiple selections will move the date forward
or backwards a week or a day at a time depending on the control in use.
Date
& Time Display-The
current time and date is displayed in the top right hand corner of the
diary screen
Booking
Function: To
the right of the date controls is the booking selection, to open the booking
form point and mouse click.
 To
enter a booking and create a job card select this button from the diary
screen
To
enter a booking and create a job card select this button from the diary
screen
Jobs
& Bookings
Jobs
& Bookings, Day View:
Records client and vehicle information representing the booking, work
in progress or completed job by a time line in cells representing 15 minute
time slots from 6.00am – 8.00pm. The time line changes colour according
to job status.

|
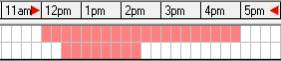
|
If you wish to filter jobs by time point and
left hand mouse click on the header of the start time cell, point and
right hand mouse click on the finish time cell header – only jobs within
the selected time frame are displayed in the diary list. |
Fig 4.01 Jobs & Bookings Day View
|
Colour |
Job Status |
When a job is closed the time line remains on
the diary screen for the time the work in progress time although the colour
will change to green indicating work completed. Work in progress moves
forward to the next day and is indicated by a pink or red bar depending
on job status. |
|
Blue |
Booking only |
|
Light Red |
Work in progress within allocated time |
|
Dark Red |
Work in progress outside of allocated time |
|
Green |
Work completed |
|
Orange |
Loan car booking |
Diary,
Accessing Records From The Grid: It
is possible to open records by clicking in specific fields from the diary
screen’s day view – pointing and double mouse clicking will display the
following:
|
Area |
Form Displayed |
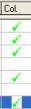
|
The diary screen allows you to record when a
vehicle has been delivered back to the client. Point and mouse click in
the Col (collected) column a green tick is displayed. Note: It
is only possible to tick closed job records. |
|
Client Name |
Client Form |
|
Vehicle Registration |
Vehicle Form |
|
Make & Model |
Vehicle Form |
|
Job # |
Job Card |
|
Booking Line |
Booking Form |
When forms are accessed via the diary grid they
can be edited in the same way as if they were opened from the client or
vehicle listing. To display changes made to these records you will need
to refresh the diary screen (change screens and then re-open the diary
screen). To display services simply point at the service field
Jobs
& Bookings, Week View: In
this mode the operator can view 7 days of jobs and bookings plus open
invoices are displayed in the eighth grid.

Fig 4.02 Jobs & Bookings Week View
|

|
Invoice
Grid Week View: The eighth
grid displays open invoices and cash sales information includes client,
job number and the opening date. Once an invoice or cash sale is closed
it will automatically be removed from the open invoice display.
|
Fig
4.03 Open Invoice Grid
View
an invoice: Point at the required
record and left hand mouse click.
Deleting
Bookings:
It is
possible to delete bookings from the diary screen in day view only:
highlight the record and select the delete button. Note:
You can only delete bookings it is not possible to delete work in progress
or closed jobs from the diary screen.
Booking
Sheets, Printing: It
is possible to print single or multiple booking sheets, information includes
client, vehicle details, service history, vehicle availability plus work
authorisation. Booking sheets are printed from the sales screen. Create
the booking in the normal way, select the sales icon from the top of the
screen, use the drop down menu at the top of form to select booking. Click
in the check box to select records you wish to print booking sheets for.
To initiate the print run select print from the bottom of the sales screen.

Fig 4.04 Selecting Bookings From The Sales Screen
 To print the job / booking status for the
day select the print function located at the top of the diary display.
To print the job / booking status for the
day select the print function located at the top of the diary display.
Bookings,
Creating:
Bookings can be created from three areas:
Diary Screen
Client
Listing
Vehicle
Listing
To create a booking select this button from either
of the above 
Selection will open the booking form, which contains
information on the client, vehicle, services required and the period of
availability. It is also possible to allocate technicians to a job from
the booking form. To create bookings follow these steps:
1)
Select create a booking
either by client or vehicle.
2)
If the client does not exist
open a client form by selecting new and enter the details.
3)
Select the vehicle
or enter details if the client is new or if you are creating a booking
for an additional vehicle
4)
Select the service or
services required
5)
Update the odometer
if necessary – vehicles with a service history
6)
Select the start and
finish times
7)
Enter all other details
as required ie: order number, WOF or registration
check
8)
Work to be done if applicable
9)
Technicians time allocation
10)
OK (F12) to save the booking
on the diary
Selecting
The Client: Type the customer
or company name into the client field, click on the client field button
you will now see the client is highlighted in the client listing. If the
client does not exist click on insert new and add the details, remember
you must click on OK to save any new information.
Selecting
The Vehicle: Select the vehicle
from the list. If no vehicles exist or you wish to add a new vehicle select
insert – New and enter vehicle details as previously described. Select
the vehicle you wish to work on by moving the cursor with the arrow keys
or clicking. Select OK (F12) – You are now prompted to select a service
from the listing.
|

Fig
4.05 The Booking Form
|
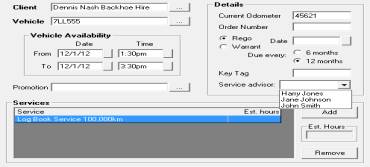
|
Service
Advisor, Adding – It is also
possible to record the service advisor details on the booking form, which
are then added to the job card. To record the service advisor click on
the down arrow symbol to the right of the service advisor field, highlight
the record and double click. The service advisor details are now displayed.
Note that the service advisor must be recorded in the employee list. |
Work
Descriptions: The booking
form defaults to print work descriptions, if work descriptions are not
required on your hard copy point and click on the check box next to include
work descriptions.
Vehicle
Faults: If vehicle faults were
reported on the prior invoice they will display in the booking form with
a red exclamation mark above the tab header.
Client
Notes: When notes are recorded
against clients a note icon is included on the client button, when selected
client notes are displayed.

|
|
|
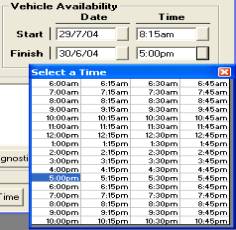
Fig 4.06 Vehicle Availability – Finish Time |
Vehicle
Availability: The diary represents
in graphical form time the vehicle is actually available. The time line
is blue when entered as a booking, changing to light red once a job card
has been created indicating work is in progress within the original allocated
time block. If this time is exceeded the time bar will change every 15
minutes displaying in bright red indicating the nominated time has been
exceeded. To use this function select start using the pick list select
a start date and time, repeat the process to record a finish date and
time.
Allocating
Technicians Time: Select Tech
Time option enter the technician’s name, if you wish to set up a new technician
select the field button to view the list. Select Insert – New and complete
the fields select OK to save. Allocate time using the same method as vehicle
availability; the chosen time is represented by a blue line in the Technician
Time Allocation field at the bottom of the diary screen.
|
Order
Number: Enter orders number
if required, this will be printed on the invoice and statement.
Key
Tag: This is a free typing
reference field that can be used to record the key tag number issued to
a vehicle, duplicate entries are not allowed on open jobs.
Warrant
Registration Due: Select the
month by clicking on the selection button to the right of the month field,
next select the year using the same process.
Odometer: Update the odometer reading (not necessary
if this is a new vehicle)
Work
Done: This field allows you to make notes on
work that is required; any text entered here will be inserted into the
work done section of the job card when it is created. Note:
that you can also access the work done comments pick list and insert line
items.
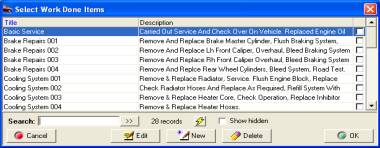
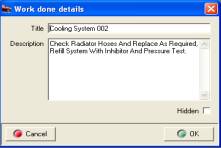
Fig 4.07 Selecting text
from the work to be done database
Fig 4.08 Entering A New Work
Description
Work
Done, Text Selection: This
Auto Easy feature allows the operator to store commonly used work description
for retrieval by code. The function will dramatically reduce the amount
of time it takes to enter text into this area. A list of all work descriptions
can be printed from the reports module by selecting work done list from
the other reports section.
Work
Done, Spell Checker: Auto Easy
has an in-built spell check function for the work text field. To check
and correct spelling first type into the text field, next select the ABC
button located on the bottom right of each field.
If there is a spelling mistake a window is displayed
listing suggested replacements
|
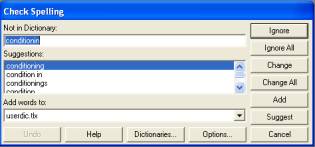
|
To replace a word highlight the selection from the
suggestions list and click on change, to ignore a single entry click on
ignore to ignore all entries of that word select ignore all. Select change
all if you wish to replace all entries of the incorrectly spelt word in
the text block. You can also add new words to the dictionary by selecting
add. Selecting the suggest button will display the most probable replacement,
to enter select change. |
On completion of the spell check the check spelling
display will automatically close.
Bookings,
Entering Work Descriptions – Select work to be done from the
booking form the list is now displayed, select new from the bottom of
the data window. A work done details form allows you to enter a code and
the required lines of text. Codes can be alpha or numeric or a combination
of both. To save the new text, select OK (F12).
Work descriptions can also be added from the
diary screen by selecting the pick lists from the top menu bar of the
diary screen point and click on work descriptions this will open the text
field. Alternatively pressing F12 from the diary screen will take the
operator directly to the work description listing.
Bookings,
Selecting work descriptions:
type the text or arrow to the required entry, your cursor will now highlight
the text line to paste this onto the booking form press enter or mouse
click on the line a tick will appear in the box to the right.
Multiple entries can be made from this screen. If
a mistake is made and you wish to un-flag an entry, point at the line
and mouse click or arrow up / down to place your cursor on the line and
press enter. The tick is now no longer displayed indicting the line will
not be pasted to the booking form and ultimately to the job card.
Bookings,
Comments: It is possible
to record special instructions in the comments section of the booking
form. Point and click on the comments tab, type your notes into the comments
field. Jobs with notes are identified in the diary screen with a note
it icon. Pointing and double clicking on the icon opens the comments field.

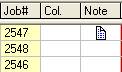
Bookings,
Saving:
Check all information is
correct then select OK (F12) from the booking form. A blue bar in the
Jobs and bookings section now represents the booking with any time allocated
to a technician showing in the bottom section also in blue.
Bookings,
Viewing:
Double click on the line
item or press enter all information entered is now visible.
Bookings,
Editing:
Open the booking by pointing
at the entry on the diary screen, select the field you wish to edit and
save. If the odometer has been entered incorrectly editing the value from
the booking form will change the entry on the job card header.
Bookings,
Printing: It is possible to
print a booking form by selecting the print option at the bottom of the
form. Booking forms can be printed from a booking or an open job.

Fig 4.09 Bookings Are Represented By A Blue Line
On The Diary Screen
Bookings,
Viewing Client & Vehicle Details: You
can view and edit client and vehicle details from the booking form by
selecting the client or vehicle buttons on the right hand side of the
form. To view a transaction histories select Client and click on the history
tab.
Booking
Sheets, Printing: It
is possible to print single or multiple booking sheets, information includes
client, vehicle details, service history, vehicle availability plus work
authorisation. Booking sheets are printed from the sales screen. Create
the booking in the normal way, select the sales icon from the top of the
screen, use the drop down menu at the top of form to select booking. Click
in the check box to select records you wish to print booking sheets for.
To initiate the print run select print from the bottom of the sales screen.
Bookings,
Step Through Process: It is possible to select a step through
process to manage bookings. To activate this function you will need to
access File / Settings / Program Options and select the step by step booking
process option

Save your setting by selecting OK (F12). The step
through process is now activated when selecting the booking option from
the diary screen.
Sort
Options: From the diary
screen, jobs can be sorted by client name, vehicle registration or job
number, to sort by either of these fields point and double click on the
column header record.
Short
Cut Keys: Use C to select
clients or V when creating a booking via the registration number.
Diagnostic
Worksheet: The diagnostic worksheet is formatted
so the service adviser can record specific problems a client maybe experiencing,
the report can then be printed and attached to the job card for the technicians
reference.
Diagnostic
Worksheet, Accessing & Printing: The diagnostic worksheet form can be accessed
from the option displayed under the work to be done section of the booking
form.
|
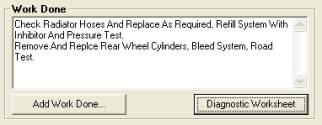
Fig
4.10 Accessing The Diagnostic Worksheet |
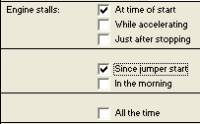
Fig 4.11
Completing The Diagnostic Sheet |
To print the diagnostic worksheets select the print
button at the bottom of the display.
Technicians
Labour Allocations
Labour
Allocation, Overview: Auto
Easy Ultimate allows the operator to allocate labour resources to specific
jobs. The allocations are displayed on the technician’s diary screen by
day only. The technician’s time allocations are color coded and displayed
in the time grid
Labour
Allocation, Viewing: To
display the technicians allocation screen point and click on the icon
to the right of the job view at the top of the diary screen.
 Select the centre icon to open
the technician’s allocation screen
Select the centre icon to open
the technician’s allocation screen
The screen displays the client’s name, registration
make and model, labour allocated colour coded (by technician) in 15-minute
time cells including job status. The grid at the bottom of the screen
displays the colour allocated to each technician, total hours available
for the day, allocated and remaining hours. The display also shows total
hours allocated by job and technician. The screen displays job status
plus a list of all jobs to be done can be viewed by hovering the
pointer over the job number.
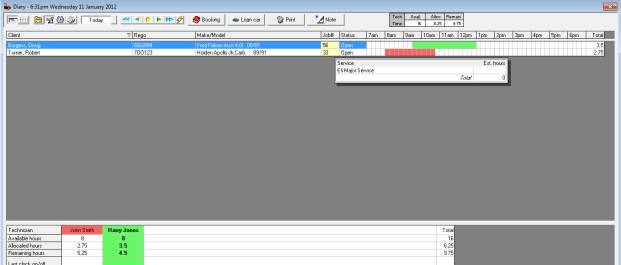
Fig
4.12 Technicians Labour Allocations
Labour
Allocation, Available Hours: Available
hours per day need to be recorded in the employee form. To enter this
value, select lists / employees, point and double click on the record
you wish to edit and enter the daily hours available in the daily hour’s
field, save your changes with OK (F12). This value will now display on
the technician’s allocation screen.

It is possible to change the daily hour available
default value from the labour allocation screen, point and double click
on the technician at the bottom of the display an available hours message
box is displayed showing the default value.
|
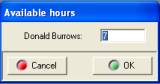
|
To change the available hours for a technician highlight
the value and overtype. The total hours available for technicians will
adjust + / - depending on the entry |
Labour
Allocation, Adding: To
allocate a technician to a job, point at the name field (each technician
has a unique colour displayed in this field) and left hand mouse click,
the grid will highlight. Move your mouse pointer to the time cells you
wish to allocate, hold down the left hand mouse button and drag across
the line. When the appropriate time cells are completed release the mouse
button. The time cells will now display the colour of the technician you
allocated. To delete allocations, repeat the same process holding down
the right hand mouse button instead of the left, this action will clear
the time cells.
 To print the job / technician status for
the day select the print function located at the top of the allocation
display, select all or the individual technicians you wish to send to
the report.
To print the job / technician status for
the day select the print function located at the top of the allocation
display, select all or the individual technicians you wish to send to
the report.
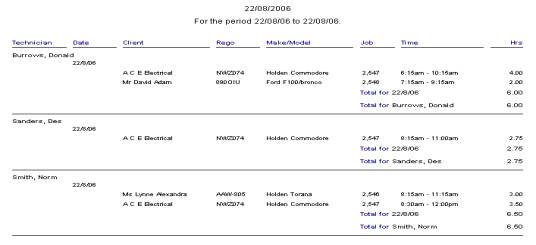 .
.
Jobs
Carried Forward: This version
allows the operator to set-up a prompt reminder to edit the allocated
hours for the day when a job that is carried over from a previous day
is opened for the first time. If you wish to use this feature go to settings
and select this option from database setting:
 When set to true a message
will be displayed on opening a carried forward job for the first time.
When set to true a message
will be displayed on opening a carried forward job for the first time.
 Message is displayed the first
time a job is opened.
Message is displayed the first
time a job is opened.
Loan Car, Recording: Auto Easy allows you to record loan car
bookings directly onto the diary screen, to use this function you will
first need to record details of the loan cars. Select Lists / Loan Cars
from the top of the screen. Select New from the bottom of the list – add
the vehicle details, selecting the make and model from the drop down list.
|
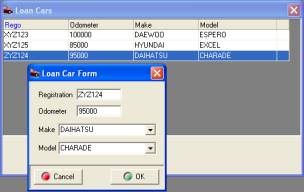
|
Save the loan car details by selecting OK (F12).
To allocate a loan car to a client select the loan car option located
at the top of the diary grid.
 On selection you are prompted to enter the
loan car details from a drop down list, plus select the client by clicking on
the down arrow to the right of the client field.
Finally you are required to
enter the time and dates the loan car is required by the customer. On selection you are prompted to enter the
loan car details from a drop down list, plus select the client by clicking on
the down arrow to the right of the client field.
Finally you are required to
enter the time and dates the loan car is required by the customer.
|
Fig 4.13 Recording
The Loan Car Details
|
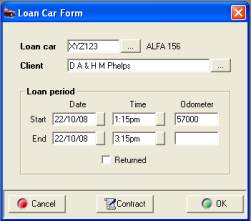
Fig 4.14 Allocating A Loan Car To A Client |
To save the details select OK (F12). The loan car
allocation is represented on the diary screen by a light pink line extending
across the time cells selected. It is also possible to record that the
loan car has been returned by double clicking on the time line and selecting
the returned option on the loan car form. A green tick is displayed in
the Col. Column.
 
Deleting - To delete a loan car allocation from
the diary screen, simply highlight the entry you wish to delete and select
delete from your keyboard.
|
Loan
Car, Contract Printing: To
print the loan contract for your client click on the contract option from
the loan car form, it is suggested you print 2 copies one for the client
and retain the other for your records.
Loan
Car, Contract Editing: you to edit the terms and conditions of
the loan contract, to access the standard text open the settings option
from the file menu, click on the fifth tab titled loan car, edit text
as required and save by selecting OK(F12).
Loan
Car Movements Report: On the
return of a loan car you will be prompted to record the kilometers on
the vehicle. A loan car report can be accessed from Reports / Other Reports;
the format details loan car movements over a selected date range.

Notes,
Loan Car Bookings – Point
and click in the note field from the diary screen to add a note to a loan
car allocation, click OK from the loan comments screen and a note it icon
will be displayed in the note column. To view or modify a note point and
click on the icon, to save any changes select the OK (F12) option from
the bottom of the text entry screen
Diary, Day Note
The operator has
the ability to record a day note on the diary screen; an added function
of this feature is the ability to block bookings for a selected day. To make a day note select
the note option from the display above the main diary grid, type your
note into the text field, if you wish to block bookings for the day select
the option at the bottom of the form. To enter a note for another day,
select the day from the diary options first, if you try to enter bookings
for a blocked day a message is displayed informing you that you cannot
proceed.
|
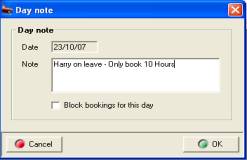
|

Select this option to enter a day note or block bookings
|
Fig 4.15 Entering A Day Note
Overview: This function allows the operator to track
the actual time worked by each technician on individual jobs. The technician
can log on from both the labour allocation screen or directly from the
job card, Auto Easy provides the user with a barcode option, requiring
the technician to scan a unique printed barcode from the technicians list
and job card. The clocked time is displayed in the labour allocation table
on job close when time tracking is used.
Time
Tracking, Logging On And Off: An
employee record must be created for a technician to log on / off of jobs,
If a barcodes are the preferred method of identifying a technician you
must print these from the report provided – Select reports / Other Reports
/ Technician Barcodes
|
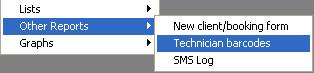
|
A unique barcode will be printed for each employee,
it is suggested that you cut out and laminate the code. |
|

|
To log onto a job select either the F11 key or click
on activities, point and click on the clock on / off job function from
the menu list. It is possible to log a technician on and off a job from
anywhere within the program. Simply press the F11 key or Activities /
Clock on / off function. Using this function from forms other than the
job card will require you to enter the job number via the keyboard or
scanning the job barcode.
|
The select or scan technician form allows technicians
to log on / off of selected jobs, two fields are displayed, job number
and technician. If you are using barcodes point at the barcode on the
bottom of the job card and scan, the job number is recorded, next scan
the technician’s bar code a message is displayed showing the date and
time the technician logged on or off a job complete the process by clicking
OK. If you are not using a scanner type the job number into the Job #
field, tab to the technician selection and click on the button to the
right, the technicians list is now in view, highlight the technician you
wish to log on / off and select OK (F12).
When clocking On / Off of jobs a message is
displayed informing the user who has clocked onto or off of a job and
at what time. If you are using a barcode scanner, scan the code and select
enter, there is no need to open the technicians list.
Note:
It is not possible for a technician to be logged onto two jobs, if you
try to log a technician onto a job twice a prompt will request that you
log off from the original job.
Time
Tracking / Viewing & Editing: To view, edit or delete time tracking,
select F11 or Activities / Log on / off job function. Enter the job number
point and click on view, the clock times are displayed, if you wish to
delete an entry highlight the line and select the delete function from
the bottom of the screen. To edit an entry point and double click on the
line or highlight the record and select edit (F2) from the bottom menu
bar.

Fig 4.13 Clocked Times
List For An Individual Job
|
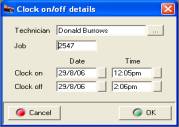
|
Click on the button to the right of the fields to
change the data displayed. It is also possible to allocate labour to alternate
technicians by selecting the button to the right of the Technician field,
highlighting the replacement technician and selecting OK (F12) from the
bottom of the technicians list. To save changes made to the clock on /
off details select OK (F12) on close.
|
|
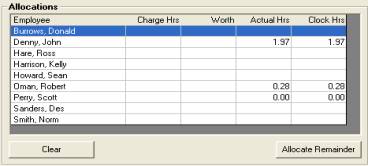
Fig 4.15 Labour Allocation / Clock Hours |
Time
Tracking, Labour Allocations:
The clocked hours by technician are displayed in the labour allocation
screen. If you wish to edit the actual hours point and click on the value
and overtype.
|
Clocked
Time View:
Auto Easy also displays clocked
labour allocations by technician, to access this function select the time
clock icon from the top left hand corner of the diary screen
 Select the third icon to
the right to display the clocked time screen
Select the third icon to
the right to display the clocked time screen
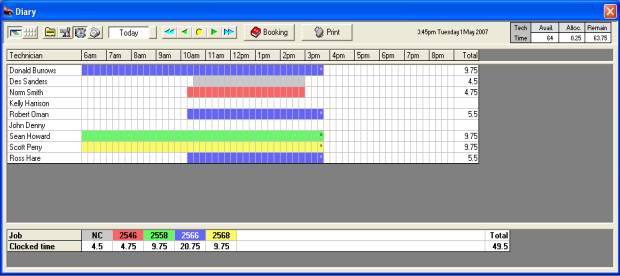
Fig 4.16 Clocked
Time View Display
The top grid provides the user with a graphical
and statistical representation of clocked time allocated to each technician
for the day. Each job has a unique colour code, the job numbers and allocated
total time is displayed in the lower grid. If a technician has clocked
on / off multiple jobs during the day each job is represented by a colour
coded bar to the right of his name in the time column.
Clocked
Time View, Accessing Job Details: To
view job details point and double click on the job number displayed in
the lower grid, this action opens the booking form, from this display
it is possible to view the job by selecting the job card button located
on the bottom left hand side of the display.
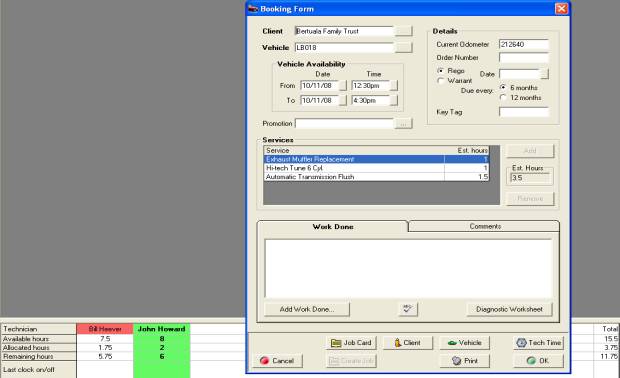
Fig
4.17 Opening The Booking Form From Clocked Time View
Clocked
Log On, Viewing: It is possible
to view the last log on time and job number by technician from the labour
allocation screen. To display this data select the  icon
from the top of the diary screen. Details of the last log on (the job
a technician is currently assigned to) is recorded at the bottom of the
labour allocation screen.
icon
from the top of the diary screen. Details of the last log on (the job
a technician is currently assigned to) is recorded at the bottom of the
labour allocation screen.

Non-Chargeable
Items, Creating:
To create a new non-chargeable item select lists / non chargeable items.
To create a new item select new from the bottom of the display, enter
the name of the item and save using OK (F12).
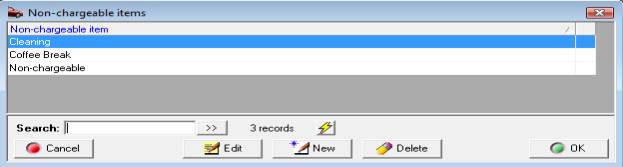
Fig 4.18 Non-Chargeable Items List
Non-Chargeable
Time, Allocating: Auto Easy
allows the operator to track the amount of time technicians are allocated
to non-chargeable tasks. The allocation is summarised separately from
chargeable allocations in a technician’s productivity report.
To allocate a technician to a non-chargeable task
select the F11 key from any screen, manually enter or scan the barcode
for the unique non-chargeable item. Barcodes are printed at the bottom
of the technician’s barcode report.
|
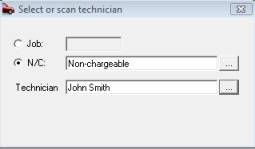
|
To allocate a technician to a non-chargeable task
select the N/C option, click on the button to the right of the N/C field
select the task, next select the technician you wish to allocate. A prompt
will display the status of the selection.. |
Non-chargeable time is represented by a grey time
bar on the clocked time view screen; the total amount of hours for the
day allocated to non-chargeable activities is displayed under the NC job
type grid

Productivity
Reporting: The productivity
report displays all clocked labour allocations by technician / job for
a selected day. Chargeable and non chargeable times are totalised by each
and all technicians. To access this report select reports / technician
time reports / productivity report – enter the date / dates you
wish to view and proceed by selecting OK (F12).
|
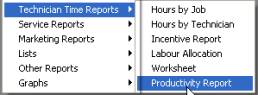
|
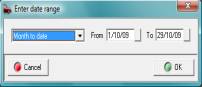
|
Note: The productivity report can be run for any
date range or period |
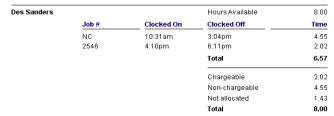

Technicians allocations by job
Allocation summary
Labour
Allocation Table: The labour
allocation table is displayed at the top of the diary screen; values can
be calculated in two ways.
1)
Total technician hours
available minus the allocated total value from the technicians allocation
screen.
2)
Total technicians time
available minus the total estimated time for all jobs on the viewed day.
Automaton defaults to calculate via the labour
allocation screen, if you wish to change the calculation to the second
option select File / Settings / Database Settings, click in the checkbox
of the following option:

Save your selection
by exiting setting with OK (F12).
 The table displayed at
the top of the diary screen records available / allocated and hours remaining
according to the selection.
The table displayed at
the top of the diary screen records available / allocated and hours remaining
according to the selection.
Technician
hours available: Auto Easy
allows you to record days or periods when a technician is not available.
If for instance an apprentice attends classes on a Monday you can record
from the employee form that he is not available on that day of the week.
When this option is selected the employees daily hours will not be added
to the available total for that day.
|
Availability is calculated by the total daily
hours and days the technician is available. To select a period ie: holidays
point and click on the box to the right of the unavailable fields, select
the dates from the calendar. Daily hours will not be added to the total
hours available in the period displayed. |
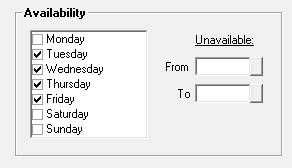
|
Sales
Transactions
Overview: Auto Easy allows you to manage the sales
process effectively by providing an option for each transaction type.
For instance you can perform a simple cash sale or create a booking and
job card to retain details of both customer and vehicle or create a charge
invoice requiring only the client details to be recorded. All invoice
forms and job cards share the same operating features making it easy to
familiarise yourself with the all-important sales functions of Auto Easy.
Invoicing,
Setup:
Setup options for the invoice layout are accessed from File / Printer
settings. Options include the ability to use letterhead stationery, adjust
the top printer margin, invoice type, copies to be printed and selection
of a logo. See page 15 – Installing Auto Easy Ultimate
There are other options that will affect the invoice
layout these include:
Track
Loyalty Points:
If you are operating a loyalty program mouse click in the appropriate
field. When using the loyalty program member’s invoices display a statement
of points to date.
Track
RSA: This feature allows
you to issue roadside assistance to your clients if you intend using support
services.
RSA
Contact Number: If you are
issuing roadside assistance to your client base type in the contact number,
which will be printed on the invoice. If you are using support services
the number will be supplied to you. RSA issue details are printed on the
invoice if this feature is selected.
See page 15 – Installing Auto Easy For Further
Details
Job Card
Job
Card, Overview: The job card allows the
operator to enter parts from either the catalogue (no stock control),
inventory listing or as a buy in (parts bought specifically for a job).
Auto Easy also allows the addition of extra services and the ability to
create purchase orders for suppliers. A financial summary is displayed
showing a breakdown of parts and, GST is also recorded in this area. Text
relating to work done and vehicle faults are entered directly onto the
job card. To save entries without exiting the job card select the save
option from the bottom of the form.
Job
Card, Creating: -
A job card can be created once the booking is completed in two ways.
1)
Directly from the booking
screen before it is committed to the diary.
2)
Selecting the booking (Blue
Bar) from the Diary screen.
From the booking form click on create new job
card, a prompt will appear displaying previous vehicle faults (If faults
have been reported prior to this job card being created).
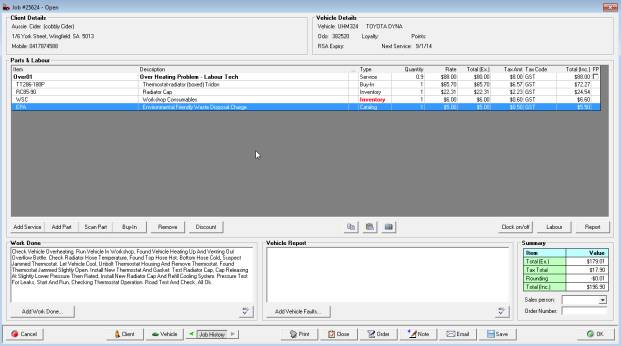
Fig 5.1 Job Card Layout
Job
Card, Previous Vehicle Faults: If
the vehicle has been worked on previously and vehicle faults were reported
an option to paste the faults list to the new job card is in view. Selecting
the copy command will place this text into the vehicle faults section
of the new job card. It is suggested these are always copied to the new
job to ensure consistency in reporting, if some items are found to have
been attended to the operator can edit the text in the vehicle faults
section of the job card. The new list of faults will then overwrite the
previous record to be displayed when the next job card is created. Selecting
yes or no will now create a new job card. Remember to save the new job
card you must exit only using the OK (F12). Once a job card is created
the booking time line will turn light red on the diary screen to indicate
work in progress.
Job
Card, Layout: The
job card is split into areas each of which has a specific function these
are:
Client
Details: Includes address
and contact numbers
Parts
& Labour: This window
displays all services and parts attached to this job including the retail
price. The FP column indicates the fixed price status of both services
and parts.
Summary: Displays job card totalisation for parts
and labour plus the tax component
Vehicle
Details: Information includes
registration, make & model, RSA details, odometer and the next service
due.
Vehicle
Report: Allows you to add faults
and other text by free typing or selecting from the faults database.
Work
Done: Records all work performed,
any text entered during the booking process will be displayed in this
area
Other Fields
Salesperson: Enter the name of the salesperson if required
Order
Number: Displays order number
entered on the booking form – number can also be entered once the job
card is open
Email: Allows you to email the form directly to
a client
Job
Card, Adding A Service: To
add an additional service to the job card select add service. The service
listing is now displayed select a service by moving the cursor with the
arrow keys or pointing and clicking on the service description.
This process will flag the service by placing a tick in the box to the
right of the list; multiple services can also be flagged for importing
to the job card. Selecting OK (F12) will paste your selections to the
job card.
Job
Card, Hide Hours On Invoice: Auto
Easy defaults all non-fixed price services to not show hours on the invoice.
Ie: 2 hours of labour sold at $60.00 per hour will print as labour = $120.00.
You can however show labour by the hour 2 hours x $60.00 = $120.00. To
show hours on the invoice point at the non-fixed price service and double
click. The service form is now in view, point at the hide hours on the
invoice check box and click. The hours charged will now print on the invoice.
 Deselect this option from the
service form if you wish to display hours charged.
Deselect this option from the
service form if you wish to display hours charged.
Loyalty,
Redeeming Loyalty Points –
If the operator is using the loyalty Programme feature it is possible
to redeem points to pay for a service. Firstly select the service form
enter the amount of points required to cover the cost of the service.
Selecting the use loyalty point’s option from the service form will check
the client’s loyalty point balance and deduct the redemption value from
the total.
 Selecting this option from the
service form will allow you to redeem loyalty points.
Selecting this option from the
service form will allow you to redeem loyalty points.
Note:
If the reward account does
not contain enough points to cover the cost of the service a warning will
be displayed and the transaction will not be allowed.
Job
Card, Adding Parts: Highlight
the service you are adding the parts to, this ensures the items are listed
under that service on the invoice; parts are also allocated correctly
for reporting purposes. Select the add part button to enter parts
from either the catalogue listing or inventory file, to select an item
type the part number into the search field and select by either pointing
and clicking or pressing the enter key. Multiple selections are available
from this screen, when all selections are made click on OK (F12). The
items are entered into the parts and labour section of the job card, point
at the quantity and financial fields click to edit, you can navigate using
your arrow keys. Note: If an inventory item is out of stock
the word inventory is displayed in red.


Fig 5.2 Editing Quantity & Retail Price From
The Job Card
Fig 5.3 Selecting Tax
Job
Card, Selecting Tax Codes: To
change the default tax code point at the tax field of the line item you
wish to edit and click, select a new tax code from the drop down list.
If you wish to add a new tax code to the list, select lists / tax codes
from the top of the screen and add to the list by selecting new from the
bottom of the display.
Job
Card, Fixed Price Services:
When a fixed price service is added to a job card or invoice the FP column
is ticked, all parts added to that service will automatically be flagged
as being included in the fixed price service. If you wish to charge for
an item (not included in the fixed price), point and click on the FP field,
the financial summary will change to reflect the extra charge.
Job
Card, Buy in: Allows
you to enter goods received by supplier or create purchase orders for
parts specific to the open job card. See purchasing for more details.
Job
Card, Viewing Or Editing Parts And Service Entries: arts
and services can be edited only when the job card is open, viewing data
can be performed from both open and closed job cards. To edit entries
move your cursor to the part or service and point and click on the required
line or select view / edit from the parts and labour data window.
Job
Card, Removing Parts Or Services: Select
the item you wish to remove by highlighting with your cursor, click on
the remove function confirm the action. If a service is removed all associated
parts will also be deleted from the job card.
Job
Card, Moving Parts & Services: The parts & labour section of the
job card allows the operator to change the order of parts and services
by dragging and dropping items within the grid. To perform this ask highlight
the item you wish to move, hold down the left hand mouse button and drag
the item to the position you wish it to occupy.
It is also possible to move compete service (parts
& labour) , Auto Easy allows you to move parts from one service to
another on open jobs, however once a job is closed parts can only be moved
within the service. You will have to reopen the job if you wish to move
items between services.
Job
Card, Copying & Pasting Contents: Auto
Easy allows you to copy the contents of a job card to another open job.
To perform this task use the copy and paste buttons located under the
parts and labour section of the job card.
 Selecting the icon to the left
will copy services, parts and text to the clipboard, use the icon to the
right to paste the clipboards content to another job card.
Selecting the icon to the left
will copy services, parts and text to the clipboard, use the icon to the
right to paste the clipboards content to another job card.
When pasting from one job card to another you need
to be aware of the following:
1)
You will replace the total
contents of the job card you are pasting to with the copied data, you
can’t append the target job card.
|
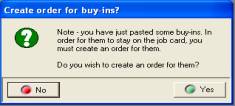
|
2)
If buy-ins form part of
the paste you will be prompted to create an order selecting no will paste
all items except buy-ins, on selecting yes your supplier list is displayed
so you can choose the original or alternative supplier. Items are displayed
on the job card as being on order. The supplier order can be converted
to a bill once the items are delivered. |
Services & parts can be copied from open and
closed job cards; however they can only be pasted to an open job.
Job
Card, Inserting Text To Parts & Labour: You have the option to insert text into
the parts and labour section of the job card on selection or automatically.
The text is printed on the invoice under the part or service the text
is attached to. The job text form provides the same text and link capabilities
as the work done field, you can free type or insert text from your work
done database by selecting the option from the bottom of the form. Spell
checker is also available by selecting the abc option.
Job
Card, Auto Insert To Job Text: Work
done attached to services can be pasted automatically into the job text
field instead of using the work done field. For this feature to work it
is essential that you have text attached to the service and have selected
that service text goes to service comments on job card from Settings /
Database Settings.
Note:
 Select this option from Settings / Database Settings
to auto insert service text to the job text field.
Select this option from Settings / Database Settings
to auto insert service text to the job text field.
Access job text by performing the following:
|
Point and mouse click on the column located in the
parts and labour grid to the left of the type field identified
by … a text box will display. The field has a limitation of 64,000
characters and can be populated manually or automatically from attached
service text. |
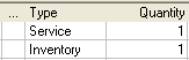 |
|
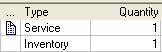
|
When text has been added to the job item text field
a note it icon is displayed in the column. To view text point and click
on the note it icon. |
|
|
|
|
|
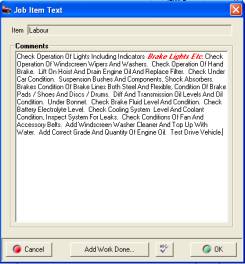
|
Comments are printed on the final invoice under the
item you attached the text to.

|
|
It is suggested that before accessing this feature
you decide on how you wish your invoice to present. For instance you may
decide that some services require the work description to be in the standard
work done field, occasionally you may wish to print text under the service
or part. In this situation it would be best to not select the auto entry
option from settings and make manual entries according to the layout required. |
Note: Text
can be added to open or closed jobs using this feature.
Text
Editing:
Auto Easy allows you to
display and print text entered into the work done, job text or vehicle
report fields in bold, italics or red. It you wish to change the text
format point in front of the first character you wish to change, hold
down the left mouse button and drag along the line until the blue shade
finishes after the last character, release the mouse button. Next select
the RIGHT HAND mouse button you will see a menu is displayed, select the
format required and double left mouse click, the text format will change.
|
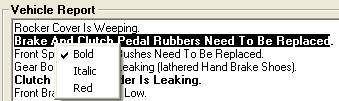
|
It is possible to using this feature to store multiple
edits however these will have to be performed one at a time. To undo a
format highlight the line of text right hand mouse click and click on
the format you wish to change. |
Job
Card, Applying A Discount: Allows
the operator to allocate a discount to the job card. Discounts can only
be added to open job cards, if you wish to apply a discount to a job card
or invoice that is closed, reopen, apply the discount and close, the financial
summary and the totals are adjusted accordingly.
Job
Card, Spell Checker: Auto Easy has an in-built spell check
function for both the work done and vehicle report fields. To check and
correct spelling first type into the text field, next select the ABC button
located on the bottom right of each field.

If there is a spelling mistake a window is displayed
listing suggested replacements
|

|
To replace a word highlight the selection from the
suggestions list and click on change, to ignore a single entry click on
ignore to ignore all entries of that word select ignore all. Select change
all if you wish to replace all entries of the incorrectly spelt word in
the text block. You can also add new words to the dictionary by selecting
add. Selecting the suggest button will display the most probable replacement,
to enter select change. |
On completion of the spell check the check spelling
display will automatically close. If you wish to cancel the spell check
select the cancel option from the bottom right hand of the screen.
Note:
The spell checker will only work for the work done and vehicle report
fields.
 Labour,
Applying To Open Jobs: to allocate labour to single or multiple
technicians from an open job card select the labour button located under
the parts & labour section of the job card. To use this function you
will first need to setup your technicians in the employee list by selecting
Lists / Employees. If you wish to allocate the total hours to one technician
select with the mouse and click on allocate remainder. All the labour
has now been allocated to the technician selected. To enter multiple labour
allocations select a technician and type in the hours or dollar value,
select allocate. Repeat this procedure for any subsequent technicians
using allocate remainder on the final entry. The labour allocation form
allows you to record actual time worked, making it possible to track the
true productivity of technicians. When the task is completed save with
OK (F12). The allocated hours (charged & actual) will be recorded
in the technician’s reports; if you do not wish these statistics to form
part of your reporting do not apply labour to open job cards.
Labour,
Applying To Open Jobs: to allocate labour to single or multiple
technicians from an open job card select the labour button located under
the parts & labour section of the job card. To use this function you
will first need to setup your technicians in the employee list by selecting
Lists / Employees. If you wish to allocate the total hours to one technician
select with the mouse and click on allocate remainder. All the labour
has now been allocated to the technician selected. To enter multiple labour
allocations select a technician and type in the hours or dollar value,
select allocate. Repeat this procedure for any subsequent technicians
using allocate remainder on the final entry. The labour allocation form
allows you to record actual time worked, making it possible to track the
true productivity of technicians. When the task is completed save with
OK (F12). The allocated hours (charged & actual) will be recorded
in the technician’s reports; if you do not wish these statistics to form
part of your reporting do not apply labour to open job cards.
 Job
Card, Financial Report:
The report option displays financial details of the current job both by
service and part including percentages, sub totals and grand totals. It
is possible to include the cost of labour, which is based on the wages
paid to technicians over the last 90 days divided by the standard rate
to display an hourly cost or the value entered onto the employee form
in the cost per hour field. Entering a password and ticking the appropriate
field in the control variables can suppress the display of this information.
Job
Card, Financial Report:
The report option displays financial details of the current job both by
service and part including percentages, sub totals and grand totals. It
is possible to include the cost of labour, which is based on the wages
paid to technicians over the last 90 days divided by the standard rate
to display an hourly cost or the value entered onto the employee form
in the cost per hour field. Entering a password and ticking the appropriate
field in the control variables can suppress the display of this information.
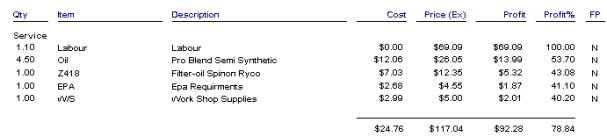
Fig 5.4 Viewing The Financial Report From The Job
Card Or Invoice
Job
Card, Viewing Service History: Select
history from the bottom of the form to view past job cards by selecting
the arrow to the left of the button, selecting the right hand arrow will
move the operator forward.
Job
Card, Adding Vehicle Faults: This is a free typing field or text lines
can be entered from the vehicle faults text listing by selecting adds
vehicle faults and tagging each entry, selecting OK (F12) will paste the
text to the data window.
Vehicle
Faults, Adding Text: This
function can be performed in two ways
From the job card by selecting Add vehicle faults
Selecting Lists / Vehicle Faults
Vehicle
Faults, Entering Records: Select
vehicle faults from either the job card or diary the list is now displayed,
select new from the bottom of the data window. A vehicle faults details
form allows you to enter a code and the required lines of text. Codes
can be alpha or numeric or a combination of both. To save the new text
lines, select OK (F12).
Job
Card, Selecting Vehicle Faults: type
the code or arrow to the required entry, your cursor will now highlight
the text line to paste this onto the job card press enter or mouse click
on the line a tick will appear in the box to the right. Multiple entries
can be made from this screen. If a mistake is made and you wish to un-flag
an entry, point at the line and mouse click or arrow up / down to place
your cursor on the line and press enter. The tick is now no longer displayed
indicting the line will not be pasted to the booking form and ultimately
to the job card.
Vehicle
Faults, Editing Entries: Select
the list and move your cursor to the entry requiring editing, select edit
from the bottom of the form, make the changes and save by selecting OK
(F12).
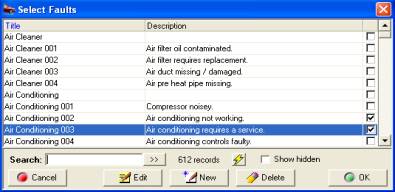
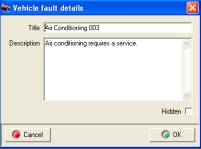
Fig
5.5 Selecting Vehicle Faults
Fig 5.6 Adding Vehicle Faults

Job
Card, Selecting Client Details: Selecting
the client button from the bottom of the job card displays client contact
details, profile and history.

Job
Card, Selecting Vehicle Details:
Displays vehicle details including last service, next service warrant
of fitness / registration renewals and RSA information.

Printing,
Job Card: Selecting
job card will display a job card including all information entered when
the booking was first created and any subsequent information added to
the job card after it was created. To print select the print icon located
at the top of the display.
Printing,
Job Summary: Allows you to view and
print the invoice as a job summary prior to closing the job card, the
format is exactly the same as an invoice except the word invoice is replaced
by job summary. If you are unsure or wish to check the invoice details
from hard copy print a job summary before you close the job as no changes
can be made once the job has been closed.

Job
Card, Creating A Purchase Order: If
inventory items have been added to the job card where insufficient stock
is available the word inventory will be highlighted in red. It is possible
to raise a purchase order directly from the job card for these items by
selecting the Order option located on the bottom menu bar of the job card.
On selection you will be need to select the supplier you wish to provide
the items, highlight your selection, select OK (F12), a purchase order
assigned to the supplier listing the items required is displayed. Save
the purchase order by selecting OK. When the items arrive convert the
purchase order into a bill, enter the supplier invoice number and save
by selecting OK (F12). The items originally highlighted in red will now
be displayed in normal text indicating the parts are on hand and the job
can be completed.

Access job notes made n the diary screen directly
from the job card.

Job
Card, Closing: To
close a job card select close, the functions that follow depend on the
setting in your control variables. You will notice there is a selection
in this management function labeled auto procedure on job close if this
is set to true the following will occur:
Job
Card, Labour allocation: The
labour allocation screen allows you to allocate labour to single or multiple
technicians. To use this function you will first need to setup your technicians
in the employee list by selecting Lists / Employees. If you wish to allocate
the total hours to one technician select with the mouse and click on allocate
remainder. All the labour has now been allocated to the technician selected.
To enter multiple labour allocations select a technician and type in the
hours or dollar value, select allocate. Repeat this procedure for any
subsequent technicians using allocate remainder on the final entry. The
labour allocation form allows you to record actual time worked, making
it possible to track the true productivity of technicians, payroll also
allows you to calculate wages based on hours charged or hours worked.
When the task is completed save with OK (F12).
Job
Card, Service Reminders – From this screen service reminder
records can be added or removed from the vehicle record, or current entries
can be edited. If auto close is set to false in the control variables,
on closing the job card only the job update screen will be in view although
labour and service reminders can still be edited / added or removed.

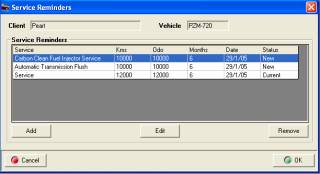
Fig 5.7 Allocating Labour
Fig 5.8 Adding Service Reminders
Service
Reminders, Managing From The Job Card: The service reminder
form is split into two sections existing service reminders and new service
reminders. It is possible to perform the following:
Clearing
Existing Reminders:
Select clear from under the existing service reminder window
Adding
New Service Reminders:
Select add, from the service listing highlight the next service you wish
to reminder the customer to have performed, complete the kilometre and
month fields.
|
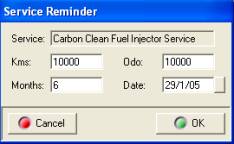
Fig 5.8 Distances / Time Form |
Changing
Service Reminders: Select
the change option from the Service Reminders form. Edit the Kms. And months
field on the distance / time form. Select OK (F12) to save.
Removing
Service Reminders:
Selecting the remove option will delete any highlighted service reminders.
|
|
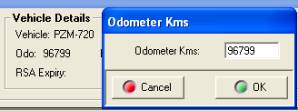
Fig
5.9 Editing The Odometer From The Job Card
|
Odometer
Editing: It is possible to
edit the odometer from both an open and closed job card. To perform this
function point and double click on the odometer field located in the header
of the job card. Change the reading in the box provided, save by selecting
OK.
|
|
|
|
|
Job
Card, Odometer Reading Prompt: Auto
Easy will prompt you to enter an odometer reading as you close a job if
one of the following has occurred:
1)
The
odometer reading is the same on this job as the previous closed job performed
2)
If
the odometer reading field is blank or contains a zero reading.
In either of these situations you will be prompted
with the following message
|
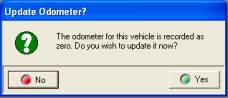
|
Select yes if you wish to proceed, the vehicle
form will open with the cursor flashing in the odometer reading field,
enter a value and close the vehicle record with OK (F12). Finalise the
close job function.

|
Additional
Job Card Functions
|

Fig 5.10 Job Update Report |
Job
Card, Job Update Report:
The job update Report displays a summary of the job details, this will
display automatically after exiting the payment receipts form if auto
close is set to true. The job update form is displayed after selecting
the close button if auto close is set to false.
Print
Check Lists – Select this
option if you wish to print check lists attached to services
Hide
Fixed Price Parts – This
feature allows you to not print parts that have been included in a fixed
price service |
Bill
To Fleet Solutions:
This option is only available to authorised sites – tick the box
if you wish to allocate this sale to Fleet Solutions. Note:
The client will have to be set up as a sub client of Fleet Solutions for
you to receipt multiple payments.
Printing,
Invoices From Closed Job Cards: Select
Ok (F12) from the job update report, to print the attachments (checklists)
tick the print attachments on invoice selection. It is also possible to
print a closed invoice from the body of a closed invoice by selecting
the print option and clicking on invoice.
Emailing
From The Job Card Close: As
you close the job card you are presented with the option to print or email
the form. If you wish to email the invoice point and click in the email
option checkbox, select OK, Auto Easy will confirm sending of the document.
Note: This feature will only function when an email address is
recorded on the client card.
 Labour,
Viewing From A Job Card:
You may want to view details of the job labour allocation after it has
been closed. Go to a closed job card; select the labour button to view
the labour allocation screen. It is possible to edit the labour changes
from this screen even though the job card is closed.
Labour,
Viewing From A Job Card:
You may want to view details of the job labour allocation after it has
been closed. Go to a closed job card; select the labour button to view
the labour allocation screen. It is possible to edit the labour changes
from this screen even though the job card is closed.
Charge
To: This
option allows you to charge an alternative client for the job. Point and
click on the button to the right of the charge field, your customer list
is displayed, highlight the client you wish to bill, select OK (F12) from
the bottom of the client list, your selection is displayed in the field.
Click OK (F12) to finalise the transaction.
An entry is posted to both the original client
and the billed clients service history, no value is posted to the original
client.

Billed client’s history

Original client’s history
The transaction will be printed on the charged client’s
statement
Picture
Attachments – Pictures
can now be stored against a specified job, to use this feature open the
job card and select the view pictures icon displayed under the parts and
labour section.
|
|
Selecting this option will open the images window,
the job number is inserted in the certificate number / folder name field,
this can be overwritten however the folder must always be a sub-folder
of Auto Easy Ultimate\Site. |
To create the folder select the set option accept
the create prompt, the process will be confirmed.
|
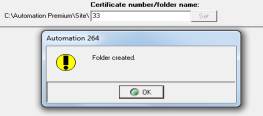
|
Select the OK option to save the new folder. All
images relating to this job must now be saved to the designated folder.
Once the images are stored they can be retrieved from the job card by
selecting the view pictures option. Pointing and clicking on the image
will expand the picture for more detailed viewing. To close the viewing
screen select OK (F12). |
Notes- The viewing window also contains a free
typing notes section, to enter text simply type in the field provided
and save using OK (F12).
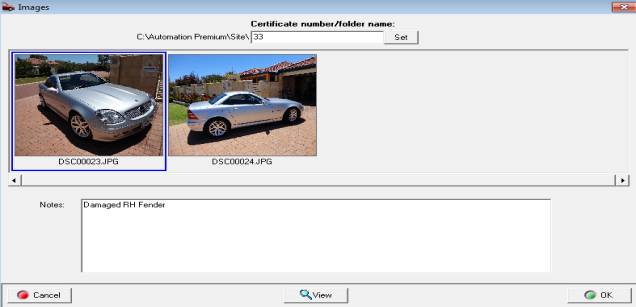
Fig 5.10a Image Viewing Window
Accessing
Job Cards
Job
Card, Viewing: Open
and closed job cards can be accessed in three ways:
1)
Diary screen by double clicking on the green time line
and selecting job card
2)
Client transaction history – Select clients or vehicles highlight
the client or vehicle and select history from the client form a list of
all previous transactions is displayed. Point and click on the required
line item to open the job card.
3)
Sales Screen – Highlight the job you wish to view and
double click n the transaction
Job
Card, Deleting – This function can only be performed
on closed job cards, select clients from the top of the screen, highlight
the client with the job card you wish to delete. Double click on the record
or select edit to view the client form, select the history tab and perform
the following:
1)
Highlight the job you wish
to delete
2)
Select the delete function
from the bottom of the screen
3)
Type in the password, enter
the operators name and reason for the deletion
4)
Select OK (F12) to complete
the process.
5)
If a payment has been made
against the job, you will be requested to enter which account you wish
to withdraw the payment from, alternatively you can choose not to make
an adjustment; in this case the amount will remain on the clients account
as an unallocated credit.
All
parts and labour allocations relating to the transaction are now reversed,
this procedure will only work on closed job cards; open cards cannot
be deleted.
Job
Card, Reopening: Auto
Easy allows you to open a closed job card, to perform this function go
to a closed job card either from the diary screen or client card. Select
the re-open option. Enter the password (entered in settings / Security).
Next you need to enter your name and the reason for the job card to be
reopened. When these details have been entered financial records can be
edited.
Note:
Text can be edited from either an open or closed job card; changes will
be printed on the invoice.
Invoicing
Invoicing,
Overview: Auto
Easy allows you to create three types of invoice a vehicle invoice is
not recorded in the day segment of the diary screen. A charge invoice
allows you to allocate an invoice to a client account without the client
having a vehicle attached. Finally a cash sale gives you the ability to
create an invoice without allocating to a customer. All of the invoice
functions operate in the same way as a job card.
Invoicing,
Accessing: To
create a new invoice select the invoice icon from the top of screen, a
menu displaying the three invoice types is in view. Select the invoice
required by pointing and clicking on your selection.
|
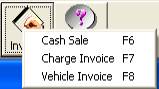
Fig 5.11 Invoice Types |
To start invoices select the invoice icon from
the top of screen – from the menu select the type of invoice you wish
to create.
Cash
Sale:
Auto Easy allows the operator
to make cash sales without recording any vehicle information. Consequently
his function should not be used if you wish to keep details of a transaction
against a vehicle.
|
The cash invoice has the same functionality as a
normal job card except the service type headings are not printed on the
invoice. Also you are able to exit and return to the card, the open transaction
is recorded in the invoice grid of the diary and as a line item in the
sales screen. When a cash sale is closed the record is deleted from the
dairy screen.
Invoice
Layout: Cash sale is the parts and labour default
on this form, the cash sale display is not printed on the invoice. It
is possible to allocate parts to the cash sale item; only the items selected
will be printed on the final invoice.
Notes:
This section is used to
make notations on the invoice. It is possible to select text lines from
the vehicle faults function.
Work
Performed: If labour is included
on the invoice use this text field to note the work performed. . It is
possible to select text lines from the add work done function
Service
Selection: It is possible
to select services from the cash invoice; you can allocate parts to a
service the same as a job card. Note: The invoice
will not display the fixed price or mechanical repair headings that are
printed on a standard invoice
Cash
Sale, Viewing A Closed Invoice:
Closed cash sale invoices can be accessed by opening the sales screen,
highlighting cash sales from the drop down menu. To view cash sale details
point and double click on the line item.

Fig 5.12 Viewing Cash Sales
Charge
Invoice, Creating: Select
the invoice button from the top of screen, Select Charge invoice from
the menu, highlight the client from the listing and select OK. These selections
will open the invoice form. The charge invoice functions in the same way
as a cash invoice.
Order
numbers: Select
the order number field at the top of form enter the order number in either
numeric or text format and finalise with the enter key.
Viewing
Charge Invoices: Charge
invoices can be viewed from either the diary invoices grid, sales display
or the client form by selecting history and double clicking on the transaction.
Invoicing,
Re-opening A Cash Or Charge Invoice:
Closed invoices can be re-opened from either the client form or sales
screen. Open the closed invoice by double clicking on the line item or
highlighting and selecting edit. Select the reopen button on the lower
menu bar of the invoice form enter the password / name / reason to reopen
the invoice. Items or services can now be edited / deleted / added as
required.
Invoice
Sales Reporting:
If parts are allocated to a service on the invoice. Parts and labour values
will be displayed in the invoice / service summary report as a service
component. However if a service is not selected parts will be listed under
the Invoices section of the report.
Salesman,
Adding To The Invoice: It
is possible to record the salesman’s name on both the charge and cash
sale invoice. Select the button to the right hand side of the salesman
field, highlight the record required and select OK from the menu bar of
the select a staff member display. The name is now recorded in the salesman
field; these details will be printed under the financial summary of the
invoice.
Vehicle
Invoice, Creating: Select
the invoice button from the top of screen, Select vehicle invoice from
the menu. Select the client, vehicle and service required. The vehicle
invoice functions in exactly the same way as an open job card except the
details are not displayed in the date cells of the diary screen.
Vehicle
Invoice, Accessing:
The vehicle invoice can be accessed from the following: Sales, Diary,
Client Form / History
|
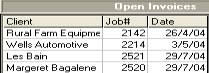
Fig 5.13 Diary Screen / Open Invoices |
The eighth grid of the diary screen when in week
view lists open vehicle, cash and charge invoice. To view an invoice,
point and double click on the transaction. Closed invoices are not displayed
in this grid
|
Credit
Memo
Credit
Memo, Overview: A
credit memo is used when a client returns previously purchased items or
a refund is given on services performed. Auto Easy allows you to process
a credit memo for the customer and pay the refund from a designated account.
When the transaction is finalised all parts listed on a credit memo are
placed back into stock.
Credit
Memo, Creating: Select
Activities / Create Credit Memo from the top menu highlight the required
customer; confirm your selection with OK (F12). The credit memo form is
now displayed. All functions on the credit memo work exactly the same
as an invoice or job card.
Credit
Memo, Adding A Part:
Highlight Select the add part button to enter parts from either the catalogue
listing or inventory file, to select an item type the part number into
the search field and select by either pointing and clicking or pressing
the enter key. Multiple selections are available from this screen, when
all selections are made click on OK (F12). The items are entered into
the parts and labour section of the job card, point at the quantity and
financial fields click to edit, you can navigate using your arrow keys.
Credit
Memo, Adding A Service:
To add a service to the credit memo select add service. The service listing
is now displayed select a service by moving the cursor with the arrow
keys or pointing and clicking on the service description. This process
will flag the service by placing a tick in the box to the right of the
list; multiple services can also be flagged for importing to the job card.
Selecting OK (F12) will paste your selections to the credit memo.
Credit
Memo, Adding A Buy-in:
Select the buy-in button, this opens the select a buy-in list, locate
the item or items you are going to refund confirm with OK (F12). A message
will request that you confirm conversion of the item to inventory (This
is necessary as buy-ins are not held in inventory) select OK (F12). Buy-ins
will appear in your parts listing as inventory once the memo is processed.
The item is now listed in the parts and labour section of the memo; it
is possible to alter retail prices if required.
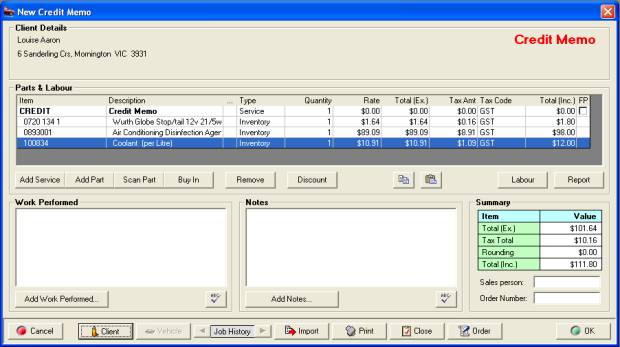
Fig 5.14 Credit Memo
Credit
Memos, Finalising:
Select close from the menu bar if auto close is set to true you can allocate
labour. If auto close is turn off and you wish to allocate labour select
the labour button from the job update report. At the payment receipt form
select the refund media and the account you wish to pay from. Undeposited
funds contain payments that have been received but not deposited, if a
payment is made from this account it will appear as a negative receipt
in the receipts listing.
Credit
Memos, Viewing:
Closed credit memos can be accessed by opening the client listing, highlighting
the record, clicking and selecting history from the client form. Double
clicking on a transaction displays the details. Alternatively view from
the sales screen
Quotations
Quotations,
Overview: Auto Easy has the ability
to fully manage your quotations; functions include creation by customer
and vehicle, reporting and conversion including automatic purchase order
generation. It is easy to retain details of any parts required for individual
jobs including supplier, cost and intended retail prices. Auto Easy tracks
all quotations allowing for either the printing of a report or a quick
view function from the sales screen. Converting quotes to jobs is as simple
as a selecting the conversion option at the bottom of the quote form.
Quotations,
Generating: Quotations can be created
from the client form by selecting the quotes option from the bottom icon
selection. Alternatively select activities / create quotes option from
the menu
 The quote option is located
at the bottom of the client form, to generate a new quote perform the
following:
The quote option is located
at the bottom of the client form, to generate a new quote perform the
following:
1)
Open the
client form from the client listing by highlighting the client
name double clicking on the line or selecting edit (F2) from the bottom
of the display. Alternatively you can create a quotation from the job
card by selecting the client option from the bottom of the screen
to open the client form.
2)
Select the
quotation option a list of vehicles owned by the customer is displayed,
highlight the vehicle you wish to create the quotation for and
select OK (F12).
3)
A new
quotation form is created displaying no transactions in the parts
and labour section.
4)
Select the
service button, highlight the service required and click on the
line item or press the enter key. Select any additional services in the
same way, when completed select OK (F12) to paste your selections
to the quotation form. Add parts to the quotation by highlighting
the service record, clicking on parts, making your selections and confirming
with OK (F12).
5)
Add text
to the work done field if required.
6)
Select the
print button to print a customer copy.
7)
Save
the quotation
by selecting OK (F12).
Quotations,
Adding Buy-ins: To apply a buy-in to a quotation
you need to follow the same process as when adding to a job card, however
when adding buy-ins to a job card you are simply retaining the details
for conversion to a purchase order if the quotation is converted to a
job card.
1)
Highlight
the service you are going to allocate the buy-in part to
2)
Select buy-in
from the row of options located below the parts and labour window
3)
Highlight
a suppliers from the list – select OK (F12)
4)
Enter the
purchase order number (or accept the sequential number) – press enter
5)
Select an
item from the buy-in list or add a new item by selecting new
6)
Confirm
selection with OK (F12)
7)
Edit the
line item if required
8)
Select OK
(F12) to save
Quotations,
Creating A Buy-In Item: To
add a new buy-in to the list select new from the bottom of the
buy-in list and complete the following fields displayed on the Part Form
/ Buy-in:
Part: Description of the item
Part
No: Manufacturers reference
Type: Auto select – Buy-in
Category: Use the button to the right and select
from the category list
Income
Parts: Default account
Cost: Inc or Ex
Price: Enter or select the calculator option
Tax: Default tax codes to change make a selection
from the list
Included: Cost & Price includes or excludes tax
|

Fig
5.15 Part Form / Adding A Buy-in To A Quotation |
Selecting new from the menu bar of the select buy-in
listing opens the part form in buy-in mode. Complete the fields and save
OK (F12) the new item is automatically entered into the list and flagged
for insertion to the job card.
|
Quotations,
Viewing: Quotations
can be viewed from either the client listing, Job card, booking form or
sales screen.
Client
Listing - Open
the client form from the client listing by highlighting the client
name double clicking on the line or selecting edit (F2) from the bottom
of the display. Alternatively you can view a quote from the job card or
booking form by selecting the client option from either screen to access
the client form. Select the history tab, click on the quotes
button to list, to view details of a quotation point at the line item
and double click.

Fig
5.16 Selecting Quotes View From The Client Form
Job
Card - Select
client from the bottom of the job card to display the client form. Select
the history tab, click on the quotes button to list, to
view details of a quotation point at the line item and double click.
Booking
Form - Select
client from the right hand side of the booking form to display the client
form. Select the history tab, click on the quotes button
to list, to view details of a quotation point at the line item and
double click.
Sales
Screen – To
view quotations from the sales screen select the quotations option from
the top of the display:

Fig 5.17 Selecting Quotes View From The Sales Screen
To view details point and click on the line item,
if you wish to view quotations that were created in a different period
select the date range required, to view all quotations select all from
the drop down period menu.
Quotations,
Reporting: Auto Easy allows you to
print a report containing details of quotations for any date range. Select
reports from the top of the screen, click on service reports, select quotation
report from the sub menu.
|
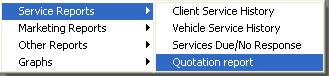
Fig 5.18 Printing A Quotations Report |
Select the date range, only quotations created during
those date will be printed on your report. |
The report displays client and vehicle details,
quotation reference number, brief description and the total of the quote
provided.

Fig 5.19 Quotation Report
|
Quotations,
Converting To A Job or Booking Locate the quotation from
the client form / history display, point and double click
on the line item, the quotation is displayed. Select the convert
button from the bottom of the display; you will be prompted to create
a job card, booking or to cancel. |
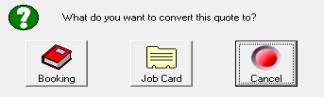
|
|
 The
convert option is only available from quotations The
convert option is only available from quotations
|
When a quote is converted the converted column
will display the job number.
Quotations,
Converted Buy-ins:
If your quotation included buy-ins you will notice these line items are
displayed with an order reference in the parts and labour listing. The
reference indicates that a purchase order containing the original detail
is present in the purchasing module.

Fig
5.20 Buy-ins Converted To Orders
Receive items on order through the purchasing function
by selecting the purchase order and converting to a bill, the job card
is automatically updated.
Sales Display
Sales,
Overview: The sales display lists invoices, jobs
and credit memos including the status (open or closed) plus the financials
of each transaction. The display includes date, open invoices and outstanding
filters; it is also possible to search by client and invoice number. It
is also possible to process payments from this screen by selecting the
payments bottom from the bottom of the screen. Transaction history for
an individual client can be viewed from the client form by selecting the
history tab; transactions can be filtered by registration number. You
also have access to a unique previous job search feature from the sales
screen that allows you search for a previous transaction by key word,
(must be in the text area of the job card) and make and model. This feature
will assist you with quoting when the same job has been performed previously.
 Select the sales button from
the top of the screen to display transactions
Select the sales button from
the top of the screen to display transactions
Sales,
Accessing:
To open the sales screen
select the sales button from the top of the display, to view transaction
details highlight a record, point and double click the job card or invoice
is displayed. Select OK or Cancel from the job, invoice or credit memo
screen to return to the sales listing.
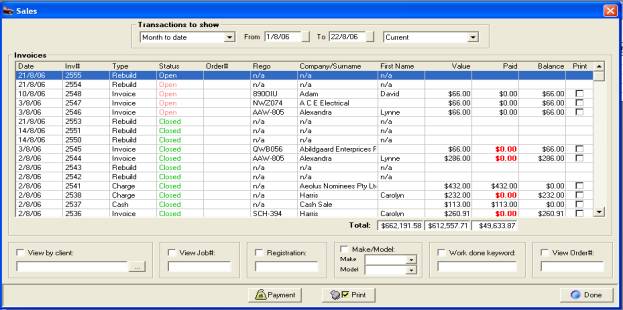
Fig 5.21 Sales Screen
Sales,
Selecting A Date Range:
The screen is set to automatically display transactions for the month
to date, open transactions are always displayed regardless of the
date they were created. It is possible to select another period by clicking
on the button to the right of the month to date field, from the drop down
menu point and click on the period you require.
|
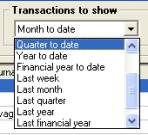
|

|
You can also select the - from to dates- by either
typing into the fields at the top of form in DD/MM/YY format or selecting
the button to the right of the - from / to - boxes and double clicking
on the date required. Today’s date is highlighted in red, to move between
months select the arrows at the top of the calendar form |
Fig 5.22 Selecting Periods And Specifying A Date
Range
|
Sales,
Viewing By Transaction Type: It
is possible to filter sales records by transaction types. Point and click
on the arrow located to the right of the field displaying current on the
top right hand side of the screen header. To filter records by transaction
type make your selection and double mouse click, only records relating
to the chosen transaction type and date range or period will be
displayed. |
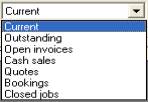
|
Current:
Shows cash sales, open and
closed jobs/ invoices
Outstanding
Balances: Outstanding balances are highlighted in
red on the sales screen except for open jobs or invoices (Work In Progress)
Credit balances that have not been processed are displayed as a figure
enclosed in brackets ie: ($456.30). You can filter any records by date
range or client: for instance if you wish to view all transactions with
an outstanding balance select all from the date drop down menu.
Open
Invoices: Displays all open
invoices and jobs
Cash
Sales:: Displays a list of
cash sales in the selected period or date range
Quotes: Shows all quotes created within the selected
date range or period
Bookings: Displays all booking for the date range
or period
Closed
Jobs: When selected only
closed jobs / invoices populate the screen for the chosen period or date
range
Sales,
Searching By Client, Job Number, Registration & Order: To
filter records by client select the button to the right of the view by
client field, the client list is displayed, highlight the required client
and select OK (F12) from the bottom of the client list, the client’s name
is entered into the field, point and click in the check box above the
clients name.

To search by job number, enter the invoice number
you wish to reference into the view job # field, point and click in the
checkbox. Follow the same procedure to search by registration number or
order number, remember to tick the box above each field you wish to filter
by. Search criteria can be by single or multiple filters.
Sales,
Searching By Key Word, Make & Model: The sales screen allows you to search
for previous jobs by Make, Model and keyword. To use this feature, select
the button to the right of the make field, point and click on the make
required, perform the same for model, finally enter the keyword you are
searching by into the keyword field and tick the check box above the text.
|
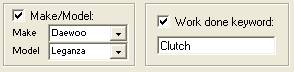
|
It is essential that after selecting your search
criteria you change the period or dates if the record is not found in
the month to date. Using a combination of filters will narrow the search. |
Fig 5.23 Searching by Make, Model & Keyword
Sales,
Multi Print Function:
From the sales screen it is possible to print multiple copies of invoices,
work orders and job cards. You can also choose to print checklists with
job cards or invoices. To print multiples select transactions from the
sales screen by pointing and clicking on the line, a tick is displayed
in the checkbox. Point and click on the multi print icon at the bottom
of the screen, select the form type and whether you wish to print checklists
from the menu,
Sales,
Viewing Totals: The
totals at the bottom of the sales screen change according to the search
criteria. Values equal total transaction value, amount paid and the outstanding
balance.

Sales,
Transaction Type:
The sales screen displays the transaction type; there are 5 types which
are:
Invoice = Job card (created from the diary)
Vehicle = Vehicle invoice (Created from Invoice
/ Vehicle Invoice Option)
Cash = Cash Sale
Charge = Invoice created without vehicle details
Credit = Credit memo
Receipts
Receipts,
Overview: Auto
Easy allows you to process money received for jobs or invoices from the
sales, job card, invoices, cash sale or receipts screen these screens
can be bypassed by selecting Activities / Receive Payment from the top
menu bar. Each option takes you to the payment receipts form which allows
you to allocate payment to single or multiple invoices. Receipts are viewed
from the receipts screen, outstanding monies are reported in the AR aging
summary in current / 30 / 60 / 90 day format.
|

Fig 5.24 Payment Receipt Form |
Job
Card, Processing Payment: Processing
a payment as the job card is closed requires the operator to select payments
from the job update screen if auto close procedure is not turned on. If
this feature is used the payment receipt form will open automatically
after selecting OK (F12) from the service reminder form. To process a
payment you will notice the value of the invoice is recorded in the amount
field. To accept payment select the payment media and either auto apply
if or select the invoice by mouse clicking in the box to the right of
the top of transaction. Selecting OK will display an updated job report
and print a record of the payment on the invoice.
Note: Part payments can be allocated
to the invoice from this screen.
|
Receipts,
Accessing Payment Form: The payment form is available from the
following screens:
Receipts
Select 
Sales
Select

Job
Update Select

Alternatively select Activities / Receive payments
option from the top of screen, each one of these options will open the
payment receipt form. Opening the form from receipts and the activities
menu requires you to search the client listing for the record you are
going to allocate payment to. Opening the form from the sales screen automatically
enters details of the highlighted transaction including the balance payable.
Processing from the job update screen enters the value of the job or invoice
just closed.
|

Fig 5.25 Payment Receipt Form |
The payment receipt form is split into three areas:
Client
Details: Includes the client
name, payment terms, credit limit and current balance.
Payment
Details: Amount being allocated,
media, account and transaction record.
Payment
Allocation: List of outstanding
invoices including outstanding balances |
Receipts,
Processing Payment:
The most popular way of processing payment is from the sales screen, as
most clients do not pay as the job is finalised. If the payment option
is not selected as the job is closed the amount is allocated to the clients
account. The payment form lists ALL outstanding invoices for the client,
enter the amount and media type account and record if required, next flag
invoices that you wish to allocate payment to. The allocation and balance
fields will change accordingly. If the amount to be paid equals the total
balance select auto apply flagging all listed invoices, if you make a
mistake reset will un-flag your selections.
|
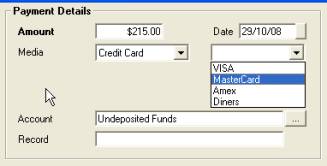
|
Credit
Card Payments:
If a percentage value has been recorded in database settings the surcharge
is automatically calculated and added to the invoice value. Select from
the card selection menu and the recorded percentage is added to the invoice
total.
The surcharge is posted to an Income account
titled Credit Card Surcharges, the total collected over any period can
be viewed from the profit and loss report. |
Receipts,
Editing From The Payment Receipt Form: To
view / edit an existing receipt from the 70payment receipt form point
and double click on the transaction, the receipt form will be displayed,
edit as required click OK (F12) and you will return to the Payment receipt
form, any previous selections will remain flagged.
Receipts,
Selecting Payment Media:
Click on the button to the right of the payment receipt form media field,
from the drop down list select the payment media and click your selection
is now visible.
Receipts,
Unapplied Credits:
Unapplied credits are payments received that have not been allocated to
an outstanding invoice. For instance you may have received payment in
advance for a job and wish to allocate the amount when the job is closed.
Unapplied credits can be selected from the media type drop down menu located
on the top right hand side of the receipt payment form, point and double
click on your selection and the form will close, reselect to apply further
payments to invoices.
Receipts,
Applying Unallocated Payments: Auto
Easy allows you to receive money without allocating the funds to an invoice;
you may also delete a paid invoice without deleting the original payment.
Both of these actions will result in an unallocated amount being credited
to the client account. It is possible to apply these unallocated payments
to subsequent invoices from the payment receipt form. If unallocated payments
exist you will see the value displayed in red on the header of the form,
the payments button is active when unallocated payments exist.
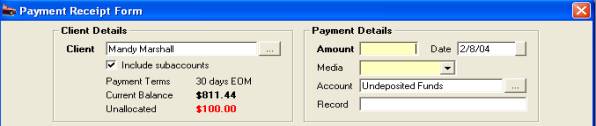
Fig
5.26 Displaying Unallocated Payments
 To
apply unallocated payments select the payment icon, the receipts screen
opens displaying all unallocated payment for the client. To allocate an
amount point and click on the unallocated transaction which is indicated
by a red cross. The payment receipt form opens, apply the unallocated
values to outstanding invoices in the normal way.
To
apply unallocated payments select the payment icon, the receipts screen
opens displaying all unallocated payment for the client. To allocate an
amount point and click on the unallocated transaction which is indicated
by a red cross. The payment receipt form opens, apply the unallocated
values to outstanding invoices in the normal way.
Receipts,
Selecting An Account:
The default account is Undeposited funds, although payments can be directly
credited to another current asset or bank account, if you wish to deposit
a payment another account such as an EFT payment to your trading account
select the button to the right of the account field from the list highlight
the account you wish to post the payment to, confirm by using OK (F12).
Payments can be allocated to bank or a fixed asset account. Accepting
the Undeposited funds default will allow you to deposit funds to a bank
account from the receipts screen.
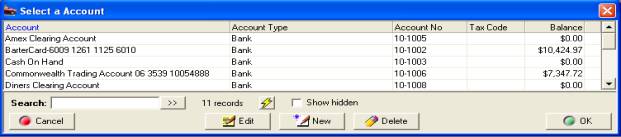
Fig
5.27 Selecting A Posting Account From The Payment Receipt Form
Receipts,
Accessing:
To access
the receipts screen select Accounts from the top menu, click on receipts
from the drop down list.
|
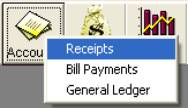
Fig 5.28 Accessing Receipts |
The receipts screen displays all payments including
account allocations. All transactions that have not yet been deposited
are allocated to Undeposited funds (highlighted in red). When payments
are deposited to an account the posting account is entered on the line
item. It is possible to process new payments and create deposits from
this screen. To view transaction details, highlight the record and double
click or select edit to open the receipt form |
Receipts,
Selecting Date:
The screen is set to automatically display transactions for the month
to date. It is possible to select another period by clicking on the button
to the right of the month to date field, from the drop down menu point
and click on the period you require. You can also select the - from to
dates - by either typing into the fields at the top of form in DD/MM/YY
format or selecting the button to the right of the - from / to - boxes
and double clicking on the date required. Today’s date is highlighted
in red, to move between months select the arrows at the top of the calendar
form.
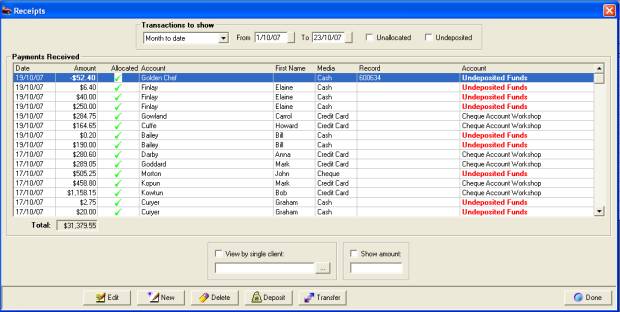
Fig 5.29 Receipts Screen
Receipts,
Viewing Unallocated Payments:
An unallocated payment is indicated by a red cross in the allocated field,
if you wish to view just unallocated payments select the unallocated check
box at the top of the screen. You will need to specify a date range by
selecting from the drop down period selection or entering a from and to
date

Receipts,
Viewing Undeposited Payments: To
view Undeposited payments select the undeposited check box at the top
of the screen. Again the date selection will need to entered, if you are
going to create a deposit it is suggested you select all from the date
period menu.

Receipts,
Viewing By Single Client:
From the bottom of the receipts screen select the button to the right
of the view by single client option. The client list is now in view, highlight
the client and confirm with OK (F12) point and click on the check box
above the field. Only transactions relating to the client are in view.
You will need to select a period or date range if you wish to view transactions
pre month to date.
Receipts,
Searching By Amount: To search
by value enter into the show amount field and tick the show amount box
Receipts,
Editing:
It is
possible to edit a payment from the receipt screen, select the payment
double click. Details of the payment are displayed; the amount can be
edited and invoices un-flagged. Confirm with OK (F12), the changes are
recorded against the original transaction.
Receipts,
Purchase Payments: When
paying suppliers it is possible to pay from Undeposited funds, the transaction
is listed as a negative amount ie: ($110.00). Indicating this money which
would normally be cash is missing from your undeposited funds. You create
deposits from this screen; to ensure your deposit reconciles you need
to select the negative transactions to deduct these values from your cash
holding.

Receipts,
Credit Memos:
It is
also possible to refund a client from Undeposited funds; these values
will also appear as a negative indicating the cash is missing from your
receipts. The negative receipts need to be selected when processing a
deposit.
Receipts,
Deleting:
It is
possible to delete a receipt which does not form part of a reconciled
deposit. Auto Easy does not allow you to edit or delete transactions
once they have been reconciled. Receipt deletions adjust the original
transactions they were allocated to. For instance you process a payment
of $500.00 against a $1,000.00 invoice leaving a balance of $500.00; if
you delete the $500.00 receipt then the outstanding balance of the invoice
will return to $500.00. To delete a receipt highlight the entry and select
delete from the bottom of the screen. A warning box will request you confirm
the request, if the transaction forms part of a reconciled deposit
a message box will cancel the deletion.
Receipts,
Processing A Payment:
From the bottom of the receipts screen select new to open the payment
receipts form. Select the button to the right of the client field, from
the list highlight the required entry confirm with OK (F12). The payment
receipt form lists ALL outstanding invoices for the client, enter the
amount and media type, account and record if required, next flag invoices
that you wish to allocate payment to. The allocation and balance fields
will change accordingly. If the amount to be paid equals the total balance
select auto apply flagging all listed invoices, if you make a mistake
reset will un-flag your selections. Finalise by selecting OK (F12) from
the payment receipts form.
Client
Statements
Statements,
Overview:
Auto Easy
allows you to produce client statements for any period. The statement
form lists the opening balance, transactions, payments and a closing balance
for the date range. When printing a statement for a client with sub-accounts
transactions for each individual account are listed. The form also has
a payment advice section that can be mailed back to you with payment.
Statements,
Creating: Statements
can be printed or emailed for all clients with balances other than zero
or for selected clients. Select the activities menu, click on create statements,
selecting outstanding will allow you to print statements or email all
clients with an outstanding balance.
Choosing the selective option allows you to select
individual or multiple clients you wish to print or email statements for
from the client list. Both options will display a list of clients with
outstanding balances, you now have the ability to select by what means
you wish to deliver the statement either email or printed. If a client
has an email address it is displayed in the window. When emailing to a
selective listing simply select the records that have email addresses
and choose email from the bottom of the display, these records will be
deleted from the list when an email has been sent successfully, you are
now able to select the remainder for printing.
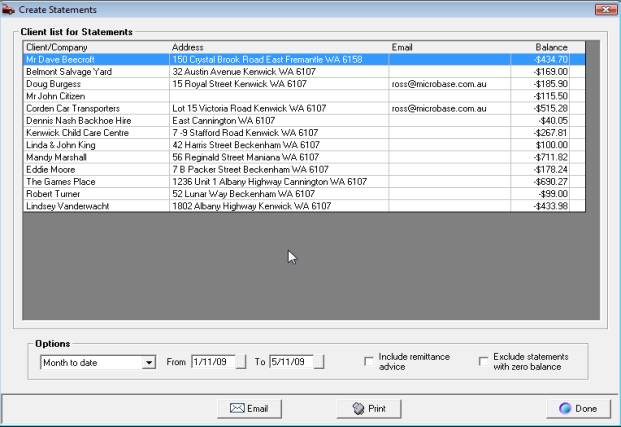
Fig
5.30 Statement dispatch Selection
|
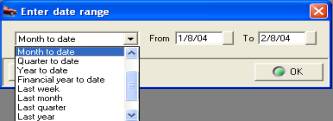
|
Statements,
Selecting Date Range: From
the enter date range display you can select a period such as last month,
the date range is inserted in the from / to fields. Alternatively type
the date range into the from / to fields or select from the drop down
calendar.
|
Fig
5.31 Date Selection
Statements,
Printing Remittance Advice: If
you wish to print or email a remittance advice with each statement select
the option at the bottom of the task display.
Statements,
Clients With Zero Balances:
To ensure you do not print or email statements for client with a zero
balance select the option from the message box.
Client Records
Client
Records & Transaction History, Overview: Auto
Easy Ultimate contains separate client and vehicle databases; vehicles
are attached to a client. This structure gives the operator flexibility
to move vehicles to a new owner. It is possible to search the client listing
by any field displayed within the grid. It is possible to search any field
by keyword; the operator can also index the client listing by any field
in the display.
Client records are tabulated into the following displays:
v
Contact Details: name, address, phone number and email etc.
v
Profile: Account details, loyalty program, comments,
pricing profile and effective media.
v
History: Jobs, loyalty, RSA, quotes & reminders
v
Tasks: Notes & Tasks
Client
Listing
Client
Listing, Viewing:
There are two ways to open the client list, one by displaying the lists
option at the top of the screen, highlighting clients from the drop down
menu and selecting. The second and easier way is to select the client
icon at the top of the screen.
 Selecting this button from the
top of the screen will display your client listing.
Selecting this button from the
top of the screen will display your client listing.
The display includes company / surname, first name,
home phone, work phone, mobile, address, client balance and discount rate
if applied.
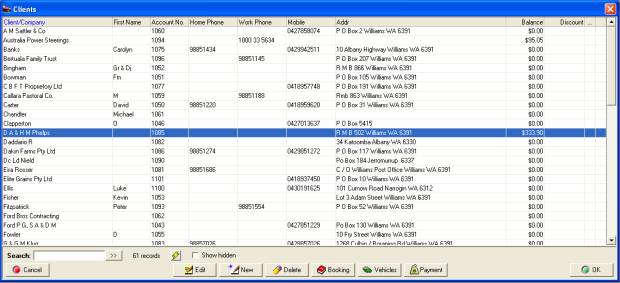
Fig
6.01 Client Listing
Email
Addresses: When an email address
is recorded on the client form a [@] symbol is displayed in the name field.
Place your cursor over this symbol to read the email details

Client List displaying a symbol against client that
have email addresses recorded
Client
Listing, Searching: You
can search the database by any field displayed. To select the field you
wish to search by point at the field header and mouse click. The header
text will be displayed in blue, to change the search field point and click
on the next required header. Double clicking the field header will re-index
the information grouping items with similar data. Type your query into
the search field, the cursor will move to your selection. If you wish
to expand the search select the button to the right of the field, the
cursor will locate a record containing your query each time you select.
Client
Listing, Creating A Record:
Select new from the bottom menu bar of the clients display, the client
form will display you will notice this has 3 tabs contact details, profile
and history. To create a new record you need to complete the contact details
and profile sections of the form.
Client
Listing, Creating A Booking: Highlighting
a client record and selecting the booking button from the lower menu bar
of the display allows the operator to initiate a booking without having
to return to the diary screen. When the function is selected the vehicle
listing for the client is displayed, select highlight the vehicle you
wish to make the booking for, confirm with OK (or F12). The service listing
will be displayed; select the service / services required select OK (or
F12) and complete the necessary fields on the booking form in the normal
way.
Client
Listing, Viewing Notes: When text is entered into the client
comments field comments field a note graphic is displayed in the last
column of the display. Access the comment by clicking on the note graphic
once. Text can be edited / deleted from this screen, save your changes
by selecting OK (F12).
 Client
Listing, Viewing Vehicles: Select
the vehicle button from the bottom menu bar of the client listing. A vehicle
list is displayed including service information, it is also possible to
add new or edit existing vehicle information from the list.
Client
Listing, Viewing Vehicles: Select
the vehicle button from the bottom menu bar of the client listing. A vehicle
list is displayed including service information, it is also possible to
add new or edit existing vehicle information from the list.
 Client Listing, Processing
Payment: Highlight the client from the listing and select payment,
the payment receipt form is displayed enter the value and allocate to
the invoices displayed in the body of the form.
Client Listing, Processing
Payment: Highlight the client from the listing and select payment,
the payment receipt form is displayed enter the value and allocate to
the invoices displayed in the body of the form.
Contact Details
|

Fig
6.02 Client Form / Contact Details |
Client
Form: Can be accessed from
the client listing by selecting new (insert) or edit (F2) from the client
listing. To view the profile or history records point at the tab and select.
Phone
Listings Search:
Auto Easy allows you to search imported phone listings and insert client
or company details directly to the client form. If you have been provided
with a phone listing from
Genesis perform the following to insert a record:
|
Contact detail fields consist of the following:
Company
/ Surname: Enter the surname
or company name
Private
(default) / Business: Selecting
business will disable the title and first name fields. The contact field
however is accessible.
Parent:
Allows the operator to pick
a parent account for the client
Title: displays a
pick list after clicking on the button adjacent to the field – selecting
M will insert Mr. (not available in business mode)
First
Name: ie: John (not available
in business mode)
Contact: field
records your prime company contact ie: John Smith (not available in private
mode)
Title: displays a
pick list after clicking on the button adjacent to the field – selecting
M will insert Mr.
First
Name: ie: John
Salutation relates
to the way you wish to address your client in any communication ie: John
or Mr. John Smith.
ABN: If a client’s ABN is
entered in the contact details it will be recorded on all invoices for
that client (not available in private mode).
Ph.
Work / Ph Home / Fax / Mobile / Mobile 2 –
Details are displayed on the client card and job card, SMS preferences,
if you are using the SMS feature within Auto Easy select which mobile
you prefer to send messages too.
Email:
Enter the email address
in this field – remember most email addresses are in lower case, if you
require emails to be copied to another email address enter the details
into email #2.
Address: Multiple lines
Billing
Address: If the billing
address is different from the physical address select the billing address
tab and enter the billing address, this will then be printed on any subsequent
invoice created.
Suburb: Type the suburb, then press Enter –The
postcode will be entered automatically.
Client Listing,
Sub Accounts: Auto Easy Ultimate allows the user to
attach sub accounts to “Parent” accounts. This
feature is particularly useful for fleet operators as it allows individual
details to be recorded with all transactions being amalgamated into one
account. Sub accounts are always listed under the parent account in the
client listing. It is also possible to nominate whether the address on
the displayed on the clients invoice is the sub account or parent account.
Client
Listing, Creating A Sub Account:
Enter client details as normal. Move your cursor to the parent field select
the button to the right hand side, this will display your client listing.
Select the client you wish to be the parent account, the database is indexed
and can be searched by typing the client name you wish to attach this
record to. With your cursor highlighting the entry point and left hand
mouse click this will display the parent account in the parent field.
If you wish the account address to be the parent select use parent address.
Save the details by selecting OK or F12 from the bottom of the form.
Email
Invoices – To email invoices
directly to the client select the history tab from the client form, highlight
the line containing the invoice you wish to email, point and click on
the email function at the bottom of the display. If you wish to send multiple
invoices move the cursor to highlight the required record and select the
email button from the bottom of the form.

Profile
Select the profile tab from the client form to enter
details
|
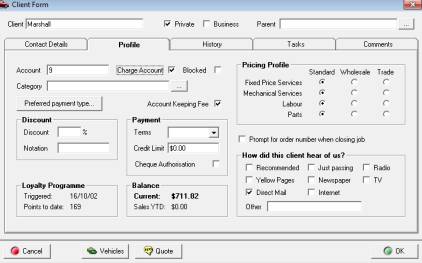
Fig 6.03 Client Form / Profile |
Profile: includes loyalty status, comments, pricing
profile and media response information.
Points
Adjusting:
Point and click on the points field on the client card an edit box allows
the operator to change points to date.
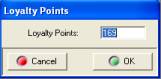
|
Fields include the following:
Account
Number: is a free typing area
that enters a unique identifier; however the number can be overwritten
if required. Note: When terms other than cash are selected
a letter C is placed in front of the account number indicating the client
has credit terms.
Category:
Allows you to segment your
database for marketing purposes. Select the button to the right of the
field, then select or add a new category to the list by selecting new
from the bottom of the display entering the new category and saving by
selecting OK (F12). Note: If track cost centres are set to true
in program configuration Auto Easy forces the entry of a client category.
Charge
& Blocked Accounts: Auto
Easy allows you to record clients that have charge accounts, selecting
this option from the client form / profile will display an asterisk against
the record in the client listing.

To Block any further sales being made to a charge
account client, select the blocked option, the title will display in red
plus you will notice the client’s name is in red in the client listing.
It is not possible to make a sales to a client that has been blocked
|
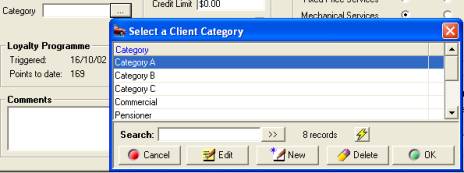
Fig
6.04 Selecting A Client Category |
Applying categories to your client base allows you
to create customer groupings. This feature gives you the opportunity to
target market your services.
|
Discount:
If you wish to apply a discount
to all invoices for this client enter a percentage value into the discount
field. On closing a job or charge invoice for the client you will be prompted
to apply the discount value, selecting no from this prompt will charge
the invoice at the normal rate.
Discount:
If you wish to apply a discount
to all invoices for this client enter a percentage value into the discount
field. On closing a job or charge invoice for the client you will be prompted
to apply the discount value, selecting no from this prompt will charge
the invoice at the normal rate.
|
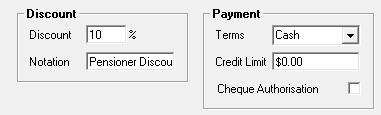
|
Discount
Notation – On the client
profile screen there is now an additional field titled notation in the
discount section of the form. Text entered is then printed on the invoice
in the discount section.
|

Terms: Use the button to the right of this field
to select payment terms, if the client is cash the field can be left empty.
Credit
Limit: Enter a maximum value,
if this amount is exceeded a warning message will be displayed, for cash
clients leave the field blank.
Gold
Key Advantage ( Only): If
the client is a Gold Key member select this option
Current
Balance: Total amount outstanding,
if the amount is displayed in brackets the client is in credit.
Loyalty
Programme: Status including
loyalty points to date and date loyalty plan initiated.
Prompt
For Order Number On Job Close:
Select if you wish to be reminded to enter an order number as you close
a job card
Comments: Is a free typing area where the operator
can make specific global notes on issues relating to the customer
Cheque
Authorisation: Tick the box
if you authorise payment by cheque from the client. Auto Easy will warn
the operator if authorisation is not set to true when processing cheque
payments for non-authorised clients.
Pricing
Profile: This
facility allows the operator to preset the pricing level for the client.
Prices applied to the job card depend on the values entered in the services,
labour or parts files. It is possible to set varying price structures
for clients for example; Labour can be set at standard, parts wholesale
and fixed price services at trade. To select a price profile point and
mouse click on the appropriate radio button. Pricing profiles can be set
at any time and will be applied to the next job for the client.
Media
Database: A report can be generated that sorts this
information into adverting types including number of responses. This feature
gives you an easy way of tracking the success / failure of any promotion
you may have in place, to select mouse click on the appropriate radio
button.
Account
Keeping Fee: Auto
Easy allows you to apply a fee to clients that have charge accounts, to
use this feature you need to perform the following:
Open File / Settings / Database Settings enter the
account keeping fee into the appropriate field located on the bottom left
hand side of the form

Save the setting by selecting OK (F12) from the
settings screen
The next step is to flag the clients who will attract
an account keeping fee, to perform this task open the client form.
|
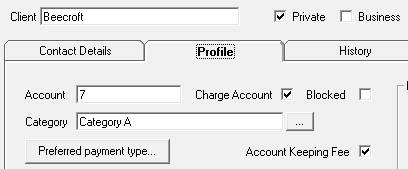
|
To the right of the preferred payment type is a checkbox
titled account keeping fee, to select point and click in the box. Save
with OK, you will now note that the account number field is highlighted
in blue indicating an account keeping fee has been applied. |
|
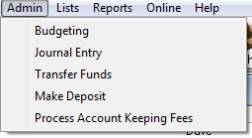
|
To process account keeping fees, select admin / process
account keeping fees. A list of clients attracting the fee is displayed;
there is an option at the bottom of the list to remove any clients to
who you do not want to charge the fee. To delete simply highlight the
appropriate record and select remove, to process the remaining records
select the process option from the bottom menu. The amount is applied
via a charge invoice and will be listed on a clients statement as an account
keeping fee |

Applying Account
Keeping Fees
Note that it is possible to change the default account
keeping fee from this screen, simply highlight the value and re-type the
correct entry. Exit the screen by selecting done.
Preferred
Payment Method – It is possible
to record the preferred payment method including credit card details on
the client card. When payment is processed the preferred method is entered
automatically onto the receipt form. Credit card details are protected
if security is being used, the option must be selected in the user profile.
|

|
Select the client preferred payment option in security
to allow access to credit card details. |
Entering
Details – Open the client form,
select the profile tab, click on the preferred payment option, from the
drop down list select the payment method. Save your setting with OK (F12).
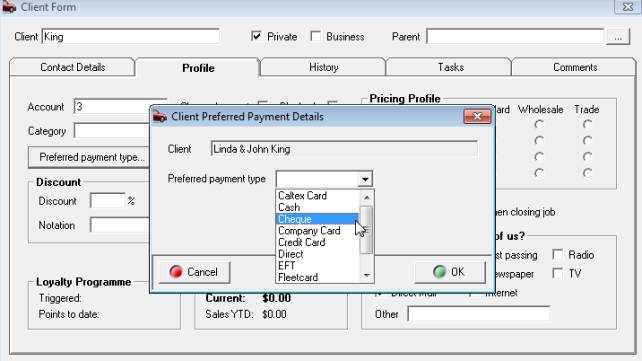
Setting The Preferred
Payment Method
If credit card is selected as the payment type an
option to enter the credit card details is displayed
|
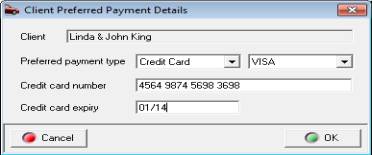
|
Enter the credit card type by selecting from the
drop down list, enter the credit card number followed by the expiree date.
Save the details with OK (F12). Note the credit card details are secured
in the database by 128 bit encryption so it is not possible to view these
details from the data source. |
Receiving
Payment – The preferred payment
method is automatically entered into the receipt form, if credit card
details are stored the credit card type is entered with the details being
able to be retrieved by clicking on the yellow arrow next to the media
type.
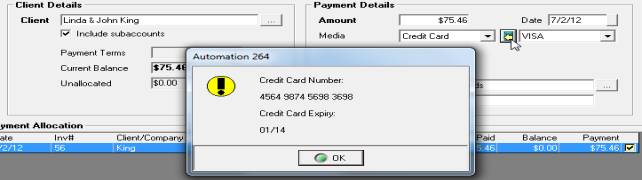
Receiving Payment using stored details
History
Selecting the history tab
from the client form allows you to view information relating to the following:
v
Jobs
v
Loyalty
v
RSA
v
Quotes
v
Reminders
v
Payments
To display change the views select the drop down
list from the show field located on the top left hand side of the client
form
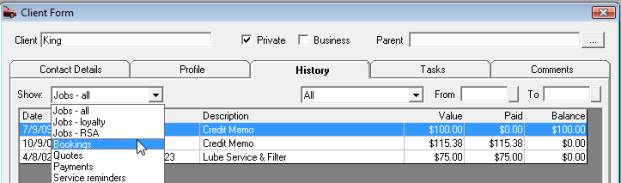
Fig 6.05 Changing The History View
Jobs – Displays all current
and closed jobs including the value and paid to date amount and balance,
to view details click on the transaction
Loyalty – Displays loyalty points
accrued by invoice
RSA – Records RSA issues by
job
Quotes – Displays all quotes
prepared for the client that have not been converted to jobs
Payments
– Displays
all payments for the date range selected to view payment details click
on the transaction.
Reminders – The
history / reminders form displays all service reminders sent or due to
be sent to the client including the service due, date and odometer. An
extra feature of this display is the done column; this will contain either
yes or no. If the service due is performed within 90 days of the service
date yes will be entered indicating the service reminder was successful.
This screen can also be used as a reference to view when the next service
is due including type/date /odometer
History,
Quick View:
To access vehicle history for the last 12 months select the balance amount
from the client listing this will display 12 months of transaction history,
use filters if you wish to change the view.
History,
Filtering By Vehicle:: Select
the arrow to the right of the filter field displaying all, a drop down
menu displays vehicle registrations. To view the histories for a specific
vehicle select the registration. Only the transactions relating to the
selected vehicle are now in view. To return to all jobs select the filter
field, all jobs, all transactions for the client are displayed.
|
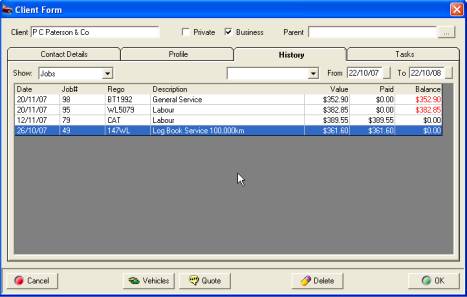
Fig
6.06 Client Form / History / Job |
History,
Jobs:
Displays
by date range previous invoices, job number, type, registration, description
and financial information for each transaction.
History,
Viewing Transactions:
Select the transaction you wish to view and double mouse click, the invoice
or job card will be displayed.
|
Invoices,
Deleting: Select the delete
button from the bottom menu bar. Note: only closed jobs can be
deleted from this screen, the following procedure is required:
1)
Highlight
the job to be deleted – this must be a closed invoice or job
2)
Select
the delete option from the bottom menu bar
3)
Enter
details for the deletion
4)
Confirm
with OK or F12
Note: When deleting an invoice,
inventory items are placed back into stock, buy-ins are converted to inventory
items. To adjust inventory quantities or remove buy-ins selects inventory
or purchasing and makes the necessary changes.
Tasks
Client
Form, Tasks:
The contact
manager allows you to record notes and tasks. Notes are text records that
record the contact type, consisting of direct, email, fax letter or phone.
You can record tasks to be performed at a predetermined time; new tasks
are listed on the client form and in the task manager.
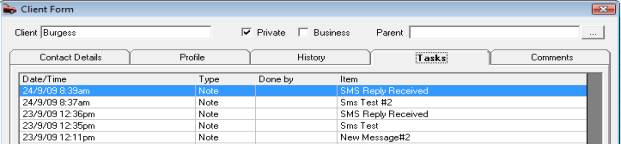
Fig 6.07 Task History
|
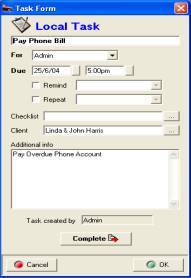
Creating
A New Task |
Client
Form, Creating A New Task:
To create a new task select the task button at the bottom of the client
form. Enter a title for the task in the first field, next select the arrow
to the right of the for field. A list of options is displayed including
the ability to set the task for a specific user, group or anyone. The
date will automatically default to today in the due field, if you wish
to change this select the button to the right, point and double click
on your selection; the date is entered in the field. Next select the time
you wish to perform the task.
If you wish to be reminded (authorised users
only) select the remind option followed by the down arrow to the right
of the field displaying 30 minutes before, make your choice from the drop
down menu by double clicking. The reminder can also be repeated on a daily
/ weekly / fortnightly or monthly basis. Select repeat followed by the
field to the right of your selection.
|
Editing
A Task:
To edit a task go to diary
day or week view or the client form tasks option, point and double click
on the task you wish to edit, make the changes and save using OK (F12).
Task
Manager, Deleting A Task: If
you wish to delete a task open the task manager in day or week view, highlight
the entry you wish to delete and press the delete button on you keyboard,
confirm your action from the message box by selecting yes.
Comments
The comments area comprises of a text field where
relevant information can be stored, when text is entered into this field
a note it icon is displayed against the customer record in client listing.
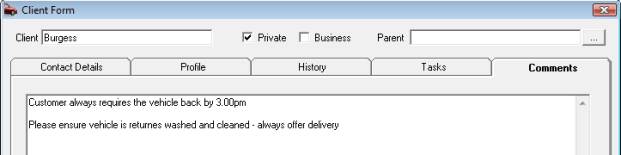
Fig
6.08 Comments View
Vehicle
Records & Services Due
Vehicle
Records & Services Due, Overview: The
vehicle and client databases have been designed so they are independent
of each other. Auto Easy Ultimate allows you to attach a vehicle / vehicles
to clients. It is not possible to add a new vehicle to the database without
first selecting a client from the listing. Vehicle records store information
in the following sections of the vehicle form:
v
Vehicle Details: Registration, make, model, year / month
of manufacture etc.
v
Servicing: Last service. Next service and type, registration
renewals and RSA details
v
Service Notes: Special servicing notes and drivers name
Vehicle Listing
Vehicle
Listing, Viewing: You
will be able to open the vehicle listing from any display that has the
vehicle button on the bottom menu bar. Alternatively the listing can be
accessed in two other ways. Select lists / vehicles from the top of the
screen, or the vehicles icon.
 Opens the full vehicle listing
display.
Opens the full vehicle listing
display.
 Select if you wish to view
the vehicle listing for a specific client.
Select if you wish to view
the vehicle listing for a specific client.
Vehicle
Listing, Viewing The Vehicle Form: Highlight the record select edit, press
F2 or point and double mouse click to view the record
Vehicle
Listing, Searching For A Client By Vehicle: Select vehicles (Click on Vehicle Button)
use the search function to locate the vehicle. Click on client option
to view the owner.
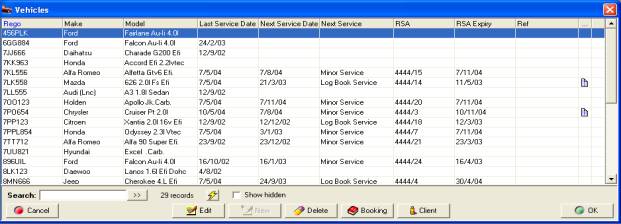
Fig 6.09 Vehicle Listing
Note: From this screen additional information
is recorded relating to the next service due and roadside assistance issue.
The data displayed in these fields is automatically posted from the service
reminder function when the job is closed. Fields can be edited from this
screen however you must remember to select F12 or click on OK when exiting
to save any new information – esc / cancel will discard any changes. If
you wish to view vehicle notes point and single click on the note graphic
displayed.
Vehicle
Listing, Creating A Booking: It
is also possible to create a booking from the vehicle listing. Open the
vehicle listing and highlight the vehicle you wish to complete the booking
for. Select the booking button located on the lower menu bar of the display
window. The service listing will be displayed. Select the service / services
required select OK (or F12) and complete the necessary fields the booking
form in the normal way.
 Selecting the booking button
allows you to create a booking without opening the diary.
Selecting the booking button
allows you to create a booking without opening the diary.
Vehicle Details
|
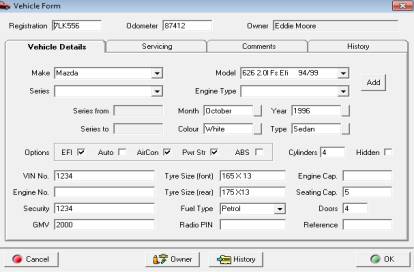
Fig
6.10 Vehicle Form / Vehicle Details |
Adding
A New Make & Model: Make & Model fields are pick lists,
if a vehicle is not listed simply type the Make and Model and select add
a prompt will ask you whether you wish to add the new make and model to
the database select yes. This information is now retained for future use.
You can also add makes and models by selecting lists / Makes & Models
from the top of the screen select new and enter the new record save by
selecting OK (F12).
|
Vehicle details contain the following fields:
|
Registration |
Automatically types in upper case |
|
Odometer |
Enter the current speedometer reading |
|
Make |
Type the make ie: Ford, there is a pick list selected
by the button to the right |
|
Model
|
When the make has been entered into the appropriate
field models can be accessed |
|
Model |
Enter the model code ie: EB, 520i |
|
Series |
Enter the series from the drop down selection |
|
Engine Type |
Select from the drop down list |
|
Month |
Select from the choices displayed |
|
Engine Type |
Select from the drop down list |
|
Series From |
First manufacture date |
|
Series To |
Last manufacture date |
|
Year |
Select the button to the right of the field and
select the year |
|
Colour |
Select from drop down list or free type |
|
Type |
Select pick list by using the button to the right |
|
EFI, Auto, Air-con, Power St. ABS |
Flag the appropriate box |
|
Cylinders |
Enter a numeric into this field |
|
VIN Number |
Free typing field |
|
Tyre Sizes Front |
Free typing field |
|
Yre Sizes Rear |
Free typing field |
|
Engine Capacity |
Free typing field |
|
Engine Number |
Free typing field |
|
Fuel Type |
ULP, PULP, LRP, LPG, Diesel – Pick-list |
|
Seating Capacity |
Enter numeric value |
|
Doors |
Free typing field |
|
Radio Pin |
Free typing field |
|
GMV |
Free Typing Field |
|
Reference |
Enter Alphas / Numeric if applicable |
|
Security |
Free typing field |
 Vehicle Owner, Changing: Select
owner icon from the bottom menu bar, enter the client listing is now in
view, select the client you wish to be the new owner, note you can add
a new client from this screen by selecting Insert / New. Complete the
process by selecting F12 or click on OK. A message box confirms the change
of owner.
Vehicle Owner, Changing: Select
owner icon from the bottom menu bar, enter the client listing is now in
view, select the client you wish to be the new owner, note you can add
a new client from this screen by selecting Insert / New. Complete the
process by selecting F12 or click on OK. A message box confirms the change
of owner.
Vehicle Servicing
|
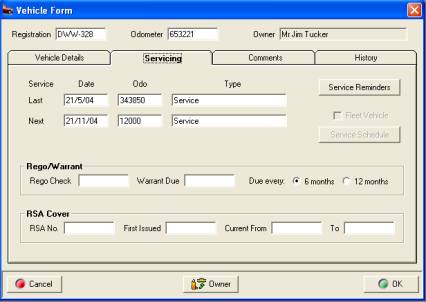
Fig 6.11 Vehicle Form / Servicing |
The vehicle servicing screen records service details.
Functions allow the operator to add / edit or remove scheduled services.
Information relating to RSA issue, cover period and registration / warrant
details can also be viewed / edited or added. The operator has an option
to select the duration between rego / warrant checks by selecting either
6 or 12 months. When the next service date is reached Auto Easy moves
the date forward according to the selection.
|
Adding
A New Make & Model: Make & Model fields are pick lists,
if a vehicle is not listed simply type the Make and Model and select add
a prompt will ask you whether you wish to add the new make and model to
the database select yes. This information is now retained for future use.
You can also add makes and models by selecting lists / Makes & Models
from the top of the screen select new and enter the new record save by
selecting OK (F12).
Vehicle
Servicing, Adding Service Reminders: Select
the service reminders button
|
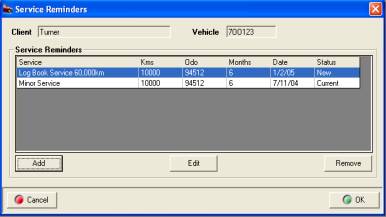
Fig
6.12 Service Reminder Form |
Select add from the bottom of the form, this action
opens the service listing. Select the service or services required a tick
is visible against each of your selections. When complete select OK (F12)
to save.
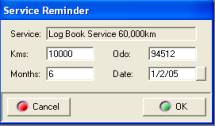
Fig 6.13
Setting Distance / Duration |
Enter the distance to travel and duration between
services into the fields provided. New services are added to the bottom
window of the service reminder form. Select add from the bottom of the
form, this action opens the service listing. Select the service or services
required a tick is visible against each of your selections. When complete
select OK (F12) to save
Vehicle
Servicing, Deleting Service Reminders:
Select clear from the bottom of the top display. This action will clear
all future services recorded for the selected vehicle. Note: It
is not possible to clear a single service from this screen. Services will
have to be recorded using the add function situated under the new service
reminder window. You can however remove a single service from the new
services window before saving.
Vehicle
Servicing, Editing New Service Reminders:
You can edit new service reminders by highlighting the record, selecting
change and editing the distance / time until next service fields.

Fig 6.14 Rego/ Warrant reminders
Registration
/ Warrant Of Fitness Renewals, Adding: It
is possible to add registration and warrant of fitness renewals either
on the vehicle or booking form. Auto Easy also provides a 6 month or 12
month option between servicing. To select, simply point and click in the
required field. These options are also available from the booking form.
Auto Easy will automatically move the due date forward according to the
time selection when the next date of check is due.

Fig 6.15 Roadside Assistance Cover
Vehicle
Servicing, Roadside Assistance Cover:
The roadside assistance details can be viewed from the vehicle record;
these are automatically entered when the roadside assistance option is
selected in settings. The membership number consists of your site id followed
by the sequential membership number.
Vehicle Comments
|
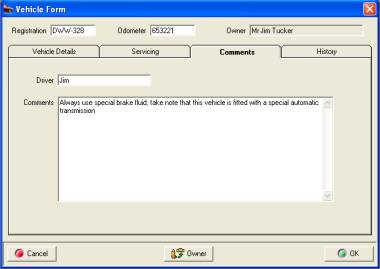
Fig 6.16 Vehicle Form / Service Notes |
Vehicle service notes are used to make notations
that relate to the serving of a particular vehicle, you can also record
the name of the vehicle driver.
Opening
Comments: Select the service
comments tab from the vehicle form to display servicing notes and the
driver name.
Adding Comments:
Type in the notes section of the display and save
by selecting OK (F12).
|
Service
Notes, Deleting: Highlight
the text in the comments section and select delete, save your changes
by selecting OK (F12).
Service
Notes, Viewing From The Job Card:
If a vehicle has service notes attached the vehicle button at the bottom
of the job will have changed from
 to
to  Selecting
the vehicle button will open the vehicle record, select vehicle notes
to view the details. Cancel (ESC) closes the vehicle form.
Selecting
the vehicle button will open the vehicle record, select vehicle notes
to view the details. Cancel (ESC) closes the vehicle form.
Service
History
|
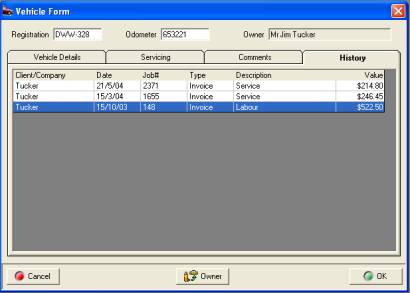
Fig 6.17 Vehicle Service History |
Clicking on the history tab displays the service
history in date range order (most recent at the top of list). Included
is the clients name, date, job number, sales type, service descriptor
and total value.
Viewing
Previous Jobs: Point and
double mouse on the record you wish to view. To return to the vehicle
form click on OK (F12) or Cancel (ESC) from the job card.
Note: It is possible to change the vehicle owner
from any section of the vehicle form by clicking on the owner button on
the lower menu bar. |
Vehicle
History Transferring: Allows vehicle history to be transferred
to another client and vehicle, a record remains on the original client
form however all outstanding amounts for the job are transferred to the
new client / vehicle.
To transfer history between clients / vehicles go
to the vehicle listing, highlight the vehicle you wish to transfer history
from, open the vehicle form, select history

New history option located at the bottom of the
vehicle form
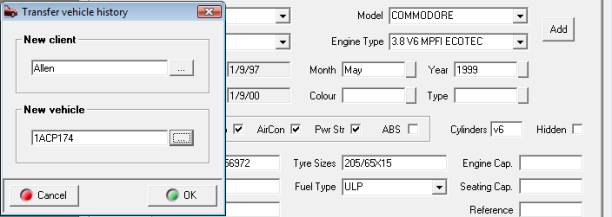
Entering the new client and vehicle
Select OK (F12) from the transfer vehicle history
form this action will transfer the history to the new client and vehicle.
A record remains on the original client form with all outstanding balances
transferred.
Services
Overview: Auto Easy Ultimate allows the operator
to sell services on a fixed (parts included) or non-fixed price basis
(parts plus labour). Services can also contain a parts kit, standard
text and attachments, to simplify the addition of text to a standard
invoice or job card there are two text databases that can be linked to
the service. Selecting text lines from these databases will automatically
insert text to the work done field or print an attachment to the invoice
as a checklist.
Service records control the next service due, loyalty
triggers, point allocation, redemption value and the issuing of roadside
assistance. It is also possible to view the transaction history for a
single service from the service form.
|
Item |
Retail |
|
|
Fixed Price |
175.00 |
175.00 |
|
Water Pump x 1 |
$60.00 |
-$60.00 |
|
Radiator inhibitor x 1 |
$15.00 |
-$15.00 |
|
Labour component |
|
$100.00 |
|
|
|
Item |
Retail |
Total |
|
Labour x 2 hours |
$100.00 |
$100.00 |
|
Water Pump x 1 |
$60.00 |
$60.00 |
|
Radiator inhibitor x 1 |
$15.00 |
$15.00 |
|
|
Total |
$175.00 |
|
|
Fixed Price - Parts &
Labour Allocations
Mechanical - Parts & Labour Allocations
Above are two examples that show the parts and labour
allocation for both fixed price and mechanical services. Essentially fixed
price services take a total value deduct the normal retail of parts added
and allocate the remainder to labour. Mechanical services allow the operator
to fix the labour component and add parts accordingly. Auto Easy allows
the operator to set service prices including or excluding tax, regardless
of selection the price file will always display the price including tax.
Service Listing
Service
Listing, Viewing: The
service listing can to opened by using the following
 Selecting this icon from the
menu bar at the top of the screen will open the service listing. Alternatively
you can select the lists option above the icons at the top of the screen
and choose services.
Selecting this icon from the
menu bar at the top of the screen will open the service listing. Alternatively
you can select the lists option above the icons at the top of the screen
and choose services.
 The service listing can also
be opened from a job card, charge invoice or cash sale by selecting the
add service button. When creating a booking the add button located below
the services section allows access to the service listing.
The service listing can also
be opened from a job card, charge invoice or cash sale by selecting the
add service button. When creating a booking the add button located below
the services section allows access to the service listing.
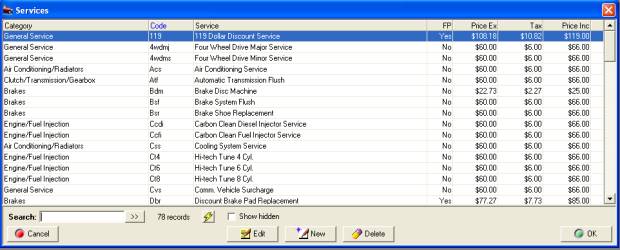
Fig 6.18 Service Listing
Services
Listing, Searching: Code
is the default search field, indicated by blue text of the header record.
To service for a service by code type into the search field, the cursor
will move to the first record containing the text or alphas entered. It
is possible to change the search field by pointing to the header record
of the field you wish to search by, on selection the header text will
change to blue. The listing can also be indexed by any field displayed,
simply point at the header record and double mouse click the order will
change according to whether ascending or descending is selected.
Service Management
|
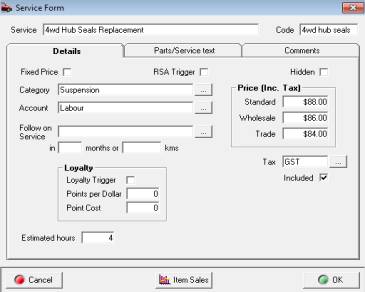
Fig
6.19 Service Form / Details |
Services,
Adding:
To add a new service select
the new button from the bottom of the service listing this action will
open a blank service form with two tabulated options: Details and Parts
& Service Text. The details section of the service form allows the
operator to setup individual service options including loyalty plan controls
and roadside assistance issues. Options also include category and account
allocation, follow on service and price points either excluding or including
GST. This form also has an option to store estimated hours against a service
on the service form, the value is automatically displayed in the estimated
hours field on the booking form.
|
Service
Form Fields
Service: Type the full name of the service you wish
to add into this field ie: Brake Wheel Cylinder Replacement. The description
is displayed in the service listing.
Code: This is your search code ie: Brake Wheel
Cylinder Replacement could be abbreviated to WCBR, Minor Service to MS
etc. The code must be unique.
Fixed
Price: If the service is sold
on a fixed price basis tick the box.
Hidden:
When selected the record
will no longer be displayed in the service listing.
Category:
Allows for the allocation
of a category to each service record. Select the button to the right of
the field to view / select a category.
Account:
Default account is labour
(income account), do not change this account unless you wish to allocate
to a specific income account. Fixed price services automatically allocate
parts and labour sales to the correct income accounts.
Follow
On Service: This function
allows you to select the next you wish your client to be reminded of.
Select the button adjacent to the field your service listing is now displayed
select the next service and save with the OK function.
Months: Enter the duration ie: 3 means if a service
was performed on the 1st. January the selected service will
be due on the 1st. April.
Kilometers: The amount of estimated kilometers the
vehicle needs to travel before the next service is due.
Price:
Auto Easy allows for the
entry of three pricing levels, Standard, Wholesale and Trade.
Tax: Your default tax code is automatically
entered into this field; if you wish to change the code select the button
to the right of the field. A new tax code can now be selected from the
tax table.
Included:
The selection defaults to
true, to enter values excluding tax point at the tick and mouse click
prices displayed now exclude tax.
Notes: Free typing field to a maximum of 256
characters
Loyalty
and Roadside Assistance
Loyalty
Program: To assist operators retain
clients Auto Easy Ultimate has the ability to allocate points to a client
reward account based on dollars spent. It is suggested these points can
be redeemed for a free service, functionality allows for the entry of
a redemption value on the service record. A statement of points
to date is also printed on the invoice if the track loyalty point’s function
is selected in the site settings. The loyalty function can be an extremely
valuable marketing tool for any automotive repairer.
Loyalty
Program, Site Settings: Select
file / settings from the top of the screen go to the program options tab
flag track loyalty points to true, save with OK or F12. Next you need
to decide which services will initiate the loyalty program, how many points
will be allocated for each dollar spent on those services and which services
will have a redemption value and how much. Once these decisions have been
made you are ready to set your loyalty parameters for each service.
Loyalty
Program, Triggering: Go
to the section on the service form / details titled loyalty, there are
three fields, when a service with a trigger set to true is performed points
will be accrued for each subsequent service that is flagged to issue points.
No reward statement will be printed on the invoice if the loyalty program
has not been initialised.
|
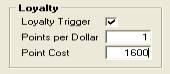
|
Field Name |
Function |
|
Loyalty Trigger |
Service will trigger the loyalty plan if set
to true |
|
Points Per Dollar |
Points allocated per $ spent on the service |
|
Point Cost |
The redemption value entered in points |
Loyalty
Program, Redeeming A Reward Service: Enter
the service onto the job card in the normal way, select the service from
the parts & labour section of the job card by pointing an double clicking
on the line item. Flag the field use loyalty points to true, the clients
reward account will be checked to ensure there are enough points available
to cover the service if the account does not cover the point value a message
will be displayed. If the account contains enough points to cover the
service the points will be deducted from the total and the retail price
of the service is displayed as zero.
Note: The service must be flagged
with a redemption value to be used as a reward service
Roadside
Assistance: It
is also possible to cover vehicles for roadside assistance (RSA) by flagging
the field trigger RSA on the service form. When a service is performed
with the choice set to true roadside assistance details will be printed
at the bottom of the invoice including contact phone number and RSA membership
number. Vehicles flagged for the issue of roadside assistance can be exported
using the Internet facility or setting up the necessary form letter in
Microsoft Word can produce membership cards in house.
Roadside
Assistance, Viewing Details: Roadside assistance details can be viewed
from the vehicle record or vehicle listing, note the RSA number is the
site id followed by the membership number.
Text
Attachments
Auto Easy allows you to attach two types of text
record to a service:
1)
Work Done: Placed in the body of the invoice
2)
Attachments: Printed as a three column checklist attached
to the invoice, option to print attachments when the job card or invoice
is finalised.
Work
Done, Viewing: You
can view the work done text database by selecting lists / work done from
the top of the screen. Alternatively the list can be opened from the services
form / parts/text by selecting the add button located below the work done
text area. Work done is also available from the booking form, job card
and invoice.
|
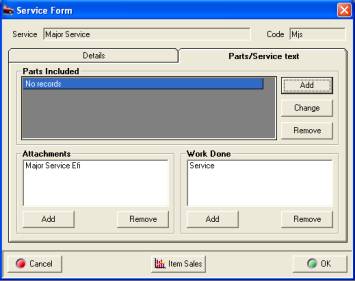
Fig
6.20 Service Form / Parts/Service Text |
Service
Form, Adding Work Done: Open
the parts/service text form select add, the work done listing is displayed.
To add a new record select new from the bottom of the listing enter a
code and type your description into the field provided. Save by selecting
OK (F12).

Fig 6.21 Adding Text To Wok Done |
Service
Form, Adding Attachments: The
procedure for adding attachments is very similar to adding work done.
Select add from the bottom of the attachments section, the attachment
listing is displayed from the list search for the required record highlight,
mouse click or press enter a tick is displayed at the end of the line,
multiple selections can be made from the list. Selecting OK (F12) will
insert the attachments. Attachments are printed as an extra sheet with
the invoice, it is suggested you use attachments as checklists and include
no more that 40 characters per line to accommodate the 3 x column format
of the report.
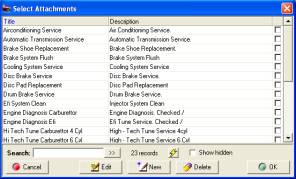
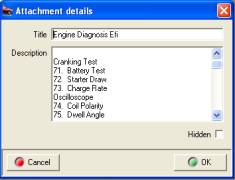
Fig 6.22 Selecting Attachments
6.23 Attachment Details
Attachments,
Adding:
To add a new record select
new from the bottom of the listing enter a code and type your description
into the field provided. Save by selecting OK (F12).
Attaching
Parts To A Service
Services,
Adding Parts:
Parts can also be attached to a service record; your entries will automatically
be inserted onto the job card or invoice when the service is selected.
To add parts select the service form/text/parts/service text form, point
and mouse click on the add button to the right of the parts included section
of the form. From the parts listing you can select single or multiple
parts (inventory or catalogue), selecting OK (F12) from the bottom of
the parts listing allows for entry of quantity by item.
|

Fig 6.24 Service Form – Parts Included |
Parts included lists
quantity, part number and part description of items attached to a service
|
Services,
Parts Included, Removing: Highlight
the item you wish to remove select the remove button to the right of the
list confirm the deletion by selecting OK (F12).
Services,
Parts Included, Changing:
Highlight the item you wish to edit and select the change button located
to the right of the parts list. You now have the option to change the
quantity, save by selecting OK (F12).
Services,
Item Sales: Selecting
item sales will display in both statistical and graphical format the sales
history for the past 12 months.
Parts
& Inventory, Overview: Auto Easy Ultimate has the ability to
sell parts as catalogue or inventory items. Catalogue items have no stock
control and as such no record flows through to quantity on hand., The
cost price for catalogue items can be edited from the parts listing, job
card or invoice. Cost and retail for non-inventory items (catalogue) are
posted to cost of goods sold, income and an other current assets account
titled non-inventory purchases.
It is suggested the operator take full advantage
of the powerful inventory management functions of Auto Easy Ultimate which
including category management, stock take reporting by category or location.
To ensure inventory management is a breeze we have included pricing and
inventory management utilities that allow for global price changes and
automatic conversion of catalogue items to inventory.
This chapter also explains how you can save time
by attaching a key board wedge scanner giving you the ability to scan
barcodes and enter items straight to the invoice or job card without touching
the keyboard.
Parts
Listing, Searching: The default search field is part number,
if you wish to search by this field type your query into the search field,
the cursor will move to the record. It is also possible to search by any
field in the listing, to change the search simply point at the header
record and select the text will change to blue indicating a change of
search field.
You
can search the list by keyword, for instance locating an item containing
the word wiper in the part field requires entry to the search field, selecting
the double arrows to the right of the search field will scroll trough
all part description containing the word wiper regardless of position.
Parts
Listing, Searching By Barcode: To
search by barcode select scan from the bottom of the screen, the scan
entry field is displayed, scan the part required and the cursor will locate
the item.
Parts
Listing, Filtering: Selecting the check boxes at the bottom
of the display window to view catalogue, inventory or buy-ins.
Category
Management:
Categories and sub categories can be setup by selecting lists / categories.
It is good practice to add a category to each inventory, catalogue or
service item as many functions and reports within Auto Easy are category
based. For instance adding a category to an item gives the operator an
opportunity to track sales and profitability for a defined group of parts
or perform a stock take by single or multiple categories.
Category
Management, Adding New Categories: From
the top of the screen select lists / categories, or view from the part
and services form. Select new from the bottom of the list, your category
form is now in view. To enter a new category or sub category type your
entry into the category field ie: Batteries, spark plugs, electrical etc.
It is also possible to create sub categories, for instance you may stock
two types of batteries Exide and Century if you wish to track sales and
run re-order reports by supplier setup two sub categories by attaching
the Exide and Century entries to the master category batteries. Select
parts, services or supplier as a grouping.
|
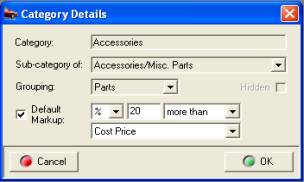
Fig
7.02 Category Details
|
Category
Management, Deleting Categories: The
system will not allow you to delete categories that have been assigned
to items by selecting the delete function at the bottom of the listing.
However if you wish to not list a category it can be hidden from view
by selecting the hidden option on the category form. Essentially this
option retains the category for data integrity purposes even though it
can no longer be accessed from the main screen. |
Default
Markup, Setting: Auto Easy allows you to set a default
markup for parts by category, the default markup can then be applied to
the part form automatically calculating a standard retail bases on cost
price or the recommended retail price. To activate this feature
perform the following:
1)
Open the category listing
by selecting lists from the top of the screen point and click on
the category option in the drop down menu.
2)
Point and double click
on the category you wish to
set the markup for, the category detail form is displayed.
3)
Point and click on the default
markup checkbox, you can now enter values into the corresponding fields.
4)
Select the arrow to the
right of the first field, select the $ or % sign, enter
the value into the next field, click on the arrow of the third field,
select more than or less than (less than should only be used if
setting by RRP) finally select the calculation criteria either Cost
or RRP, save with OK (F12).
|
Default
Markup, Applying To The Part Form: If a markup has been set for a category
attached to an item entered onto the part form an arrow is visible next
to the standard price field. To calculate the sell price using the default
markup enter your cost or RRP (into the appropriate field) next
point and click on the arrow, the sell price is automatically inserted. |
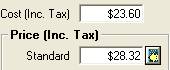
|
To reference your markup settings go to the category
list the value and calculation criteria is displayed in the right hand
column.

Catalogue
Parts, Creating:
To create a new catalogue item open the parts listing and select new from
the bottom of the display. This action opens the part form which has three
tabulated choices details and purchasing and sales. Details contain the
item setup data, purchasing information including supplier and invoice
number, this choice does not apply to catalogue items as there is no purchasing
history. Sales detail the sales history including client and invoice number.
|
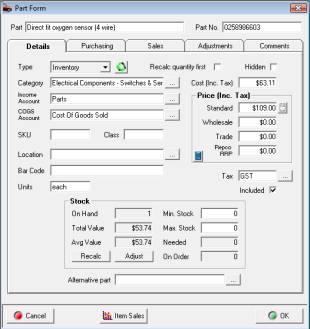
Fig 7.03 Part Form / Inventory |
Using the Calculator is an easy way to calculate
gross profit or mark up margins for retail, wholesale and trade prices.
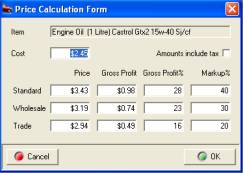
|
Part
Form, Calculate function:
Allows you to automatically calculate selling prices and or profit margins
including or excluding tax based on cost or percentage. Enter one value
into the price, gross profit, gross profit% or mark up field press tab
and all fields will be calculated. The form defaults to include tax, if
you wish to exclude de-select the amounts include tax box.
Part
Form, Fields: Consist of the following:
Part: Enter the part description
Part
No. Manufacturer’s part number
Type: Include: Each has unique use within
the system.
1)
Catalog: Assigned to items that have no stock control.
Note: Auto Easy Ultimate is based on double entry accounting principles;
as such it is not possible to record single sided entries. The chart of
accounts contains a default non-inventory purchases other current
asset which records the cost of all catalogue items, the operator will
have to transfer funds from this account to compensate for the cost of
these items.
2)
Inventory: Stock levels are recorded for inventory
items, values are posted to current assets as inventory on hand. It is
also possible to raise purchase orders for inventory items and receive
items through the purchasing function.
3)
Buy-In: Special category of inventory item relating
to parts that are purchased for individual jobs or invoices.
4)
Other: This option is used to classify expenses
and other transactions ie: Telephone, accounting, rent etc.
Category: Ability to assign an item to a category,
selecting the button to the right of the field displays a list, highlight
the entry required and select OK (F12) from the bottom of the category
list will insert the category to the part form.
Income
Account: Selecting the button
to the right allows for the posting of sales to another income account.
Default income account is parts unless you wish to track income separately
for this item it is not necessary to change the posting.
COGS
Account: The default for
all parts is Cost Of Goods Sold, however new COGS accounts can be attached
to individual parts by selecting the button to the right of the field,
creating a new account and attaching the selection to the form.
SKU:
Stock look up reference
Class:
Gives the operator the ability
to enter classes for specific items
Location:
Allows you to record the
location of a particular item, ie: Shelf 1, Bin 44 etc. Auto Easy Ultimate
allows for stock takes to be performed by item location.
Bar
Code: Auto Easy generates
a default bar code when the module is registered for use. Alternatively
manufacturer’s bar codes can be scanned directly into this field. Addition
of a hand scanner allows for items to be scanned directly onto the job
card or invoice.
Units: Defaults to each, however this is a free
typing field and is easily customised ie: Litre, pair etc.
Hidden: Select if you wish to no longer include
the item in the parts list.
Cost: What you paid for the item (based on unit
cost).
Price: Standard, wholesale, trade Auto Easy allows
you to record three price levels.
Tax: Displays default tax code, selecting the
right hand button allow for entry of a new tax code.
Included: Default is tax included this can be de-selected
to present data excluding tax.
Min.
Stock: Enter the minimum quantity
you wish to carry on hand
Max.
Stock: Enter the maximum quantity
you wish to stock
Alternative
Part: If you wish to use an
alternate when this item is out of stock select the button to the right
of the alternative part field and select the item from your parts list,
click OK (F12) from the bottom of the parts display and the part number
is entered into the field.

Fig 7.04 Selecting An Alternative Part
Quantity
First Calculation: This option
t when set to true will divide the retail price into the total for the
line item and record the quantity sold rather than changing the unit price
of the item. Example: Part Retail $1.45 item is entered onto an
invoice operator changes the total value to $14.50 the quantity sold =
10 which is displayed on the invoice / job form
|
If you apply an inventory item to a job or invoice
that has an alternate part attached and the selection is out of stock
although there is stock of the alternate part on hand a prompt will advise
you to apply the alternate part. Selecting no will paste the original
selection to the job card / invoice
|
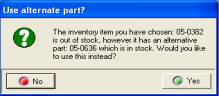
|
When creating a catalogue item ensure the type box
contains the catalog selection, when all fields are complete select OK
(F12) from the bottom of the part form to save.
Parts
Listing, Displaying Hidden Parts:
Point at the show hidden tick box located at the bottom of the list and
mouse click. Only hidden parts will be displayed. If you wish to display
a part that has been previously hidden, highlight the item and select
edit, point at the hidden selection and mouse click save you selection
by selecting OK(F12).
Parts
Comments Tab:
A text area where you can enter
notes relating to the supplier, when text is entered a note it icon is
displayed at the end of the line in the supplier listing clicking on the
icon will display text entered in the field
Inventory
Inventory
Items, Viewing Listing: Inventory
can be viewed from the parts listing or by selecting Activities / Inventory
from the top menu bar. The inventory screen provides filtering of records
Fig 7.08 Viewing Purchasing & Sales
History |
Inventory
History, Filtering: The
history display allows the operator to view transactions over a specified
date range or period. To view by period select the button to the right
of the field displaying month to date, point and click on the period required
from the drop down menu. The data may take a few seconds to load if there
are lots of transactions. Alternatively a specific date range can
be entered in the from / to date field at the top of the display. Dollar
values include tax. It is possible to drill down to the invoice or job
card from the sales list by pointing and clicking on the transaction.
To drill down to the suppliers bill, click on the purchasing tab – point
and double click on the line open, the bill is in view.
Note: Catalogue items are not included in the
sales totals; they are however displayed in brackets flagged with an asterisk.
|
Inventory
History, Item Sales: From
the part form you can view the sales performance of an item over the past
12 moths in both statistical and graphic formats. To run this report select
Item sales from the bottom of the part form
 Selecting this icon from the
bottom of the form displays the last 12 months sales data
Selecting this icon from the
bottom of the form displays the last 12 months sales data
.
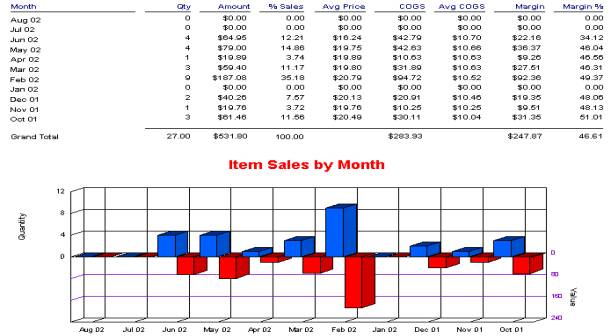
Fig 7.09 Item Sales For The Last 12 Month Period
The parts / inventory utility allows the operator
to delete unwanted parts from the listing and convert remaining parts
to inventory either globally or by category. There is also an option that
allows for the import of parts from either the working directory C:\Program
Auto Easy Ultimate, A: Drive or the internet.
Inventory
Utility, Parts Processing: To
access the parts / inventory utility select Activities / Parts & Inventory
Utility from the top of the screen. The utility is now in view, from this
screen the operator can perform the following:
1)
Delete unused parts
2)
Convert non-inventory parts
to inventory
3)
Select either function by
category
4)
Calculate Minimums and maximum
stock holdings
5)
Import a parts update file
|
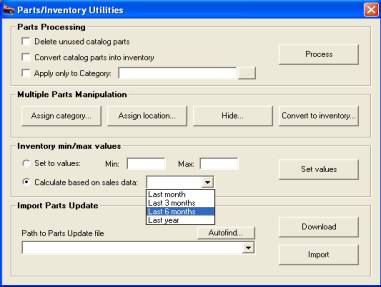
Fig 7.10 Parts / Inventory Utility |
Deleting
Unused Parts: Point
and flag the delete unused parts box, to delete all unused parts select
process. If you only wish to delete specific items these can be selected
by flagging apply to category box and choosing a category. It is only
possible to choose one category per process, select OK from the category
display and select process from the utility screen.
Note:
The data cannot be recovered;
items already used will remain in the parts listing
|
Inventory
Utility, Converting Parts To Inventory: Point
and flag the convert non-inventory into inventory, to make all parts inventory
select process. If you only wish to add specific items these can be selected
by flagging the apply to category box and choosing a category. It is only
possible to choose one category per process, select OK from the category
display, and select process from the utility screen.
Note: Inventory
and buy-ins cannot be deleted from the database, they can however be hidden
from view by selecting the hidden option on the part form.
Inventory
Utility, Apply Changes To A Category: Allows the operator to apply any of the
above processes to one category only.
Inventory
Utility, Multiple Parts Manipulation
Assign
Category To Parts: This
utility allows the operator to assign multiple parts to a category. Select
assign category to parts, the category listing is in view. Select the
category you wish to assign, confirm with OK, from the parts listing highlight
the items you wish to assign and press the enter key or select OK to flag
items in the parts listing. Once all items to be assigned are flagged
select OK to complete the task a message box will confirm the process
has been successful.
Remove
Parts From Parts Pick List:
To maintain data integrity Auto Easy Ultimate does not allow
for deletion from the parts listing of items allocated to jobs. However
this feature allows the operator to no longer display unwanted items in
the parts listing. To remove items select the option and flag items for
removal from the parts listing and confirm with OK.
Assign
Location: Use this option
to assign stock locations to individual parts. To assign locations to
items select the option and flag single or multiple items from the parts
listing and confirm with OK.
Convert
To Inventory: Select this
option to convert catalogue items to inventory, single or multiple items
from the parts listing and confirm with OK
Inventory
Min / Max Values
This feature allows you to set the minimum and maximum
quantities for inventory items in 2 ways
1)
Manually – Enter the minimum and maximum values
to be applied to all inventory items
2)
Calculate Based On Sales – Select the period from the drop down
menu you wish to use to calculate the min / max quantities. Auto Easy
will calculate the average monthly sales of each inventory item. The monthly
sales volume will be entered into the maximum field a corresponding value
of 50% of the maximum value will be placed into the minimum field.
To re-calculate the values select the set values
option from the Parts / Inventory Utility
Inventory
Utility, Importing Parts Update
Download:
This function allows for
updating of the parts file from the Genesis FTP server, the price file
directory is set in the control variables. This setting will vary between
organisations and individual users. To update the price file via Internet
select download, from the parts update screen select download now. You
will now be connected to the server via your Internet server; the required
file will be imported into your program updating your price file.
Import:
Parts listings can be imported
via the parts update function. Copy the Parts.Mdb file into the working
directory or a floppy disk, select auto find. The file name and location
is displayed in the path to parts update file field, select import to
append the parts file.
Pricing
Utility
The pricing utility allows you to change prices by
category or sub category for catalogue, inventory and services.
Options allow for the input of three price point changes standard, trade
and wholesale. Trade and wholesale can be based on either of the other
price points or cost price of the item.
Essentially using the pricing utility will save time
when updating price points and allows the operator to determine trade
and wholesale rates by using any of the three prices already recorded.
Price changes can be entered as either a percentage or dollar amount.
Price
Utility, Accessing: To
access the utility select Activities / Pricing utility from the top menu
bar. The display comprises of two sections:
1)
Prices to adjust
2)
Apply to
Price
Utility, Applying price points by dollar value: To
change prices by a dollar value select the button to the right hand side
of the % field from the pick list select the $ sign, this will now be
displayed in the box to the left. Repeat this for each price point you
wish to change. Enter the values into the second column, select the price
point by flagging adjust Standard, adjust Trade and adjust wholesale.
Price
Utility, Applying price points by percentage:
At the pricing utility display enter the percentage increase into the
first column, indicate which price points you wish to change. Select less
than / more than from the pick lists in the third column, next select
the value on which the price changes will apply in the fourth column.
Finally you need to indicate which class or class / category the price
changes are to be applied to. You can select a category / sub category
from the prick list at the bottom of the form. If you are changing prices
for a specific category flag parts, to apply a global change to all parts
select parts only and not category. The same formula applies to services.
To execute select the adjust button on the bottom left hand side of the
display.
Price
Utility, Applying Prices Based On Cost:
The utility also allows you to calculate retail, wholesale and trade-selling
prices based on cost. To adjust prices for a category or class select
cost price from the drop down menu. Enter the markup percentage (excluding
tax) or dollar value into each price field, select the category and /
or class and click on the adjust button.
|
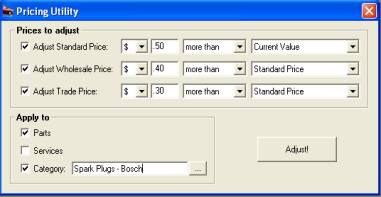
|
Example 1.0
Price
Point Changes: Standard, Trade,
Wholesale
Amount: .50 Standard, .40 Trade, .30 Wholesale
Increase
/ Decrease: Increase
Changes
based on: Standard – Current
value / Trade and wholesale on standard price
Applied
to: Parts, spark plugs / Bosch
spark plugs
|
|
|
|
|

|
Price
Point Changes: Standard, Trade,
Wholesale
Amount: $5.00 Standard, $4.00 Trade, $3.00 Wholesale
Increase
/ Decrease: Decrease
Changes
based on: Standard, Trade
and wholesale
Applied
to: All services
|
|
|
|
|
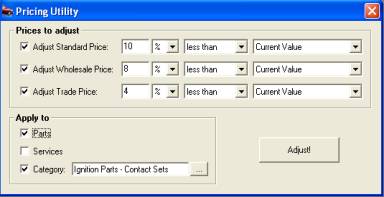
|
Example 3.0
Price
Point Changes: Standard, Trade,
Wholesale
Amount: 10% Standard, 8% Trade, 4% Wholesale
Increase
/ Decrease: Decrease
Changes
based on: Standard – Current
value, Trade and wholesale – Standard Price
Applied
to: Parts – Category Ignition
parts / Contact sets
|
|
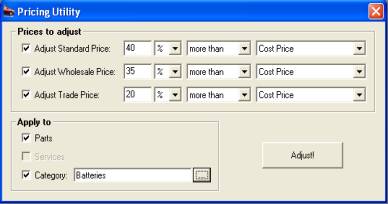
|
Example
4.0
Price
Point Changes: Standard, Trade,
Wholesale
Amount: 40% Standard, 35% Wholesale, 20% Trade
Increase
/ Decrease: Increase
Changes
based on: Cost price of items
assigned to the batteries category.
Applied
to: Batteries
|
Price
Points, Viewing: Price
points can be viewed from the part or service form, it is also possible
to edit individual parts or services from these displays.
Rebuilt
Parts
Overview:
Auto Easy allows the user
to rebuild an item from current inventory or as a buy-in, the rebuilt
item is then held in stock for sale in the same way as inventory. Labour
can be added to the rebuilt item, the cost of the item is the total value
of labour (at retail rate) plus the cost of the items. Gross profit on
these items is calculated by subtracting the cost (parts & labour)
from the sell price. Rebuilt items will be displayed in the inventory
valuation report in the same way as normal inventory. Parts and labour
used to create a rebuilt item can be copied to a new form if required.
Rebuilt
Parts, Creating: To create a rebuilt part select the parts
listing, from the bottom of the display select new (Insert) from the type
field drop down menu select rebuild
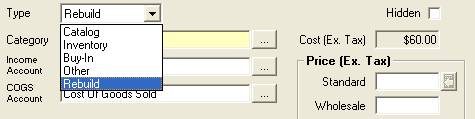
Fig
7.11 Selecting Rebuild From The Type Menu
The format of the part form will now change to allow
for the addition of labour and inventory items
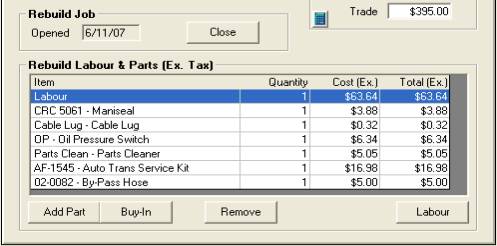
Fig 7.12 Rebuild Labour & Parts
To add labour point and click in the quantity field
and change the value, you can also edit the hourly charge by clicking
in the cost field and overtyping the standard rate displayed. It is also
possible to allocate the charged labour to a single or multiple technicians
by selecting the labour option located under the rebuild labour &
parts section of the part form.
Select the add option to add inventory items to the
rebuild. Note: Only inventory items can be added to a rebuild,
if you are buying parts in specifically for a rebuild item purchase them
as inventory then add them to the rebuild.
Rebuilds can be held open the same as charge and
vehicle invoices, access to open rebuilds is available from both the diary
(in week view) and the sales screen. You can also open a rebuild job from
the parts listing by pointing and clicking on the line item.

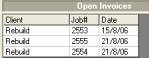
Sales
Screen
Diary Display
The quantity of parts added to rebuilds are recorded
in the allocation column of the parts listing, when a rebuild item is
completed it must be closed using the close option located above the labour
and parts grid of the part form. When a rebuild job is closed the inventory
items are subtracted from the stock on hand.
The cost of a rebuilt
item is determined by the cost of the inventory items and labour value
added to the part. The rebuild item can be priced in the same way as inventory
items, the gross profit on an item is calculated by subtracting the cost
from the retail / wholesale or trade sell excluding GST. To close a rebuild
select the close option from the rebuild form.
Rebuilds,
Re-Opening and deleting: Rebuilt parts that require editing can
be re-opened the same as job cards, to reopen a rebuilt job item go to
the part form click on re-open, confirm your action by selecting yes from
the warning message. Edit the form as required then re-close by selecting
the close option.

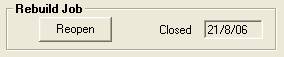
Open
Rebuild Job
Closed Rebuild
Job
To delete a rebuild the job must be reopened, highlight
the item from the parts listing; select the delete option at the bottom
of the list.
To view rebuilds in the parts listing point and click
on the rebuild option at the bottom of the list

Rebuilds,
Copying Parts & Labour: To
copy a rebuild “kit” from a previous job perform the following:
1)
Open a new rebuild item
2)
Select the copy option from
the bottom menu bar
3)
From the list of rebuilds
highlight the item you wish to copy from
4)
Select the OK (F12) button
from the bottom of the parts listing
5)
The parts and labour from
the highlighted item have been copied to the new rebuild

Use the copy option to copy parts and labour between
rebuilds
Reports,
Inventory Accessing:
Select Reports / Inventory from the top menu bar, available reports include:
Inventory Valuation Summary
Inventory Stock Status
Reorder Report
Price List
Reports,
Inventory Valuation Summary: This
report displays stock on hand by category, if you wish to show all categories
select all, to select a single or multiple categories choose selective.
Selective allows you to tick the categories required; all will print all
categories. The information contained in this report gives you a detailed
view of stock on hand with sub totals for each category choice and a grand
total of all columns.
Reports,
Inventory Stock Status: Allows
you to view quantities of stock on hand plus minimum stocks, quantities
required for jobs and items on order. The last supplier is also displayed
in the preferred supplier column.
Reorder
Report:
Provides
a list of items by supplier that are below minimum, suggesting quantities
that bring levels back up to maximum.
Price
List: Prints
a price list of parts by category including Tax if applicable.
|
|
Barcode
Labels, Printing Received Inventory: Auto
Easy allows the operator to print labels relating to goods received by
date range. To print labels the system must first be registered for barcode
scanning. Receive items as normal, when processing of goods inwards is
complete open the reports module and select the Barcode print out option,
select received inventory, select date range and OK to display the received
inventory display. The Items will be flagged for printing indicated by
a tick in the right hand selection box. It is also possible to re-select
items for printing by selecting the box to the right of the printed column.
Selecting OK will activate the printer.
It is also possible to select the row you wish printing
to commence from the barcode printout options form. The codes can be used
to enter parts directly onto the job card; numbers from 1 – 9 are printed
on the bottom of each page allowing the operator to also scan the quantity
provided.
|
Remote
Parts Inquiry
Overview: Auto Easy allows you to check the stock
of a single item on hand at other nominated sites (Remote Group) directly
from the local parts listing. For this feature to work both local and
remote machines must be connected to the internet (Broadband Preferred).
All sites in the group must have performed a replication to the Genesis
server, and finally the option must be selected in settings / Configuration.
Set-Up
|
1.
1. Ensure your site is set-up
with a unique identifier – Genesis personnel will perform this for you
on installation, you can check your site id. In File / Settings.
|

|
|
2.
2. Go to File / Settings
/ Online and select the online tab, tick the enable replication for this
database option, next select the enable replication for this machine –
manual – daily – 7,00am.
Note: The replication process can be disabled once
you have replicated, you will need to leave this set to true if you are
transferring data for your organization or for CRM purposes |
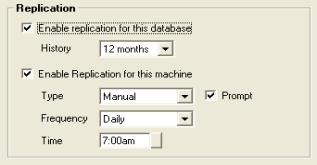
|
|
3.
4.
3. To set-up the sites
you wish to communicate with select add from the remote group section
of the form. Enter the unique site id, finally ensure that one of the
machines (if you are on a network) has the listen for requests option
selected. The machine MUST have access to the internet. If you
wish to remove a location highlight the site id. And click on remove. |
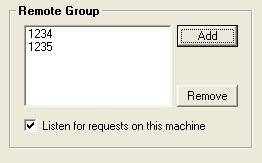
|
|
5.
6.
4. Save the new settings
with OK (F12) |

|
Performing A Parts Inquiry
Parts inquires are performed from the parts listing,
select the item you wish to run an inquiry for and mouse click on the
inquiry button located at the bottom of the parts listing.

Fig 7.18 Selecting The Inquiry Function
Your site will now communicate via your internet
connection with the other sites in your group and display the stock available.
If a site in the group is not connected to the internet the status field
will display an off line message.
|

Fig 7.19 Part Inquiry Form |
The results of your query will be returned within
5 – 10 seconds (depending on the speed of your internet connection) If
you are querying multiple locations the quantities on hand will be listed
for each site. To cancel the task select done from the bottom of the part
inquiry form. |
Purchasing,
Overview: Auto Easy gives
you the ability to manage your purchasing functions efficiently from raising
a purchase order to delivery and finally supplier payment. The purchasing
system is designed to allow for the receiving of parts into inventory
or directly to a specific job card. From the purchasing module you can
also allocated expenses to your chart of accounts. Auto Easy provides
you with a flexible system that allows for the conversion of an invoice
to a credit note or even back into a purchase order with one mouse click.
Parts can be distributed to multiple jobs from a
single invoice; you can even raise purchase orders directly from an open
job card. When you need to process payment you have the flexibility of
deducting funds from your trading account, credit card or even funds that
you have not yet deposited. Supplier invoices can be processed by due
date or invoice date, the choice is yours.
Auto Easy has made what can be a confusing process
easy to understand by providing you with a logical easy to follow practices
to manage the important task of purchasing and creditor control.
Supplier
Records
Suppliers,
Overview: Before
you can purchase items or allocate expenses you need to enter a supplier,
suppliers can be parts suppliers such as or service provider which
would include your accountant or electricity company etc. Auto Easy allows
you to create sub supplier accounts; this feature is extremely helpful
if you are dealing with multiple suppliers through one buying group which
you pay with one transaction.
 To access
the supplier listings select this icon from the top menu bar
To access
the supplier listings select this icon from the top menu bar
Suppliers,
Accessing: To
open the supplier listing click on the supplier icon at the top of the
screen. The supplier listing will automatically display when performing
buying functions either from the purchasing screen or job card. To select
a supplier when the list enter the supplier code into the search field,
or alternatively change the search field by clicking on either the supplier,
address, phone or fax field. The header text displays in blue indicating
a new search field has been selected.
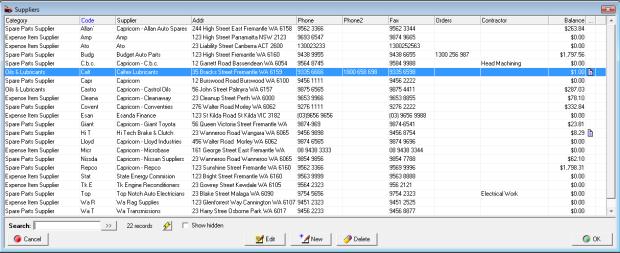
Fig
8.01 Supplier Listing
Suppliers,
Viewing Details: You
can view the supplier form by highlighting the record you wish to access
point and double click or alternatively select edit from the supplier
menu bar. If you wish to display hidden records point and click in the
show hidden field, only previously hidden records are displayed in this
mode.
Suppliers,
Creating A New Record: From
the supplier menu bar select new, a blank supplier form is displayed complete
the following fields:

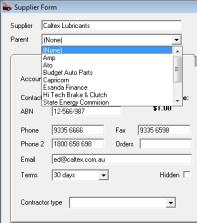
Fig 8.02 Supplier Form
Fig
8.03 Selecting A “Parent” Account
Supplier: Type the full name of the supplier
Code: Is automatically entered, based on the
first 4 alphas or numerics of the supplier name – This can however be
overwritten to a code of your choice
Parent:
Allows you to select a master
account
Suppliers,
Creating A Sub-Account:
the parent field needs to be selected, highlight the “parent” account
from the drop down menu and click. The entry is now inserted into the
“parent” field indicating the current record is a sub-account.
Category:
Allows you to assign a supplier
specific category: ie: Parts Supplier, Holden Parts etc.
Account:
Enter the supplier account
number into this field
Contact: The salesperson who you normally contact
ABN: Enter the supplier ABN
Phone,
Fax, Phone 2 & Orders:
Enter contact numbers
Website:
Suppliers web site address
Email: Supplier’s email address
Terms: Use the drop down menu to select the payment
terms
Hidden: Select if you wish to hide an existing
record from the supplier display
Address: Two line address field
Suburb: Enter the suburb and press enter – The
state and postcode are automatically inserted
To save your entries select OK (F12).
History:
Select this option if you
wish to view the purchase history for a specific supplier.
Contractor
Types: Auto Easy provides you with the ability
to enter and search by a contractor type, this is an extra field displayed
in the supplier listing.
Bank
Details Comments Tab: Allows
you to record the bank details of a supplier for ABA file exports,
included is a text area where you can enter notes relating to the supplier,
when text is entered a note it icon is displayed at the end of the line
in the supplier listing clicking on the icon will display text entered
in the field.
Contractor
Type, Searching: To search
by contractor type point and click on the title of the field which will
now display in blue. Enter the contractor type into the search field.
If you wish to search for more than one contractor of a particular type
point and click on the double arrow button to the right of the search
field each record matching your entry will be selected from the supplier
listing.
|

Fig 8.04 Contractor Field |
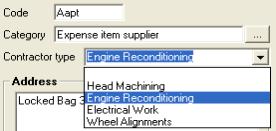
Fig 8.05 Entering A Contractor Type |
Contractor
Type, Entering: The contractor
type can is selected from the drop down list accessed from the contractor
type field displayed on the supplier form (authorised sites only).
Select the down arrow button to the right of the field, type the first
letter or scroll down to the type required point and double click and
the entry is retained. Select OK (F12) from the bottom of the supplier
form to save.
Supplier
Billing Address: A
billing address can be entered by selecting the billing address tab from
the supplier form. The default is the set the same as the physical address.
If you wish to enter an alternate, point and deselect the option from
the billing address tab and complete the details in the field provided.
Purchasing
Module
 Selecting this icon from the
top menu bar will open the purchasing module
Selecting this icon from the
top menu bar will open the purchasing module
Purchasing,
Functions: The
purchasing module allows you to view a list of Bills, Credits or purchase
orders. The module is set to open displaying a bills list, to change the
display select from the transaction type options:
The screen also displays totals of each list giving
you a transaction total, amount paid and an outstanding balance.
 Totals allow you view a summary
of all transactions.
Totals allow you view a summary
of all transactions.
Transactions are able to be filtered by supplier
including sub accounts and date range (bill date or due date); you can
also search for a specific invoice number.
Note:
When choosing to filter by supplier or invoice number you must select
the tick box above each selection.
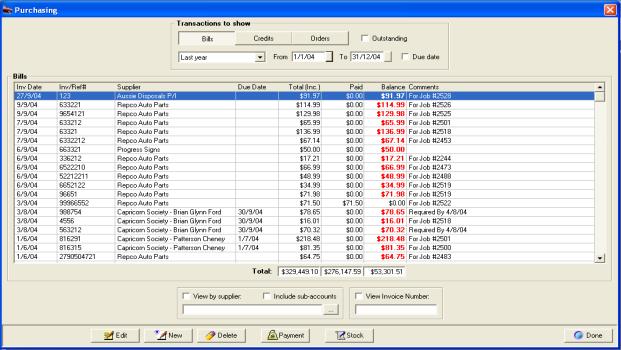
Fig 8.06 Purchasing Display
Purchasing,
Selecting Transaction Types: Three
types of transactions can be created, viewed or edited from the purchasing
screen. To select click on the option required at the top of form under
transactions to display
 Point and click on the option
required.
Point and click on the option
required.
Purchasing,
Filtering By Date Range: Use
the drop down menu top select an alternative period or alternatively free
type into the from / to date fields or select the buttons to the right
of each date field to select from a calendar. Transactions can also be
filtered by due date, this feature can be extremely helpful when determining
expenditure for a specified period.
Purchasing,
Filtering By Supplier: Select
the button to the right hand side of the supplier field, your supplier
listing is displayed. Highlight the supplier you wish to select confirm
with OK (F12) only transactions relating to the chosen supplier will be
displayed. If you wish to display transaction for sub accounts select
the tick box located above the supplier search field.
Purchasing,
Filtering By Invoice Number: Enter
the transaction number into the invoice field, tick the box placed above
the field and only the required transaction will be in view.
Purchasing,
Viewing Transaction Details:
Point at the transaction you wish to view and double click or alternatively
highlight the transaction and select edit from the bottom of the display.
Purchasing,
Creating New Transactions: Select New from the bottom menu bar, depending
on which transaction type is selected a blank bill, credit or purchase
order will be in view.
Purchasing,
Deleting:
It is possible to delete transactions from purchasing, however items that
have been allocated to closed job cards have to be deleted from the job
card by re-opening.
Purchase
Orders
Purchase
Orders, Overview:
You use a purchase order to communicate with a supplier when you want
to order their goods or services.
When you use purchase orders to buy inventory items,
Auto Easy keeps track of the items you've ordered. At any time, you can
see what is on order. When you receive items, check them against the purchase
order. Auto Easy allows you to convert the purchase order into a bill,
if the ordered quantity was not delivered Auto Easy will hold the remainder
on back order, automatically updating the purchase order. Purchase orders
are created from either the purchasing screen or job card. On receipt
of goods the purchase order can be converted to an invoice. An additional
feature of Auto Easy is the ability to distribute parts out to multiple
jobs when items ordered from job cards are received though the purchasing
module.
Purchase
Orders, Accessing: To view outstanding purchase orders select
the purchasing icon from the top of the screen select the orders button
from the top of the screen to display any outstanding orders. The date
default is month to date, if you wish to display purchase orders created
during another period select from the drop down menu or enter the from
/ to dates into the fields provided.

Fig 8.07 Selecting Orders From The Purchasing Screen
To view the details of a purchase order, highlight
the record and double click alternatively select edit from the bottom
menu bar. This action will open the purchase order displaying the components
of the order. If the purchase order contains items ordered for a job you
can select the job card button displayed in the lower menu bar to view
the job.

Fig 8.08 Purchase Order Display
The purchase order displays supplier, date, order
number and items on order including a financial summary based on the previous
cost.
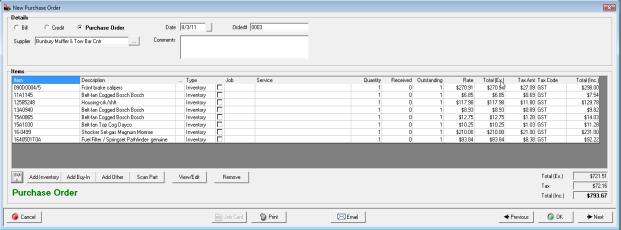
Fig 8.09 Viewing A Purchase Order
Purchase
Orders, Creating: Select
purchase orders from the transactions to view then select new, alternatively
purchase orders can be created by selecting Activities / Create Purchase
Order. Perform the following:
Inventory Items
1)
Select the supplier
you are issuing the purchase order to
2)
Overtype the purchase order
number if you wish to customise
3)
Select add inventory
from the bottom of the purchase order form
4)
Select the inventory
items you wish to order –
if you select a catalogue item you will be requested to convert to inventory
– confirm with yes, complete selection with OK (F12)
5)
Point to the quantity
field and edit accordingly for each item
6)
Save with OK (F12)
Expenses
1)
Select the supplier
you are issuing the purchase order to
2)
Overtype the purchase order
number if you wish to customise
3)
Select add Expense
from the bottom of the purchase order form
4)
From the select expenses
list tick the item / items required or create a new expense, complete
selection with OK (F12)
5)
Point to the quantity
field and edit accordingly for each item
6)
Save with OK (F12)
|
Purchase
Orders, Creating Notes: Auto Easy allows you to add notes to a
line item that forms part of a bill, credit note or purchase order. To
add a note point and click in the field identified with …located between
the description and type fields. A text field is displayed type your comments
and save using OK (F12). The text will be printed under the line item
on your purchase order, if you wish to view text comments click on the
note it icon displayed. |
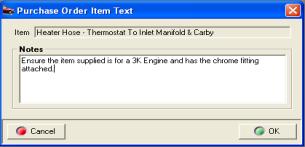
|
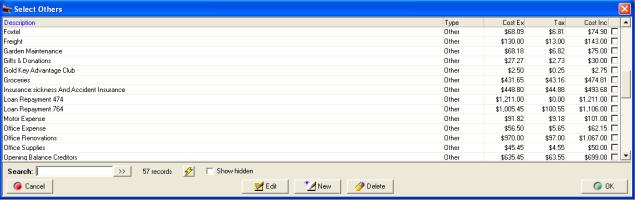
Fig 8.10 Select Expenses List
Purchase
Orders, Creating From The Job Card: Purchase
orders can be raised directly from an open job card. Items are listed
as an order in the type field, to close a job you must first receive any
items that you have on order.
1)
Select an open job card
2)
Highlight the service
ordered parts are going to be allocated to
3)
Select buy in from
the selection row under the parts and labour window
4)
Select the supplier
from the list
5)
Point the purchase order
selection at the top of the form and click
 On selection the Form will display
Purchase Order in the lower left hand corner.
On selection the Form will display
Purchase Order in the lower left hand corner.
6)
Overtype the order number
if required (enter will automatically open the buy-in listing)
7)
Select Buy-In from
the bottom of the purchase order form
8)
From the select a buy-in
listing click on the item you wish to order (or create a new item
by selecting new from the bottom menu bar). Confirm selection with OK
(F12)
9)
Edit the quantity
field from the purchase order form
10)
Save by selecting OK (F12)
11)
The item is now listed on
the job card displaying order in the type field
Purchase
Orders, Editing: Select
purchasing / purchase orders, highlight the purchase order you wish to
edit, double click or select edit from the bottom menu bar of the purchasing
screen. An open purchase order allows you to add or remove items and adjust
quantities. It is also possible to change the cost price by double clicking
on a line item in the purchase order and editing the cost field. To save
changes select OK (F12).
|
Purchase
Orders, Printing: Select the
print option from the bottom of the purchase order, you will be prompted
to include or exclude the previous costs. To include select yes, selecting
no will exclude the costs. |
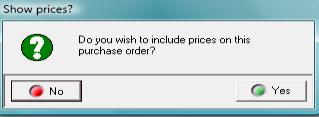
|
Purchase
Orders, Emailing: You can
email purchase orders to the supplier by selecting the email option at
the bottom of the order form. A confirmation message is displayed when
the email is successfully dispatched.
Purchase
Orders, Deleting: Items
on order can be removed either from the purchase order listing or an open
job card
Purchase
Orders, Receiving Parts: Parts
are received by selecting the Purchasing icon from the top menu bar, point
and click on Purchase Orders and perform the following:
1)
Point and click on the purchase
order you wish to process
2)
Edit the PO to list items as displayed on the supplier
invoice
3)
Point to the Bill selection
at the top of form and click - a selection message is displayed

Purchase Order Conversion Selection
4)
Select either convert
or copy
5)
Enter the invoice number
(This will vary from the PO number)
6)
The form is now converted
to a bill
7)
Select OK (F12) to save
Convert
To Bill: Converts all items
on the order to a bill deleting the purchase order.
Copy
To A New Bill: Creates a bill
without deleting the purchase order.
Cancel: Cancels the conversion
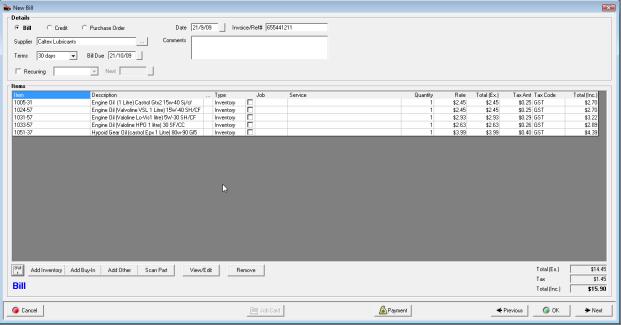
Fig
8.11 Bill Form
If you wish to allocate a purchase to a job, point
the checkbox in the line item, select the open job and service you wish
to assign the part to. The same procedure applies to buy-ins.
Sort: on selection will sort the parts by part
number
Previous
& Next: Will scroll you
through previous invoices or allow you to create a new invoice for the
same supplier
Stock,
Re-ordering Items Below Minimum Quantity: Auto Easy allows you to create a stock
order for items that are below minimum quantity. The order can be filtered
by category and supplier, if a supplier is selected only items below minimum
that were previously purchased from the supplier will populate the new
stock order, selecting categories allows you to be select the type of
parts you wish to order from the chosen supplier.
 To initiate the stock order
select the stock button from the bottom of the purchasing screen
To initiate the stock order
select the stock button from the bottom of the purchasing screen
|
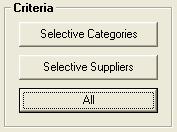
|
Select from the criteria options whether you wish
to raise the order by supplier, categories or all. Selecting categories
will display a list, to include a category in the order point and click
in the check box at the end of the line on completing your selection select
OK (F12). The supplier option allows you to select multiple suppliers
and raise an order to a new single supplier. The all selection will display
all items that are below minimum levels including a suggested order quantity.
If you have recently setup your inventory it is suggested you use the
all option as you may not have any purchase history by supplier |
|
|
Use the check boxes at the end of the line to exclude
an item from the order. Pointing and clicking will clear the check box.
Note you can’t change quantities to order from this screen these adjustments
need to be performed from the order form. |
|
|
|
|
Selecting OK (F12) from the bottom of the stock
listing will open a new order form with the option to select a supplier,
highlight the supplier you wish to purchase from, select OK (F12) from
the bottom of the supplier listing. Make the necessary adjustment to quantities
from the order form and save by selecting OK (F12). The purchase order
can be converted to bill in the normal way once the stock arrives.
Receiving
Inventory
Receiving
Inventory, Overview: Auto
Easy allows you to receive inventory and enter the supplier bill in one
integrated operation automatically updating your accounts payable account
(creditors). Catalogue items can easily be converted to inventory during
processing. Quantity and value on hand is updated as invoices are entered,
it is also easy to edit a received invoice if adjustments are required
after posting.
Receiving
Inventory, Processing: To
receive inventory open the purchasing module by either selecting Activities
/ Enter Bill – Receive Items or select purchasing and new from the bottom
menu bar of the display and perform the following:
1)
Select a supplier
from the listing
2)
Enter the invoice number
(or reference)
3)
Select Add Inventory
from the bottom of the bill form
4)
Select items received from the parts listing (convert catalogue
items to inventory) – OK (F12)
5)
Edit quantity and values
(note: All financial fields can be edited)
6)
Check tax codes (click
in the tax field and select from the drop down menu to change)
7)
Ensure the bill total
equals the supplier invoice total
8)
Process by selecting OK (F12)
Receiving
Inventory, Converting Catalogue Items To Inventory:
Occasionally you may list an item as a catalogue part (non-inventory)
and decide to carry stock Auto Easy allows you to convert a catalogue
part to an inventory item as you enter the items received, Simply tick
a catalogue part and you will be prompted to convert to inventory to complete
the process select Yes from the message box.
Receiving
Inventory, Editing A Bill:
Auto Easy allows you to edit a bill from the purchasing module. Select
a bill from the purchasing screen, edit the quantity or financial fields
as required and save with OK (F12). If payment has been allocated to the
bill you will need to edit accordingly from the bill payment screen, unallocated
payments are indicated by a red cross against the transaction.
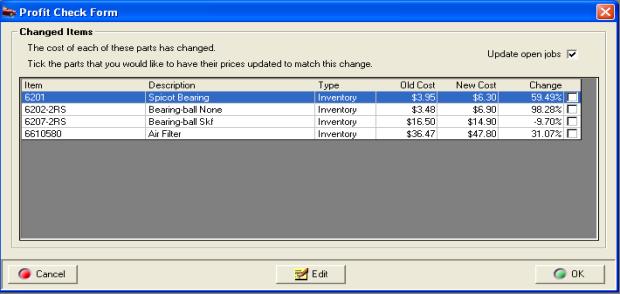
Fig 8.12 Profit Check Form
Receiving
Inventory, Profit Check: When
entering inventory Auto Easy checks current against previous cost
and prompts to increase selling prices according the previous profit margins
set for retail, trade and wholesale. If you wish to adjust the selling
price according to the percentage increase or decrease point and click
in the appropriate check box at the end of each line item. Alternatively
highlight a record select edit or double click to open the part form,
make the necessary changes and save with OK. Do not tick the check box
if you change prices manually.
Receiving
Inventory, Deleting A Bill:
You can select a bill from the purchasing screen click on the delete button
located at the bottom of the display. Confirm your action by selecting
the yes option from the warning message. Note: If payments have been received
you will need to adjust these accordingly from the bill payment screen.
You are not allowed to delete a bill with a reconciled payment allocated;
adjustments in this case will have to be performed via a journal entry.
Receiving
Job Parts
Receiving
Job Parts, Overview: Auto
Easy has a unique buy-in feature available from the job card allowing
for entry of items purchased for a particular job to be entered directly
onto the job form. The buy-in features also allows for easy reference
of purchase details from either an open or closed job. You have the option
to select previous parts allocated to other jobs, saving time when allocating
specific items.
Receiving
Job Parts, Processing: Go
to an open job card and perform the following:
1)
Highlight the service
you are going to allocate the buy-in part to
2)
Select buy-in from
the row of options located below the parts & labour window
3)
Highlight a supplier
from the list – select OK (F12)
4)
Enter the supplier invoice
number – Press enter
5)
Select an item from
the buy-in list or add a new item by selecting new
6)
Confirm selection with OK (F12)
7)
Edit the line item if required
8)
Select Ok (F12) to save
Receiving
Job Parts, Creating A New Item:
To add a new buy-in to the list select new from the bottom of the buy-in
list and complete the following fields displayed on the Part Form / Buy-in:
|

Fig 8.13 Part Form / Buy-in |
Selecting new from the menu bar of the select buy-in
listing opens the part form in buy-in mode. Complete the fields and save
OK (F12) the new item is automatically entered into the list and flagged
for insertion to the job card.
|
Part: Description of the item
Part
No: Manufacturers reference
Type: Auto select – Buy-in
Category: Use the button to the right and select
from the category list
Income
Account: Default account
COGS
Account: Default Account
SKU: Stock Reference
Class: Stock Grouping
Sub-Contract: Select if item is sub-contracted, the job
summary report will display a total value for sub-contracted work sold.
Cost: Inc or Ex
Price: Enter or select the calculator option
RRP: recommended price
Tax: Default tax codes to change make a selection
from the list
Included: Cost & Price includes or excludes tax
Buy-ins,
Viewing History: To view
the purchasing history of an item allocated to a job go an open or closed
job card. Point and double mouse click on the item you wish to view, from
the part / buy-in form select the purchasing or sales tab.

Fig 8.14 Viewing Purchase History From The Part
Form
Purchasing history for an individual item can be
accessed from the part form be selecting the purchasing tab
Buy-Ins,
Removing From The Job Card: To
delete a buy-in from a job card highlight the entry and select the remove
button – confirm your choice in the message box by selecting yes.
Parts,
Allocating To A Job From A Bill: Auto Easy allows you to allocate parts
from directly from the bill to a selected open job. Items that can be
allocated include buy-ins and inventory. To allocate a part to a job,
bring the part onto the bill in the normal way by selecting the inventory
or buy-in option (if you wish to attach to a job) Inventory items selected
will be added to the job however there will be no link between the bill
and the item added to the job card from purchasing.
Point and click in the job column adjacent to the
part you wish to add, a drop down menu allows you to select the job you
wish to allocate the part to, point and click on the appropriate job number,
the record is added to the line item. Next move across to the service
field again clicking in the cell will allow you to allocate the part to
a service that is listed on the job card.
Note: When allocating a part to a job through purchasing
you must select a service allocation to finalise the transaction.

You must
select a service allocation to complete the transaction from the bill
Supplier
Credits
Supplier
Credits, Overview: Supplier
credit notes can be created from either the purchasing module or job card.
Supplier credits are listed as debit entries in the payment form, allowing
you to reconcile your supplier statement and process payment accurately.
Supplier
Credits, Inventory Credits: Open
the credit form by selecting Activities / Supplier Credit or from Purchasing
/ Credits / New and perform the following:
1)
Select the supplier
2)
Enter the credit note
number – if this is pending enter TBA
3)
Select Add Inventory
from the bottom of the form
4)
Select the item or items
you wish to add to the credit – confirm selections with OK (F12)
5)
Adjust the quantity and
financials to equal the supplier credit note
6)
Save OK (F12)
Alternatively a bill can be selected and converted
or copied to a credit note
1)
Select the bill you
wish to convert from the bill listing, open by double clicking
2)
Select credit from
the radio buttons at the top of screen
3)
From the options selection
choose convert or copy
|
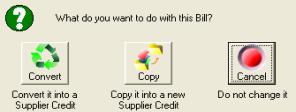
Fig 8.15 Converting A Bill To A Credit |
Convert
To Credit: Converts all items
on the bill to a credit deleting the original bill.
Copy
To A New Credit: Creates
a credit without deleting the original bill.
Cancel: Cancels the conversion
|
4)
Edit line items on the credit if required
5)
Save OK (F12)
Note:
If you do not want to create
a credit for all items on the bill copy to a credit note and delete the
items that are not being returned for credit. You can also adjust the
quantity by pointing and clicking in the quantity field of the line item.
Buy-ins,
Creating Credits: Credits
can be raised from the job card; options include raising a credit, deleting
the item from your records or placing the buy-in into inventory. Perform
the following:
1)
Open a job card (you
are unable to delete buy-ins from closed job cards)
2)
Highlight the buy-in
you wish to remove
3)
Select remove from
selections under the parts and labour window
4)
Select remove from original
bill, place into inventory or raise a credit
|
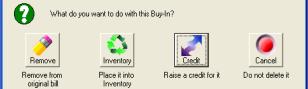
Fig 8.16 Options For Removing A Buy-In From
The Job Card |
Remove:
Completely erases the item
from the original bill
Place
Into Inventory: Converts a
buy-in to an inventory item
Raise
A Credit: Creates a credit
Note
Cancel: Cancels the options
|
Supplier
Credits, Viewing: Supplier
credits can be viewed from the Purchasing / Credits screen. The date range
for the list automatically defaults to month to date, it is possible to
select another period from the drop menu or enter the from / to dates
in the appropriate fields. You also have the option to sort by supplier
and invoice number. View the details of a credit note by highlighting
from the list and selecting edit or pointing at the transaction and double
clicking.
Supplier
Credits, Editing: Select
the required entry from the Purchasing / Credits list. To edit the details
of a credit note highlight from the list and select edit or point at the
transaction and double click. Make the required changes and save with
OK (F12).
Supplier
Credits, Deleting:
Highlight the required entry from the Purchasing / Credits list and select
delete from the bottom of the display accept the delete action. Note:
It is not possible to delete a credit not that is contained within payment
reconciliation; adjustments will have to be made via a journal entry.
Credits,
Creating Notes: Auto Easy allows you to add notes to a
line item that forms part of a bill, credit note or purchase order. To
add a note point and click in the field identified with …located between
the description and type fields. A text field is displayed type your comments
and save using OK (F12). The text will be printed under the line item
on your credit note, if you wish to view text comments click on the note
it icon displayed.
Credits,
Emailing: You can email credits
to the supplier by selecting the email option at the bottom of the credit
form. A confirmation message is displayed when the email is successfully
dispatched.
Expenses
& Other Purchases
Expense
& Other Purchases, Overview: Expenses
include the costs you incur to operate your business, these can include
items such as phone and electricity, accountant’s fees, travel and vehicle
expenses. Fixed assets are capital items that are usually depreciated
over a period of time. In Auto Easy expenses, fixed assets and other purchases
(excluding stock or job parts) are entered through the purchasing module
and allocated to the required expense or fixed asset account.
Expense
& Other Purchases, Entering: To
enter a new item open the purchasing module by either selecting Activities
/ Enter Bill – Receive Items or select purchasing and new from the bottom
menu bar of the display and perform the following:
1)
Select the supplier
2)
Enter the invoice or
reference number
3)
Select Add other
from the bottom left hand side of the display
4)
From the select expenses
list. Flag the item or items required, alternatively add a new
item
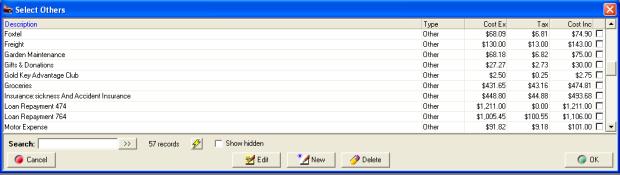
Fig
8.17 Selecting An Expense Or Other Item
5)
Confirm your selection with OK (F12)
6)
Edit details from the bill form as required
7)
Save with OK (F12)
Note: It is possible to edit the value of any
expense entered onto the bill form by pointing and clicking in the appropriate
field.
|
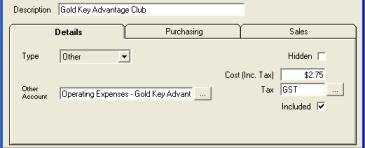
Fig 8.18 Item Form |
Purchases,
Adding To Listing: Select
new from the buttons at the bottom of the select expenses display complete
the following fields:
|
Description: ie: Fuel, accounting fees, rent and stationery
Type: Default – Other
Expense
Account: Select the button
to view the chart of accounts, highlight the required account or
create a new expense account.
Hidden: Select if you wish to remove the expense
from the listing
Cost: Inc / Ex tax
Tax: Default account displayed, select the button
to choose an alternative
Included: Inc / Ex tax
Purchases,
Viewing Item History: Select
the history tab from the item form to view the transaction history.
Purchases,
Viewing: Expense
and fixed asset purchases can be viewed from the Purchasing screen. The
date range for the list automatically defaults to month to date, it is
possible to select another period from the drop menu or enter the from
/ to dates in the appropriate fields. You also have the option to sort
by supplier and invoice number. View the details of an expense by highlighting
from the list and selecting edit or pointing at the transaction and double
clicking.
Purchases,
Editing: Select
the required entry from the Purchasing list. To edit the details of an
expense purchases highlight from the list and select edit or point at
the transaction and double click. Make the required changes and save with
OK (F12).
Purchases,
Deleting:
Highlight the required entry from the Purchasing / bills list and select
delete from the bottom of the display accept the delete action.
Note:
It is not possible to delete an expense purchase that is contained within
payment reconciliations; adjustments will have to be made via a journal
entry.
Purchases,
Crediting: To
create an expense purchase credit follow the same steps as supplier
Inventory credits, creating.
Creditors
Creditors,
Overview:
A major component of successful financial management is keeping track
of your creditors (money you owe). Auto Easy allows you to process payment
directly from the purchasing module or through the bill payments option.
When payment is processed you have the flexibility of nominating which
account the funds are to be deducted from. Once a bill has been processed
it is easy to track payments from purchasing, bill payments or general
ledger. Auto Easy handles tax and superannuation payments differently
to normal supplier invoices. Essentially you can display a summary of
amounts owing for any period and process payment to include any tax payable
account.
Creditors,
Viewing Bills:
There are two ways to view outstanding supplier invoices, the purchasing
screen and by selecting Activities / Pay Bills from the
top of the screen.
Purchasing
Screen – The screen displays
invoices for the all suppliers in the current month it is possible to
filter transactions by date range, supplier, due date, outstanding and
invoice.
v
Date
Range: The
screen is set to automatically display transactions for the month to date.
It is possible to select another period by clicking on the button to the
right of the month to date field, from the drop down menu point and click
on the period you require. You can also select the - from to dates - by
either typing into the fields at the top of form in DD/MM/YY format or
selecting the button to the right of the - from / to - boxes and double
clicking on the date required. Today’s date is highlighted in red, to
move between months select the arrows at the top of the calendar form.
v
Supplier: Select the button to the right hand side
of the supplier field, your supplier listing is displayed. Highlight the
supplier you wish to select confirm with OK (F12) only transactions relating
to the chosen supplier will be displayed. If you wish to display transaction
for sub accounts select the tick box located above the supplier search
field.
v
Due Date: This function is used in conjunction with
the date range, select the period or enter to / from dates, select due
date; only invoices that are due for payment are displayed. From the top
of the screen select the due date checkbox, invoices that are due for
payment in that date range are displayed. Further filtering is possible
by selecting view by supplier.

v
Outstanding: Selecting outstanding displays only invoices
with outstanding balances, transactions include invoices that are part
paid.

v
Invoice Number: Enter the transaction number into the invoice
field; tick the box placed above
the field and only the required transaction will
be in view.
Activities
/ Pay Bills – Displays all
outstanding bills for an individual supplier giving you the opportunity
to process payment. To select a supplier click on the button to the right
of the supplier field, from the supplier listings highlight the required
record and confirm with OK (F12). Filters include the ability to display
outstanding invoices by date range including due date.
Supplier,
Viewing Sub Accounts: It
is possible to include invoices allocated to sub-accounts, select the
include sub accounts option under the supplier field. Invoice received
or due in the date range for each supplier sub account is now in view.
Creditors,
Viewing Bill Details:
From the purchasing screen point at the transaction you wish to view and
double click or alternatively highlight the transaction and select edit
from the bottom of the display. Note: It is not possible
to view invoice details from the bill payment form
Bill
Payments
Bill
Payment, Overview: Bill
payments are processed through the bill payments form. The Form can be
accessed from the purchasing module, bill payments or the activities menu.
When you pay a bill the accounts payable account balance is reduced by
the same value as your payment account. Auto Easy gives you the ability
to pay bills from any bank or asset account (ie: Undeposited funds).
Bill
Payment, Purchasing Module: To
pay a bill from the purchasing module highlight the transaction and select
the payment button at the bottom of the screen.
 Selecting payments opens the
bill payment form
Selecting payments opens the
bill payment form
The bill payment form opens displaying just the invoice
that was highlighted with the outstanding amount automatically entered
into the amount field. To process payment for a single account complete
the details in the details section of the form
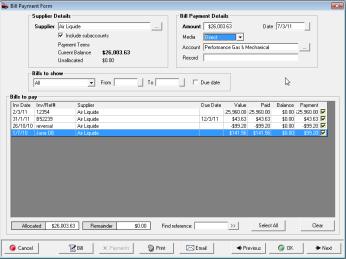
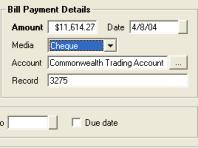
Fig 8.19 Bill Payment Form
Fig 8.20 Bill Payment Details
Bill
Payments, Form Layout: The
bill payment form is split into these areas:
Supplier
Details: Supplier, Payment
Terms, Current Balance
Bill
Payment Details: Amount,
Date, Media, Account, Record
Bills
To Show: Period, Date Selection
& Due Date
Bills
To Pay: Invoice Date, Due Date,
Value, Paid Balance & Current Payment
Find
Reference: To locate an outstanding
bill by invoice number type into this field and click on the double arrow
option to the right.
Select
All: When processing multiple
bills select all allows you to flag all invoices displayed for payment.
Clear: Clears all selections
Print: Prints a remittance advice
Previous
& Next : The previous and next options at the bottom
of the form to locate previous entries, if you wish to create more that
one bill payment using the next option will open a blank transaction form.
To select the media use the drop down menu, highlight
the required type double click and it is displayed in the media field.
If you select cheque your trading account and next cheque number is automatically
entered into the account and record field. You also have the option of
selecting a bank or fixed asset account such as undeposited funds to make
a payment from. To view available accounts select the button to the right
of the account field.
After completing the details select OK (F12) to process
the payment for the original invoice selected from the purchasing screen
Bill
Payments, Purchasing Selecting Multiple Bills: Selecting
payment from the purchasing module only displays the highlighted invoice,
it is however possible to display all invoices owing and flag for payment
by selecting all from the bills to show menu. As you select the outstanding
invoice the value in the amount field will increase, unflagging a value
will decrease the amount you are paying.
Bill
Payments, Editing Existing Bills: If
you wish to edit an existing bill from the bill payments form, point and
double click on the line item, the original bill is now in view, change
the value in the bill form and select OK (F12). Auto Easy will return
you to the bill payment form, the previous bills selected for payment
will remain flagged.
Bill
Payments, Adding Bills: As
you reconcile your supplier statement you may find that bills have not
been posted, if this is the case select the bill option at the
bottom of the bill payment form, this action will open a new bill for
the supplier. Enter the details in the normal way and save with OK, you
will be returned to the bill payment form with all selected items still
flagged for payment.
Bill
Payments, Activities Menu:
to open the bill payments form from the activities menu select the pay
bill option. At the bill payment form select the button to the right hand
side of the supplier field, highlight the supplier you are processing
payments for, confirm your selection with OK (F12) the supplier name is
now displayed in the supplier field then perform the following:
1)
If you want to display all
outstanding invoices by date (not due date) point click on due date
2)
Select the invoices you
wish to pay – Select All to flag all invoices displayed
3)
Enter the payment media
from the drop down menu
4)
Select the account
5)
Enter a record number (sequential
based on your last entry is displayed)
6)
Process payment by selecting
OK (F12)
Remittance
Advice, Printing: If
you wish to enclose a remittance advice with your payment select the print
button located on the lower menu bar of the form. The layout of this report
allows you to insert into a window faced DL envelope.
Remittance
Advice, Emailing: To
email a remittance advice firstly ensure there is an email address recorded
in the supplier form, select the bills and payment media, point and click
on the email option, confirm your selection and the form is emailed. You
can check when a remittance was emailed by selecting the email option
which displays a green tick, you also have the ability to resend from
this message screen.
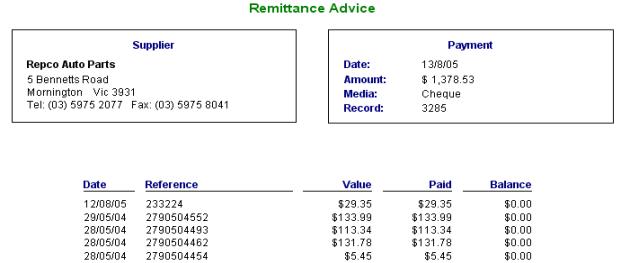
Fig 8.21 Supplier Remittance Advice
Bill
Payments, Quick Pay Method: You
can process payment for a single bill from the bill form by selecting
the payments button from the lower menu bar of the screen, this option
will save the bill and open the bill payment form with the supplier invoice
ticked for payment in one action. The operator enters the payment method
and account clicks OK (F12) and the bill is recorded in purchasing as
paid.
 To quick pay select payment
from the bill form.
To quick pay select payment
from the bill form.
Bill
Payments, Processing: You
also have the option to process a bill payment directly from the bill
payments screen.
|
|
To access the bill payments select the accounts icon
from the top of screen, click on the bill payments option to view the
display. Select new from the bottom of the bill payments
screen. The bill payment form is now in view; select the supplier and
process invoices as required. Confirm the transaction with OK (F12) from
the bill payment form.
|
Bill
Payments, Viewing:
It is possible to view payments from purchasing and the bill payments
module. To view a payment from the purchasing module highlight a paid
invoice, select payment from the bottom of the screen, details of the
payment are now in view. Viewing payments from the bill payments screen
requires you to point and double click on the transaction or highlighting
the payment, selecting edit (F2) from the bottom of the screen, details
of the payment are displayed in the bill payment form. You can also filter
transactions by type to view supplier or payroll liability payments, click
on the arrow to the right of the types field, point and double click on
your selection.
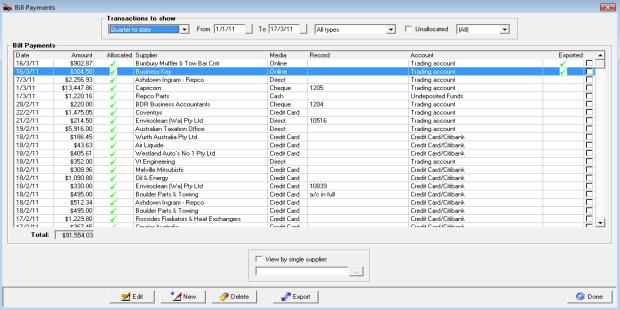
Fig 8.22 Bill Payments Display
Bill
Payments, Allocating Payment:
A green tick is displayed in the allocated column of the bill payments
screen indicating the payment has been allocated in full. If a payment
is not allocated correctly a red cross is displayed. It is possible to
view unallocated payments only by selecting the unallocated option at
the top of the screen. You will need to select a new period if you wish
to view transactions pre the current month. An unallocated payment may
exist due to a paid invoice being deleted from the system or overpayment
has been processed leaving unallocated credits on the suppliers account.
It is possible to edit a payment to correct the allocation only
if the payment does not form part of a reconciled transaction.
Bill
Payments, Editing: Open
the bill payment form from either the purchasing or bill payments display.
It is now possible to select or de-select payment allocating by clicking
in the selection field aligned to the transaction, you can also alter
the payment amount and account posting from bill payments section of the
form. To save your changes select OK (F12).

Fig 8.23 Selecting / Deselecting Payment Allocations
Bill
Payments, Selecting Date:
The bill payments screen is set to automatically display transactions
for the month to date. It is possible to select another period by clicking
on the button to the right of the month to date field, from the drop down
menu point and click on the period you require. You can also select the
- from to dates - by either typing into the fields at the top of form
in DD/MM/YY format or selecting the button to the right of the - from
/ to - boxes and double clicking on the date required. Today’s date is
highlighted in red, to move between months select the arrows at the top
of the calendar form.
Bill
Payments, Deleting: Payments can be deleted
from the bill payments form by highlighting the record you wish to remove
and selecting delete from the bottom of the screen, confirm the deletion
from the warning message. When a payment is deleted from the system paid
invoices are reversed to outstanding. The supplier total amount due will
increase by the amount you deleted. It is not possible to delete
a payment if it forms part of a reconciled transaction.
Bill
Payments, Processing Credits: Credits
are displayed in the bills to pay section of the bill payment form with
the amount id brackets ie: ($89.60) when selected the amount owing displayed
in the bill payment details will decrease.
Bill
Payments, Paying From Undeposited Funds:
When processing payment it is possible to pay from undeposited funds,
the transaction is listed as a negative amount in the receipts display
ie: ($110.00). Indicating this money which would normally be cash is missing
from your Undeposited funds.
Bill
Payments, Unallocated Payments:
Auto Easy allows you to delete paid or unpaid bills providing the payment
does not form part of a reconciled transaction. If payments are allocated
to a bill selecting delete displays a message box warning that payments
have been processed. Continuing will leave the amounts unallocated, unallocated
payments will also be created when paying a supplier in advance. When
opening the bill payment form if unallocated credits exist for the supplier
you will notice a payment button with a red cross.
 Selecting
this button from the payment form allows you to view unallocated payments
for the supplier from the bill payments screen. To process an unallocated
payment highlight the line item and double click or select edit (F2) from
the bottom of the bill payments screen.
Selecting
this button from the payment form allows you to view unallocated payments
for the supplier from the bill payments screen. To process an unallocated
payment highlight the line item and double click or select edit (F2) from
the bottom of the bill payments screen.

Fig 8.24 Unallocated Payments Are Indicated
By A Red Cross From The Bill Payments Screen
The bill payment form will open, select the date
range you wish to display and allocate the payment to invoices by clicking
in the box at the end of the line item, save your allocations with OK
(F12).
Recurring
Transactions - Purchasing
Overview:
Auto Easy allows the user
to identify a supplier bill as a recurring transaction, it is possible
to then store the record and batch run the transactions when payment date
is due. This feature allows you to record the payment frequency and next
payment date.
Recurring
Transactions, Adding: To add a recurring transaction, open a
new bill add the item in the normal way, before closing the bill point
and click on the recurring transaction option located in the top left
hand side of the header, a tick is displayed, point and click on the button
to the right of the frequency field, make a selection from the drop down
menu. Move across to the next field select the button to the right, from
the calendar point and double click on the next payment date, your choice
will display in the field. Save or pay the bill in the normal way.
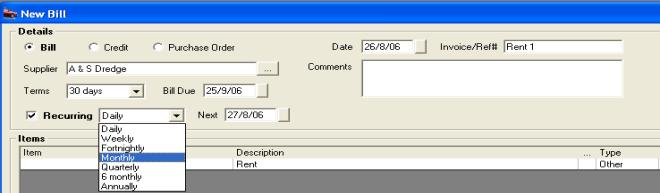
Fig 8.25 Recurring Transaction Set-up
Recurring
Transactions, Processing: To
process recurring transactions, select Activities / Recurring Transactions,
from the recurring bills screen point and select the transactions you
wish to create, complete the process by select OK (F12).
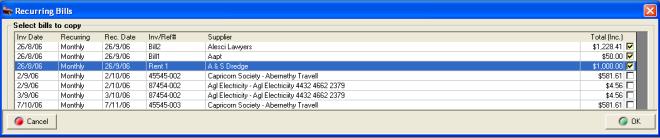
Fig
8.26 Recurring Bills Display
The bills are posted to your purchasing screen dated
the next rec. date, the list will automatically refresh to display the
next payment date.
Recurring
Transactions, Editing & Deleting: To edit or delete a transaction select
the appropriate option from the bottom of the recurring bills display.
On-Line
Payments:
Auto Easy can generate an
aba file for export to your bank to process single or multiple payments
to your suppliers. If you wish to use this feature open file / settings
/ accounts and complete your bank details including your UID (Unique identity)
this can be obtained from your bank.
|
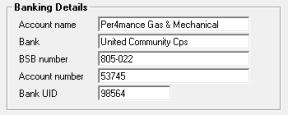
|
Before processing on-line payments you must complete
your trading account details by selecting settings from the file menu
and clicking on the accounts tab. |
To create an aba file perform the following:
1)
Go to bill payments via
Accounts / bill payments, open the bill payment form for your chosen supplier,
select the bills you wish to pay, select from the payment media on-line
and the account you want the payment to be deducted from (usually your
trading account)
|
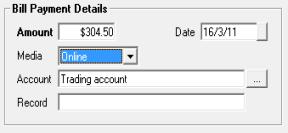
|
Finalise payment by selecting OK (F12) return to
the bill payments list you will notice on the right hand side of the transaction
list you have the ability to select a payment for export, the transaction
can be easily identified by the payment media recorded, remember you can
use the view option at the top of screen to display on-line payment transactions
only. Before moving to the next step ensure you have the suppliers bank
details recorded on the supplier form. |
2)
From the bill payments list
point and click in the check box at the end of the line item you wish
to export, select export from the bottom of the display, you are presented
with the option to select the destination folder (choose a location that
is easy for you to access when exporting to your bank ie: C:\ABA)
|
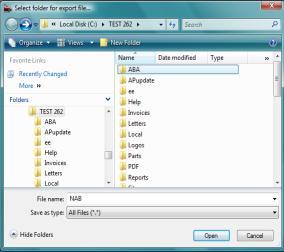
|

Confirmation your aba file has been created and
saved
Auto Easy will overwrite the previous file if the
same name and location are chosen, you can re-select exported records
to create a new aba export however be sure you do not duplicate payment
exports to your bank. A green tick is displayed in the exported column
when a payment has been added to an aba file, it is advisable to take
note of this as you process an export. |
Capricorn
Statement Reconciliation
Capricorn
Reconciliation, Overview: Auto Easy Ultimate has an automated reconciliation
feature for operators that have a trading relationship with the Capricorn
Society. To access this feature you need to firstly attach suppliers to
the master Capricorn account, enter all purchases from Capricorn suppliers,
download your statement from the Capricorn web site and finally run the
reconciliation feature.
Capricorn
Reconciliation, Supplier Setup: All
Capricorn suppliers need to be setup as sub accounts of Capricorn, plus
you must enter the supplier code onto the supplier form as the reconciliation
feature uses this field to match purchases. To setup a Capricorn supplier
perform the following:
|
|
1)
Select suppliers from the
screen icons or pick list option
2)
From the bottom of the supplier
listing select new
3)
Enter the supplier name,
select the arrow to the right of the parent field
4)
Select Capricorn from the
drop down list
5)
Complete the details on
the supplier form
6)
Enter the Capricorn supplier
reference number
7)
Complete by selecting OK
(F12). |
Note:
You are unable to save a Capricorn sub supplier form without the unique
supplier number.

Fig 8.27 Capricorn Supplier Form
The Capricorn # and supplier id must be entered onto
the supplier form for the reconciliation process to function correctly.
Capricorn,
Reconciling Purchases: For
the reconciliation feature to function correctly you must enter your purchases
including the supplier and invoice number. Processes you need to follow
are:
1)
Download your Capricorn
statement from the web site – You can connect to www.capricorn.com.au
directly from the On-Line menu functions
2)
Save the file, we suggest
you create a Capricorn directory on your local machine
3)
Select the Capricorn Reconciliation
feature from the On-Line menu
4)
“Initialising Capricorn
Reconciliation” message box and an open Capricorn Export File selection
box are now in view
5)
Point and double click on
the file named intmemb.csv, the reconciliation process will initialise
6)
A status box indicates progress
7)
When complete the Capricorn
reconciliation is in view
8)
Most items should be ticked
for payment. Others may have red crosses and comments in the notes field
9)
Correct the non-matching
items & re-run the reconciliation by selecting the re-do option from
the bottom of the screen
10)
When all items reconcile
select payment from the bottom menu bar, from the payment form select
the payment media and confirm with OK (F12)
Capricorn,
Reconciliation Display: The
reconciliation screen will display all matched items with a green tick
in the match column. This indicates that the items are flagged for payment,
the other items that have a red cross in the match column refer to invoices
that have not been found, values do not match or the invoice dates do
not match. You have a “drill down” option to correct values or dates,
pointing at the line item and double clicking will open the original purchase
entry for editing.
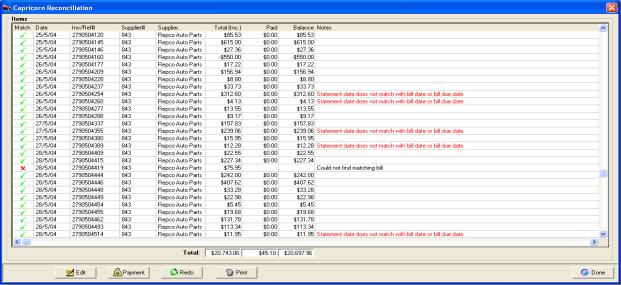
Fig 8.28 Capricorn Reconciliation Display
Capricorn,
Correcting Purchases: Auto
Easy Ultimate allows you to access and correct bills from the reconciliation
screen providing a match has been made between supplier and invoice number.
To open the original purchase point and double click on the line item,
your original bill is in view, change the date or invoice value and save.
Repeat this process for other bills displaying a discrepancy then rerun
the report by selecting redo from the bottom of the reconciliation screen.
Capricorn,
Processing Payment: Select
payment from the bottom of the reconciliation screen, all line items displaying
a green tick in the match column are flagged for payment. To process select
the media type, enter a payment or cheque number and complete the transaction
by selecting OK (F12).
|
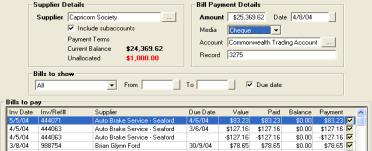
Fig 8.29 Finalising A Capricorn Payment |
From the bill payment form you can deselect items
for payment if required. Selecting clear will deselect all items, clicking
on a flagged line item deselects the single payment. The total payment
is displayed in the amount and allocated field at the bottom of the screen |
Overview: Auto Easy has a unique cost centre tracking
feature. The option allows an organisation to assign purchases to a specified
cost centre including details of the authorised user. The purchase transaction
history will display the totals assigned to each account and cost centre
by supplier invoice. The report can be exported in Excel format for import
into various accounting or administration applications.
Cost
Centre Tracking, Setup: Cost
centre tracking is not a standard program default hence the option needs
to be initialised from the settings screen. Once this is done two new
fields are displayed on the bill and credit form Cost Centre and Authorised
user, the settings defaults are automatically entered however these can
be changed according to the entry requirements.
To setup cost centre tracking perform the following:
1)
Open program settings –
File / Settings – Click on the configuration tab, select manage users
|
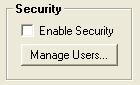
|
To access a list of authorised users you must first
enter the details into the manage users list. It is not essential to establish
security, however there is an option that allows admin to set permissions
for users to be able to authorise purchase transactions. If this is not
set it is assumed that all users have authority to process purchases. |
2)
When you have completed
entering your authorised users click on the program options
tab, tick
track cost
centre
|

|
To select a default cost centre click on the button
to the right of the field, a list is displayed; highlight the required
record and select OK (F12), the title is entered in the default cost centre
field. To create a new record select new from the bottom of the list. |
|
|
|
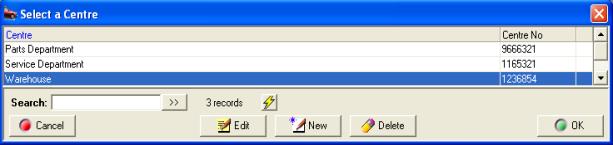
Fig 8.30 Selecting A Cost Centre
|
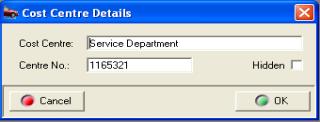
Fig 8.31 Entering A New Cost Centre |
A new account is setup on the cost centre details
form. Type the name of the cost centre followed by the cost centre number
(a value MUST be entered in the Centre No. field as this is printed on
the purchase transaction summary report. Save your entry with OK (F12).
|
3)
To save your changes in
settings select OK (F12) from the bottom of the settings
display, cost
centre tracking
is now activated.
It is important that you apply account numbers to
the posting accounts in your chart of accounts as these are recorded in
the purchase transaction summary report.

Fig 8.32 Chart Of Accounts Displaying
Account Number & Tax Code
To add new accounts or account numbers and tax codes
please refer to the setting up your accounts section of this manual.
Cost
Centre Tracking, Processing A Bill or Credit: Bills and credits are processed in the
normal way, except when cost tracking is set two new fields are displayed
on the bill or credit screen. It is mandatory for these to be completed
otherwise the transaction will not proceed. The data displayed in the
authorised user and cost centre field is accessed from the records entered
in the program default settings.

Fig
8.33 Bill Form Header With Cost Centre Tracking Set To True
If you wish to change the cost centre and / or authorised
person select the button to the right of the field, from the list highlight
the record you wish to display and complete with OK (F12).
Purchase
Transaction Summary Report: The
purchase transaction report can be run by all or selected suppliers (single
or multiple) information includes the invoice, account posting and cost
centre details.
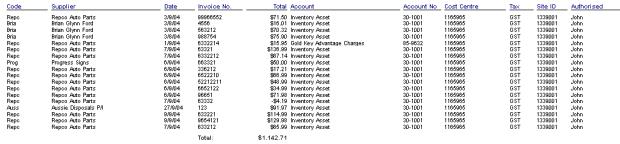
Fig 8.34 The Transaction Summary Report
To display, print or export this report perform the
following:
Display:
Select reports from the
top of the screen point and click on purchase reports, select the transaction
summary report from the sub menu. Choose whether you wish to display all
suppliers or selected, to select suppliers from the list point and click
in the checkbox at the end of the line

Fig 8.35 Selecting Supplier Transactions To Display
If selecting suppliers confirm your choices with
OK (F12). Next you need to enter the date range or period you wish to
report on. Select OK and the report will display.
Print:
To print the report select
the print icon located on the top left hand side of the report display

Export:
To report the report select
the export icon located on the top left hand side of the display

Select from the list the export type required ie:
Excel, nominate the folder you wish this to be saved to, select OK, name
the report and select save.
Tax
Payments
Tax,
Payments Overview: Auto
Easy allows you to setup multiple tax accounts, when you create tax accounts
as sub-accounts of tax payable you are able to process payment by selecting
the total owing according to a “cut off” date. For instance you may wish
to process payment of GST for the last quarter in January, in this instance
you need to select December 31st. as you up to date. The chart
of accounts lists three default tax accounts, GST, PAYG Instalments and
PAYG Withholding. Auto Easy processes tax payments differently to other
current liability accounts by only displaying a total when allocating
payment. Details of tax owing can be viewed from other areas of the program.
Tax,
Default Accounts:
The chart of accounts has three default accounts displayed as sub accounts
of tax payable, it is possible to process payment for these accounts through
the pay tax liability feature.

Fig 8.34 Default Tax Accounts
GST:
Liability or credit calculated
on sales and purchases on an accrual basis excluding income from work
in progress, GST rate is entered in settings.
PAYG
Installments: Based on the
value entered in the program settings multiplied by the turnover (excluding
tax) for the payment period.
PAYG
Withholding: Tax deducted from
wages or salaries paid for the selected period.
Tax,
Processing Payment:
Before processing a tax payment ensure the total value of the sub-accounts
are correct, for instance you may wish to create another account such
as disallowed vehicle expenses. Before processing you may wish to make
a journal entry to this account, ensuring the amount you are paying is
correct. Depending on the level of reporting required you may find it
easier to simply set up another sub-account titled tax adjustment and
make an entry into the notes field when processing journals to keep track
of the various entries.
|
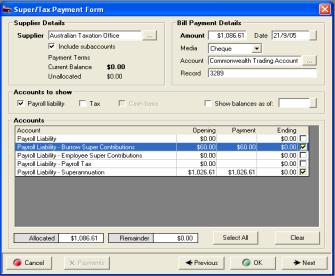
Fig 8.37 Super / Tax Payment Form |
From the Tax payment form select the button to the
right of the supplier field, highlight the payee from the supplier listing
ie: Australian Taxation Office and confirm with OK (F12). Next select
the show balances as of date by clicking on the button to the right of
the date field select your “cut off” date from the calendar. Click on
select all. The total amount is entered in the amount field, select the
payment media, account and edit the record if required. Confirm the tax
payment by selecting OK (F12).
|
Tax,
Paying Cash Or Accrual: Values
displayed on the super / tax payable form automatically default to accrual.
If you wish to pay your GST and PAYG installments on a cash basis select
the cash option located above the accounts window. Data will instantly
change to reflect amounts owed based on actual payments and receipts for
the selected date range ie: Last payment date to the date entered in the
show balances as of. Note: You must decide whether to process payment
on a cash or accrual basis, if you try to change your accounting
method a box will prompt whether you wish to continue. It is possible
to accept a change however you need to be aware of the implications of
swapping from cash to accrual or visa versa. It is suggested you seek
direction from your financial adviser on which method is the most effective
for your business.

Fig
8.38 Selecting The Payment Criteria From The Pay Tax Feature
Tax,
Editing Payments:
Open bill payments from the accounts icon, highlight the record you wish
to edit open the tax payment form by double clicking on the transaction
or selecting edit (F2) from the bottom of the display. It is now possible
to select or de-select payment allocations by clicking in the selection
field aligned to the transaction, you can also alter the payment amount
and account posting from the accounts section of the form. To save your
changes select OK (F12).
Tax,
Deleting Payments:
Payments can be deleted from the bill payments display by highlighting
the record you wish to remove and selecting delete from the bottom of
the screen, confirm the deletion at the warning message. When a payment
is deleted tax payments are reversed. It is not possible to delete
a payment if it forms part of a reconciled transaction.
Tax,
Viewing Tax Payments:
Go to the bill payments screen, select the entity you pay tax to from
the supplier list by selecting the button to the right of the supplier
field and click the view by supplier option. Next select the period or
enter the date range for the transaction you wish to view. To view the
details of a transaction double click on the transaction or select edit
(F2) from the bottom of the display.
Tax,
Locking Transactions: Auto Easy allows you to lock transactions
to a specified date, it is suggested that once you have completed your
BAS and made payment (process the last day of the reconciled period this
will display all values as zero) that you lock transactions to the last
date of the tax period. To set the locking date, go into File/Settings/Configuration,
tick the enable lock checkbox, and next select a date from the calendar
by clicking on the button to the right of the date field. You can disable
or change the date at anytime, save your settings with OK (F12).

General
Ledger
General
Ledger, Overview:
The general ledger is the core of your company’s
financial records. These constitute the central “books” of your system,
and every transaction flows through the general ledger. These records
remain as a permanent track of the history of all financial transactions
since day one of the life of your company.
Auto Easy’s accounting system has a number of subsidiary
ledgers (called sub-ledgers) for items such as cash, accounts receivable,
and accounts payable. All the entries that are entered (called posted)
to these sub-ledgers will transact through the general ledger account.
For example, when a credit sale posted in the account receivable sub-ledger
turns into cash due to a payment, the transaction will be posted to the
general ledger and the two (cash and accounts receivable) sub-ledgers
as well.
There are times when items will go directly to
the general ledger without any sub-ledger posting. These are primarily
capital financial transactions that have no operational sub-ledgers. These
may include items such as capital contributions, loan proceeds, loan repayments
(principal), and proceeds from sale of assets. These items will be linked
to your balance sheet but not to your profit and loss statement.
Setting
Up: There are
two issues you need to be aware of when setting up the general ledger.
One is their linkage to your financial reports, and the other is the establishment
of opening balances.
The two primary financial documents of any company
are their balance sheet and the profit and loss statement, and both of
these are drawn directly from the company’s general ledger. The order
of how the numerical balances appear is determined by the chart of accounts,
but all entries that are entered will appear. The general ledger accrues
the balances that make up the line items on these reports, and the changes
are reflected in the profit and loss statement as well.
The opening balances that are established on your
general ledgers may not always be zero as you might assume. On the asset
side, you will have all tangible assets (the value of all machinery, equipment,
and inventory) that are available as well as any cash that has been invested
as working capital. On the liability side, you will have any bank (or
stockholder) loans that were used, as well as trade credit or lease payments
that you may have secured in order to start the company. You will also
increase your stockholder equity in the amount you have invested, but
not loaned to, the business.
Creating
An Audit Trail: Don’t let the word audit
strike fear in your heart. I am not talking about a tax audit. If you
are called to respond to an outside audit for any reason, a well-maintained
general ledger is essential.
But you will also want an internal trail of transactions
so that you can trace any discrepancy (such as double billing or an unrecorded
payment) through your own system. You must be able to find the origin
of any transaction in order to verify its accuracy, and the general ledger
is where you do this in Auto Easy.
General
Ledger, Accessing: To view the general ledger
select accounts icon from the top of screen, point and click on general
ledger to view transactions
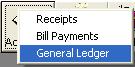 Selecting general ledger will
allow you to view transactions
Selecting general ledger will
allow you to view transactions
The general ledger screen displays all transactions
in detail including the debit / credit account posting.
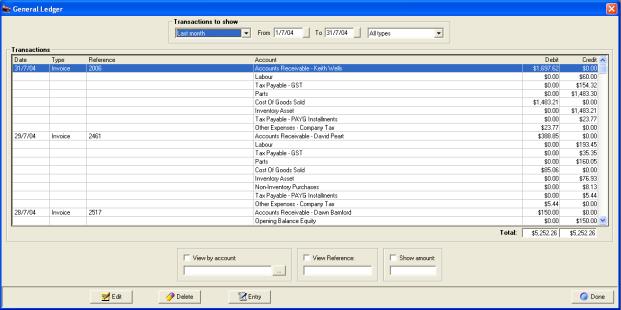
Fig 9.01 General Ledger Transaction Display
Fields include:
Transactions
To Show:
Period or date range and transaction type
Transactions:
Details
include
Date: Transaction date
Type: Includes: All types, Invoices, Receipts, Bills, Bill Payments,
Supplier credits, Deposits, Payroll, Journal entries, transfers, Credit
memos.
Reference: Invoice number or reference
Account: Chart of accounts posting
Debit: Displays accounts receiving a debit entry
Credit: Displays accounts receiving a credit entry
View
By Account:
Allows you to select an account from the chart of accounts
View
Reference:
Ability to enter an invoice, bill or reference number
Show
Amount: Search
for by transaction value
Functions include:
Edit: Allows the operator to
view transaction details and edit entries that have not been reconciled
Delete: Ability to delete transactions
that have not been reconciled
Entry: Opens the journal form
Done: Exits you from the screen
General
Ledger, Selecting Transactions To View: Firstly select period
or date range, the screen
is set to automatically display transactions for the month to date. It
is possible to select another period by clicking on the button to the
right of the month to date field, from the drop down menu point and click
on the period you require.
|
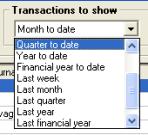
|
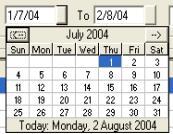
|
You can also select the - from to dates- by either
typing into the fields at the top of form in DD/MM/YY format or selecting
the button to the right of the - from / to - boxes and double clicking
on the date required. Today’s date is highlighted in red, to move between
months select the arrows at the top of the calendar form |
Fig 9.02 Selecting Periods And Specifying A Date
Range
Next select the type of transaction you wish to view,
the default is all, and selecting the button to the right of the type
field displays a drop down menu of transaction types. Highlight your choice
and double click only transactions of that type are displayed for the
period or date range selected. In the example below the type selected
are bills and the period is month to date.
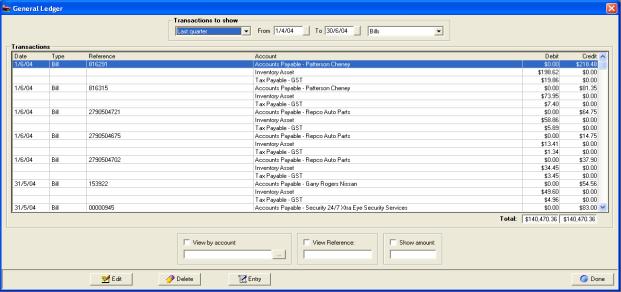
Fig 9.03 Displaying
Bills Only For The Month To Date
General
Ledger, Totalisations: The
debit and credit columns are totalised toward the bottom of the display.
The debit and credit value must always be the same, totalisations relate
to the transactions selected.
General
Ledger, Viewing Transaction Details:
It is possible to view transaction details from the general ledger. To
view the original transaction details highlight an entry, point and double
click on the transaction or highlight the line item and select edit (F2)
from the bottom of the screen, details of the transaction are displayed
in he original format they were created.
General
Ledger, Editing Transactions:
Transactions need to be edited from the original form, for instance if
you view a closed invoice from the general ledger screen the invoice will
require re-opening to change the financials.
General
Ledger, Deleting Entries:
You have the ability to delete an un-reconciled transaction from the general
ledger. If you choose to delete transactions this way all postings are
reversed. To delete a transaction highlight the record you wish to remove
and select delete from the bottom of the screen, confirm the deletion
at the warning message.
Note:
Only transactions that have not been reconciled can be deleted.
General Journal Entries
General
Journals, Overview:
The General Journal is the most basic of journals. It is a chronological
list of transactions. It has a very specific format for recording each
transaction. Each transaction is recorded separately and consists of:
date; all accounts to receive a debit entry are listed first with an amount
in the appropriate column, then all accounts to receive a credit entry
are indented and listed next with an amount in the appropriate column.
General
Ledger, Creating Journal Entries: To
create a new journal transaction select the Entry button from the
bottom of the general ledger display or select activities / journal entries
from the top menu bar. Either of these actions will display the journal
form.
|
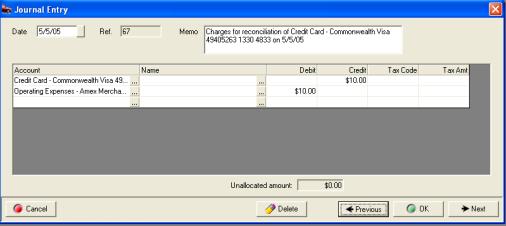
Fig 9.04 Journal Form |
To enter transaction
details select the button to the right of the first entry in the account
field column. You will see a list of accounts, select the account you
wish to debit or credit to, double mouse click the account name is entered
into the account field. Next point at either the debit or credit fields,
enter the value. ie: Trading account enter a credit of say $20.11 (according
to the principles of double entry accounting a credit to your bank account
will be logged as a debit in your chart of accounts).Point at the field
below the last account entry and mouse click, from the account list select
the account you wish to make a debit entry to, we will select bank charges
enter $20.11 into the debit column. The transactions now balance and the
unallocated amount is zero.
Journal
Entries, Using Tax Codes: You
may need to allocate an amount to tax when processing certain journals.
An example would be when adjusting a clients account to write off a bad
debt, say the amount to be written off was $110.00 you would credit the
clients account with $110.00 and split the opposing debit entry between
an expense account ($100.00) and GST ($10.00).
To apply tax to a journal select the tax code field
click on the down arrow, next point and click on the required tax code,
the tax amount is automatically calculated and placed into the tax amount
field. Tax is calculated on the value of the debit or credit entry entered
on the same line.
Journal
Entries, Adjusting Debtor And Creditor Accounts: Auto Easy allows you to adjust individual
accounts assigned to accounts receivable (Debtors) and accounts payable
(Creditors) with a journal entry. The entries are recorded in the bill
payments (creditors) and Receive Payments (Debtors) forms, payments and
receipts can be allocated to these transactions in the same way as process
bills and invoices.
To adjust a debtors account select the button to
the right of the account field, from the chart of accounts select accounts
receivable, the name field can now be accessed, point and click on the
button to the right of the field, from the client list select the client
you wish to raise the adjustment for, select OK from the bottom of the
client listing. The clients name is now displayed in the form.
If you wish to increase the balance of a debtors
account place the value (in tax) into the debit column on the same line
as the client’s name. Next select the account you wish to post to if there
is a tax value enter the excluding tax amount to the debit column on the
same line, to enter the tax value select the tax code and the calculated
value is automatically entered in the tax amount field. Note: That the
tax and debit or credit value can be changed, however the total credits
must always be equal to the total debits for the transaction to be posted.
Journal entries are displayed in the following format
on the bill payment and receive payment forms

Receipts (Debtors)

Bill Payments (Creditors)
Ticking the box at the end of the line
allows the operator to allocate payments or receipts to a journal.
General
Ledger, Journal Entries Editing:
To edit a journal go to the general ledger by selecting the accounts /
general ledger option from the top menu bar. Search for the entry you
require, highlight and double click on the line item or select edit from
the lower menu bar. You can now alter any of the details except the reference
number.
General Ledger, Journal Entries Displaying: To view journal entries only from the general
ledger display select the arrow to the right of the field at the top of
screen displaying All Types – select journals from the drop down list.
To filter journal entries by
date select the field at the top of the screen-displaying month to date.
Select the arrow to the right of the text. Next highlight the period you
wish to view or alternatively type the from to dates into the date fields
also located at the top of the form – selecting the arrows on the right
hand side allows you to pick from a calendar. Pointing and double clicking
on an entry displays the details.
General
Ledger Accounts
General Ledger, Accounts Overview: A chart of accounts is a list of the categories of financial transactions for a particular business. These categories are grouped as:
1) Asset Accounts - things of value owned by the business.
2) Liability Accounts - amounts owed to outsiders.
3) Owner's Equity Accounts - amounts owed by the business to its owners (profit). If the business loses money the owners may owe additional money to the business.
4) Revenue Accounts - Sources of income.
5) Expense Accounts - Payments necessary to run the business.
Proper accounting practice requires a double entry accounting system. This means that each value input into the system is a credit (-) to one general ledger account and a debit (+) to another. Since each entry affects two accounts by the same amount, debiting one and crediting another, the accounts are always in balance. Another way to look at accounting is to view the chart of accounts as a row of jars lined up along a wall with a label on each jar. The first jar might be labeled "Bank Account". One further down the line might be labeled "Phone Expenses". If a phone bill is paid the accounting system takes an amount of money out of the "Bank Account" jar and puts it into the "Phone Expenses" jar. Thus it can be seen that the sum of the credits will always be equal to the sum of the debits meaning the books will be in balance or the sum of the debits and credits together will be zero.
One might wonder where the money comes from to be transferred between jars. The point is that the jars (or accounts) start out empty and they stay empty to the extent that the sum of the money in the jars is always zero. A credit to one account is offset by a debit to another so that we have +1-1=0.
Auto Easy Accounts are set up in this way
Asset accounts carry a debit balance (+)
Liability accounts and owner's equity accounts carry a credit balance (-)
Revenue accounts carry a credit balance (-)
Expense accounts carry a debit balance (+)
Credits = Debits
Assets = (liabilities + owner's equity)
Owner's equity = Capital input + profit
Profit = Revenues + expenses (revenues are negative and expenses are positive)
Assets + liabilities + capital input + revenues + expenses = Zero
General
ledger, Viewing Transactions By Account: To
view the transactions associated with a general ledger account select
either the account filter from the general ledger transaction display
or select lists / chart of accounts.
General
Ledger: From the bottom of
the general ledger screen select the button to the right of the view by
account option. The chart of accounts is now in view, highlight the account
and confirm with OK (F12) point and click on the check box above the field.
Only transactions relating to the selected account are in view. You will
need to select a period or date range if you wish to view transactions
pre month to date.
Chart
Of Accounts: From the chart
of accounts list point and double click on the account you wish to view
or alternatively highlight select edit (F2) from the bottom of the list.
The account details form is displayed.
 To view transaction details
select the ledger button at the bottom of the form. The general ledger
screen is opened displaying related posting for the month to date if you
wish to view transactions pre current month you need to select a new period
or enter a date range.
To view transaction details
select the ledger button at the bottom of the form. The general ledger
screen is opened displaying related posting for the month to date if you
wish to view transactions pre current month you need to select a new period
or enter a date range.
Chart
Of Accounts, Creating New Accounts: From
the bottom of the accounts listing select new, this action opens the account
details form enter the name of the account ie: Office equipment, next
you have the opportunity to enter the opening balance.
|
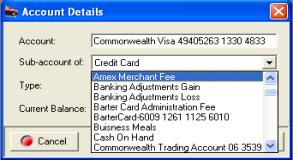
Fig 9.05 Creating A New General Ledger Account |
General
Ledger, Creating Sub Accounts:
If you wish to attach an account to a “parent” select the arrow to the
right of the sub-account field. A list of accounts is displayed, highlight
the account you require and double mouse click. The account will appear
in your chart of accounts as a sub account. Ie Depreciation -- Hoist
|
You may want to use sub-accounts for two reasons:
§
You want a further breakdown
of amounts for an existing account. To accomplish this, set up sub-accounts
of the existing account. From now on, use the sub-accounts instead of
the parent account. (You may want to edit earlier transactions so the
breakdown shows up on reports covering a period before today.) For example,
suppose you have an Insurance expense. You add sub-accounts for building,
equipment and personal
§
You already have related
accounts that you want to subtotal on reports (Or you may want to find
them more easily). You set up a new parent account and then make the related
accounts sub-accounts of the new parent.
General
Ledger, Viewing Accounts:
From the top of screen select Lists / Chart Of Accounts, your general
ledger accounts are listed including current balances.
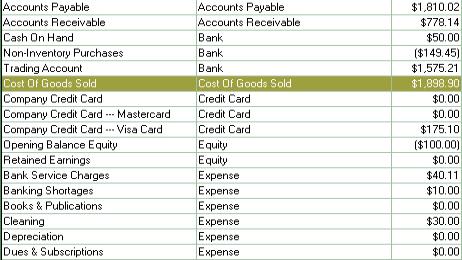
Fig 9.06 Chart Of Accounts
Bank
Transactions
Bank
Deposits, Overview: When
you receive payments, whether for jobs, invoices, or cash sales, you can
either show them as deposited into a bank account, or you can wait until
the end of the day or end of the week to deposit the money you've collected.
Auto Easy allows you to choose the method you prefer for depositing payments.
When you are deciding on the method to use to deposit
payments, think about how your bank statements show deposits. You should
select the deposit method in Auto Easy that imitates your bank statements
to make it easier for you to reconcile your bank accounts.
For example, if the bank statement shows a lump sum
for a deposit, you should group payments with other funds for deposit;
if the bank statement shows each individual cheque that was deposited,
you should choose to deposit directly to an account.
You can choose an account to deposit payments to
from the payments receipts form, if you select a bank account from the
drop-down list, Auto Easy automatically records a deposit for the amount
of the payment in the account you selected on the date you received the
payment.
If you accept the default account - undeposited funds,
Auto Easy holds your undeposited funds in a other current asset account
called Undeposited Funds until you record a deposit.
Bank
Deposits, Viewing Payment Receipts: Select
the accounts icon from the top of the screen, from the menu click on receipts.
Displayed are individual customer payments, refunds and cash payments
made to suppliers from undeposited funds.

Fig 9.10 Viewing The Receipts screen
The account field displays the amount as being allocated
to a other current asset account title undeposited funds or an account
the amount has been deposited to ie: Trading account. To view details
of the payment highlight the record and double click or select edit (F2)
from the bottom of the display. To
Bank
Deposits, Filtering Payment Receipts: The receipts screen is
set to automatically display transactions for the month to date.
v
By
Date / Period:
It is possible to select another period by clicking on the button to the
right of the month to date field, from the drop down menu point and click
on the period you require. You can also select the - from to dates - by
either typing into the fields at the top of form in DD/MM/YY format or
selecting the button to the right of the - from / to - boxes and double
clicking on the date required. Today’s date is highlighted in red, to
move between months select the arrows at the top of the calendar form.
v
Undeposited Funds: Refers to all receipts that have not yet
been deposited to a bank account. To view only undeposited items point
and click on the undeposited check box at the top of screen.
v
 To reverse your selection
point and click on the tick in the undeposited only
check box.
To reverse your selection
point and click on the tick in the undeposited only
check box.
v
Unallocated: Selecting this filter
from the top of screen displays only receipts that have not been allocated
to invoices. Unallocated amounts are indicated by a red cross in the allocated
column instead of a green tick.
 Selection
allows you to view all unapplied credits recorded in the receipts screen.
Selection
allows you to view all unapplied credits recorded in the receipts screen.
v
Client: It is also possible to filter receipts
by single client Select the button to the right hand side of the client
field, your client listing is displayed. Highlight the client you wish
to select confirm with OK (F12) only transactions relating to the chosen
client are displayed.
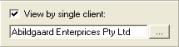 Select the
check box above the client field to view.
Select the
check box above the client field to view.
Bank
Deposits, Processing:
It is possible to bank money directly to a bank account from the payment
receipt form as you are processing a payment. To change the undeposited
funds default account select the button to the right of the account field,
a list of bank and other current asset general ledger accounts is in view,
highlight the account you wish to deposit the funds to and confirm your
selection with OK (F12).
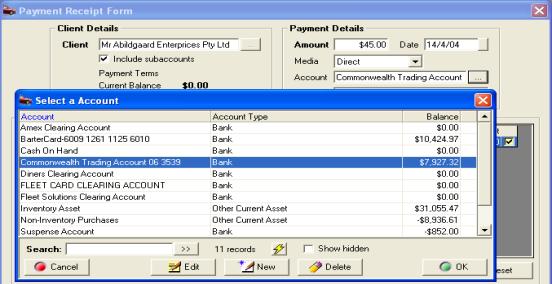
Fig
9.11 Selecting a deposit Account from the Payment Receipt Form
Alternatively a bank deposit for a group of received
payments can be created from the receipt screen by clicking on the deposit
button from the bottom menu bar or by selecting Banking / Deposits.
 Receipts Screen: Select
deposit from the bottom of the display, the deposit form opens listing
all undeposited funds recorded. To process a deposit, payments can be
selected individually or you have the option to flag all by using the
all button located at the bottom of the form.
Receipts Screen: Select
deposit from the bottom of the display, the deposit form opens listing
all undeposited funds recorded. To process a deposit, payments can be
selected individually or you have the option to flag all by using the
all button located at the bottom of the form.
 Click on the all button to flag
all records for deposit, selection is indicated by a tick in the check
box field of the transaction.
Click on the all button to flag
all records for deposit, selection is indicated by a tick in the check
box field of the transaction.
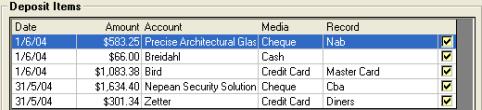
Fig 9.12 Deposit Items Viewed From The Deposit
Form
Bracketed values indicate credits (money returned
to clients and now missing from undeposited funds or supplier payments
paid from the undeposited funds account The deposit details display the
date, account, selected account current balance and a text memo field.
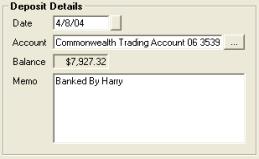

Fig 9.13 Deposit Form – Deposit Details
Fig
9.14 Deposit Summary
Deposit
Details: Allows for entry
of the date, account plus provides a texts memo field.
Date
Selection: Type the date in
DD/MM/YY format or select the button to the right of the date field and
click on the date from the calendar display.
Trading
Account: To change the deposit
account select the button to the right of the account field and highlight
a record from the list confirm with OK (F12).
Balance: Locked field recording the current balance
of the account displayed.
Memo: Is a free typing field
Navigating
Transactions: Select the
previous and next buttons if you wish to scroll through transactions.
If you wish to enter more than one deposit completing the transaction
with next will open a blank form.
Deposit
Summary: Displays totals
of the various media types and a grand total of all media components of
the deposit. When negative values ie: ($10.20) is selected from the deposit
items window the value of deposit will decrease, therefore allowing you
to reconcile the true cash value on hand.
Finalising:
To finalise a deposit select
OK (F12) from the bottom of the deposit form. You are returned to the
receipt screen displaying the deposit account against each transaction
processed
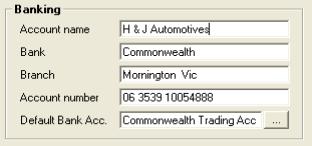
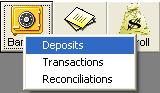
Fig 9.15 Settings / Configuration – Banking
Fig
9.16 Selecting Deposits
Before printing ensure these details are entered
in your site configuration. To print your deposit slip select the receipt
print button from the bottom of the form. Your bank details, cheques and
other payment media are entered for you allowing you to deposit without
manually completing a deposit slip.
Banking
/ Deposits: Alternatively the
deposit form can be accessed by selecting the banking icon at the top
of the screen and clicking on deposits. The deposit form opens displaying
all undeposited funds, select the items you wish to bank, print the slip
and accept with OK (F12).
Bank
Deposits, Printing A Deposit Slip:
Auto Easy allows you to enter your bank details into the site settings
by selecting the configuration tab and completing the banking section
of the form.
Deposits,
Viewing:
To view a list of deposits
select the banking icon at the top of the screen and click on deposits.
The deposit screen lists all deposits for the current month. You can view
the details of a deposit by highlighting the entry and double clicking
or selecting edit (F2) from the bottom of the display. Deposits can be
edited from the deposit form displayed; however any changes will affect
the current bank balance. Note: It is not possible to alter a reconciled
deposit.

Fig 9.17 Deposits
Deposits,
Viewing By Date Range: It
is possible to select another period by clicking on the button to the
right of the month to date field, from the drop down menu point and click
on the period you require. You can also select the - from to dates - by
either typing into the fields at the top of form in DD/MM/YY format or
selecting the button to the right of the - from / to - boxes and double
clicking on the date required. Today’s date is highlighted in red, to
move between months select the arrows at the top of the calendar form.
Deposits,
Deleting:
it is possible to delete a deposit from either the general ledger display
or deposit slip. If deleting from the general ledger highlight the transaction
and select delete from the bottom of the display. To delete from
the deposit form, open the deposit you wish to delete and select the delet
button located at the bottom of the form.
Viewing Transactions
Bank
Transactions, Viewing: To
view bank account transactions select the banking icon from the top of
screen, click on transactions from the menu. The banking screen displays
all transactions month to date for your trading account.
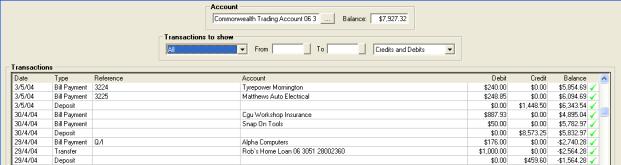
Fig 9.18 Bank Account Transactions
You can view the details of a transaction by
highlighting the entry and double clicking or selecting edit (F2) from
the bottom of the display. Transactions can be edited from the forms displayed;
however any changes will effect associated transactions. As an example
if you alter a payment allocated to an invoice the outstanding balance
of the invoice will change accordingly. Note: It is not possible
to alter a reconciled transaction; reconciled items are indicated
by a green tick at the end of the line entry.
Bank
Transactions, Selecting A Date Range: It
is possible to select another period by clicking on the button to the
right of the month to date field, from the drop down menu point and click
on the period you require. You can also select the - from to dates - by
either typing into the fields at the top of form in DD/MM/YY format or
selecting the button to the right of the - from / to - boxes and double
clicking on the date required. Today’s date is highlighted in red, to
move between months select the arrows at the top of the calendar form.
Bank Transactions,
Account Selection: The bank
transaction screen allows you to select a bank or credit card account.
Click on the button to the right of the account field from the select
account list highlight the required entry and confirm your selection with
OK (F12). The new account name is displayed in the account field including
the current balance and associated transactions for the period selected.

Fig 9.19 Selecting An Account To View From The
Bank Transaction Screen
Bank
Transactions, Debits & Credits Selection: Auto Easy allows you to view credits and
debits for the selected account or credits, or debits only. Select the
button to the right of the debits & Credits field click on your selection
from the drop down menu.
Bank Transactions, Transferring Funds:
You can transfer funds between
any two balance sheet accounts. For example, you may need to transfer
funds from a savings account to a current account to cover your weekly
payroll.
1) From the bottom of the bank transaction screen
select Transfer
2) Enter the amount you want to transfer
3) Select a media type from the drop down menu
4) Select an account to transfer funds from, and
an account to transfer funds to.
5) Click OK (F12).
Bank Transactions, Editing A Transfer: Highlight
the transaction and double click, or select edit (F2) from the bottom
of the screen, make the necessary adjustments as required and save your
changes with OK (F12).
Note:
Only transfers that have not been reconciled or allocated on the bill
payment or receipts form can be deleted.
|
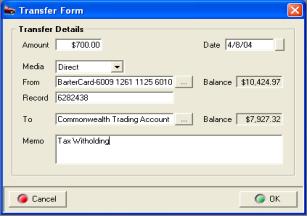
Fig 9.20 Transfer Form |
 The transfer button located
at the bottom of the screen opens the transfer form. The transfer button located
at the bottom of the screen opens the transfer form.
The funds transfer form allows you to transfer money
between accounts and allocate a media type. To make financial adjustments
between accounts where you do not want to record a media type use the
journal entry function
|
Bank
Reconciliation
Bank
Reconciliation, Overview: Auto
Easy allows you to reconcile bank or credit card transactions against
your statement. It is important that you structure your payments and deposits
as close as possible to your bank statement entries. For instance your
bank may clear EFT transactions on a daily basis, to ensure deposits match
your bank statement deposit all EFT receipts daily to your bank account.
You may have direct debits that are automatically withdrawn from your
account, again make sure you enter these as they become due; selecting
direct as the payment media will easily identify these entries.
You need to be aware that Auto Easy enforces certain
restrictions when editing reconciled transactions. Once a receipt that
is part of a reconciled deposit or a bill with an assigned payment which
has been reconciled the following rules apply.
Transaction Value: Not able to be changed
Transaction Media: Unable to be altered
Transaction Date: Unable to move to an alternative
date
Bank or Credit Card Account: Unable to move to an
alternative account
Bill
Payments: You can however
open a reconciled bill payment and re-assign payments or select an alternative
supplier, in this situation all payment allocations to the original supplier
invoices will be removed and you will need to re-assign the payment value
to invoice or journals outstanding for the new supplier.
Bills: Reconciled bills can be re-opened and items
and suppliers changed, however the total value of the invoice must always
be the same for the changes to be recorded.
Receipts: It is also possible to open receipts that
have been deposited for which the deposit has been reconciled. Allocations
can be changed plus you have the option to select a new client and assign
the amount received to outstanding invoices on the new account.
When you have completed reconciling the closing balance
must equal the equivalent balance on your bank or credit card statement.
It is possible to process transactions such as bank charges directly from
the reconciliation screen.
To avoid corrupting the integrity of your data you
are unable to edit any reconciliation beyond the very last one performed.
This feature does give you the opportunity to make changes just in case
you committed an incorrect reconciliation.
Bank
Reconciliation, Accessing: Bank
reconciliation can be started from either the bank transaction screen
by selecting the reconcile button at the bottom of the display.
 Selecting reconcile from the
bank transaction screen opens the reconcile function.
Selecting reconcile from the
bank transaction screen opens the reconcile function.
Alternatively you can go directly to the reconcile
function by selecting Activities / Reconcile from the top of the
screen. You will need to select an entry from the account list if you
open the screen from the activities menu.
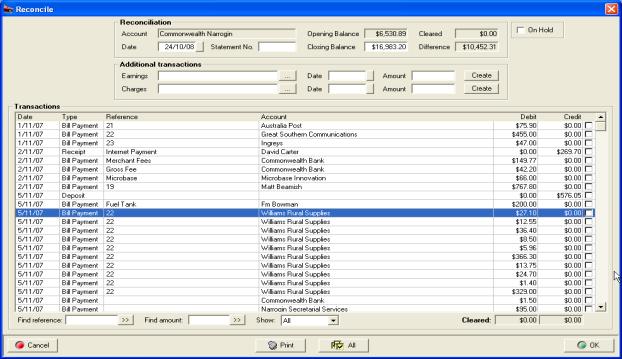
Fig
9.21 Reconcile Screen
Bank
Reconciliation, Processing: First
ensure you are viewing the correct account then perform the following:
1)
The opening balance should
be the same as the opening balance of your current statement (the closing
balance of your last reconciliation).
2)
Enter the closing balance
of your statement into the closing balance field – the difference field
will display the difference between the two values. Bracketed values are
negative ie ($45.60).
3)
Point and click on the selection
field at the end of the line item as you mark off the matching entries
on your bank statement. Note: Credits are deposits or money transferred
to your account / Negatives relate to payments ie: Cheques and direct
debits.
4)
Check the difference is
zero – finalise with OK (F12)
Bank
Reconciliation, Adding Transactions:
If you need to enter additional transactions to balance your reconciliation
use the credit or debit fields located in the additional transactions
section of the screen.

Fig 9.22 Entering Additional Transactions
A value entered in the credit field will increase
your closing balance, entering a value into the debit field will decrease
your bank balance. Select the button to the right of the field to display
your general ledger accounts, highlight your selection and confirm with
OK (F12).
Date
Editing - Auto Easy allows
for editing of the reconciliation date field, once reconciliations are
re-ordered the opening balances will re-calculate from the closing balance
of the last reconciliation based on date hierarchy.
Bank
Reconciliation, Searching Transactions: To
search for a specific record enter the reference or value into the search
fields located at the bottom of the form, point and click on the button
to the right of the field, the cursor will highlight each record that
matches your entry. Click on the double arrow to initialise the search
function. To display credits or debits only select the arrow to the right
of the show field, highlight the required entry and double mouse click.

Bank
Reconciliation, Viewing Transaction Details:
Highlight the line entry and double click or select edit from the bottom
of the display. Transactions can be edited from their respective forms;
changes will be entered directly to the current reconciliation.
Bank
Reconciliation, Posting Discrepancies:
If you complete the reconciliation with the closing balances between your
accounts and the bank statement not equaling zero a message will request
whether you wish to continue or not. Selecting yes will post the difference
to opening balance equity, if you wish to adjust this posting you are
required to raise a journal entry.
Bank
Reconciliation, Editing & Deleting: You
can only edit or delete the most recent reconciliation for each bank or
credit card account. To delete a reconciliation highlight the line item
from the reconciliations screen, point and click the delete option located
on the lower menu bar of the display.
Auto Easy also give you the option to edit the mot
recent reconciliation, to change any previously reconciled items, highlight
the line entry from the reconciliations display and double click or choose
edit from the lower menu bar, the reconciliation will be displayed. Make
the changes including your closing balance and save with OK (F12).
Bank
Reconciliation, Holding: Auto Easy allows you to “hold” an unfinished
reconciliation, select the on hold option from the top right hand corner
of the reconciliation screen. Select Ok (F12) to exit, complete the reconciliation
by de-selecting the on hold option.
Bank
Reconciliation, Select All:
To select all transactions select the All option located st the bottom
of the reconciliation screen.
 Selecting all with select all
outstanding un-reconciled transactions
Selecting all with select all
outstanding un-reconciled transactions
Credit
Card Management
Credit
Cards, Overview: Auto
Easy allows you to have multiple credit card accounts. You can pay suppliers
from these accounts and reconcile your transactions against a statement.
On completing the reconciliation you have an option to process payment
from a bank account. The general ledger accounts contain a credit card
account type which is listed under other current liabilities in your balance
sheet.
|
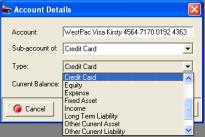
Fig 9.23 Creating A Credit Card Account |
Credit
Cards, Creating A New Account: New
credit card accounts are created from the chart of accounts list, click
on new from the bottom of your listing. At the account form enter the
title of the credit card ie: American Express, Master card, Visa. Select
the button to the right of the type field highlight credit card and double
click.
|
Credit
Cards, Entering An Opening Balance: You
are able to enter an opening balance when creating a new credit card account.
Type the amount into the current balance field and confirm your entries
with OK (F12). Opening balances are posted to the credit card account
and opening balance equity if you wish to transfer the amount from your
equity account create a journal entry.
|
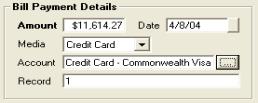
Fig 9.24 Paying A Bill With A Credit Card |
Credit
Cards, Processing A Supplier Payment:
From the bill payment form select credit card as your media from the drop
down menu. Next click on the button to the right of the account field
highlight the credit card account you wish to process the payment from,
confirm your selection with OK (F12). The record number is sequential
however this can be overwritten if required
|
Credit
Cards, Viewing Transactions:
To view bank account transactions select the banking icon from the top
of screen, click on transactions from the menu. The banking screen displays
all transactions month to date for your trading account. To select a credit
card accounts click on the button to the right of the account field and
select from the account list. All transactions for the month to date are
displayed, to view other records use the various filters available from
the bank transaction display.
Credit
Cards, Reconciling: A credit card reconciliation can be started
from either the bank transaction screen by selecting the required credit
card account then selecting the reconcile button at the bottom of the
display. Alternatively you can go directly to the reconcile function by
selecting Activities / Reconcile from the top of the screen. You
will need to select a credit card account from the list, highlight and
confirm with OK (F12) to open the reconcile display.
To complete the reconciliation first ensure
you are viewing the correct account then perform the following:
1)
The opening balance should
be the same as the opening balance of your current statement (the
closing
balance of your last reconciliation).
2)
Enter the closing balance
of your statement into the closing balance field – the difference field
will display the difference between the two values. Bracketed values are
negative ie ($95.60).
3)
Point and click on the selection
field at the end of the line item as you mark off the matching entries
on your credit card statement. Note: Credits are deposits or money transferred
to your account / Negatives relate to payments ie: Cheques and direct
debits.
4)
Check the difference is
zero – finalise with OK (F12)
Credit
Cards, Reconciling Adding Transactions:
If you need to enter additional transactions to balance your reconciliation
use the credit or debit fields located in the additional transactions
section of the screen.

Fig 9.25 Entering Additional Credit Card Transactions
A value entered in the credit field will increase
your closing balance, entering a value into the debit field will decrease
your credit card balance. Select the button to the right of the field
to display your general ledger accounts, highlight your selection and
confirm with OK (F12).
Credit
Cards, Posting Reconciliation Discrepancies:
If you complete the credit card reconciliation with the closing balances
between your accounts and the bank statement not equaling zero a message
will request whether you wish to continue or not. Selecting yes will post
the difference to opening balance equity, if you wish to adjust this posting
you will need to raise a journal entry.
Credit
Card, Processing Payment:
To process payment of your company credit card complete the reconciliation
on selecting OK (F12) a prompt is displayed if you wish to process payment
immediately select yes the transfer form is displayed. From the transfer
form select the account you wish to process payment from. Selecting your
default bank account will enter the next cheque number and the amount
automatically. To complete payment select OK (F12) from the bottom of
the transfer form.
Reconciliations,
Viewing:
To view reconciliations select the banking icon at the top of screen from
the drop down menu select reconciliations a list of previous reconciliations
is in view. To display the details of reconciliation highlight the line
item and double click or select edit (F2) from the bottom of the display.
Note: It is not possible to edit reconciliations once you have saved
the results.
Reconciliations,
Deleting & Editing:
It is possible to delete or edit only the last reconciliation saved,
all previous entries are unable to be altered. To open a reconciliation
highlight the entry at the top of the list point and double click, to
delete select delete and accept the action from the warning message displayed.
Payroll,
Overview: Payroll is an integrated
feature of Auto Easy Ultimate. This comprehensive module allows you to
record employee details, default payroll payment and superannuation information
for both employer and employee funds. The employee form allows you to
select the master account you wish the individual employees wage to be
recorded, payments and deductions can also be allocated to specific accounts.
The employee record gives you the option to record the annual holiday
and sick leave entitlements, Auto Easy will calculate a value for both
of these entitlements as a payroll transaction is processed. PAYGW values
flow over to your tax reports; superannuation is automatically calculated
and posted to a liability account of your choice. Tax is calculated through
a direct link to the ATO tax withholding calculator. Payroll provides
you with a broad range of reports including transaction detail by type
and holiday and sick leave entitlements.
Employee
Records
Payroll,
Employee Details: To enter the details of
a new employee select lists / employees from the top of the screen, select
new from the bottom of the employee listing. The employee form is
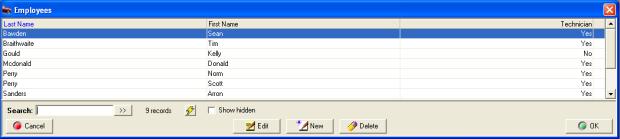
Fig10.01Employee
Listing
tabulated
into three sections; Details, Payroll, Banking & Super. Details contain
information such as address, date joined, special notes and tax file number.
Payroll allows you to record the wage, hourly rate and tax to be paid.
Banking and superannuation is a record of the employee’s bank details
for direct payments and the employer / employee superannuation fund he
/ she belongs to including the policy number.
The
details section
contains the following fields:
Last Name: ie: Smith
First Name: ie: Harry
Middle Initial: ie: P
Employee Number: You can assign employee numbers, this can be as simple
as 1,2,3 etc.
TFN (Tax File Number): Enter the employees tax file number
Joined: Select the start date from the drop down calendar
Left: Date employment terminated
Type: Full Time, Part Time. Casual
(printed on the pay advice)
Class: Prints the relevant employment class on the pay advice
D.O.B: Insert the employee’s
data of birth
Gender: Select from the drop down
list
Technician:
Point and
click if the employee is not a technician
Daily
Hours: Record
the standard daily hours the employee normally works
Hidden: Click if you wish to hide the record from the employee listing
Phone: Home phone contact
Mobile: Mobile phone number if applicable
Notes: ie: supply uniform, employee will not work after hours etc.
Address: Home address
Suburb: Enter suburb press enter, the state and postcode are automatically
inserted
State/City: Auto or manual entry
Postcode / Province: Free typing field

Fig 10.02 Employee Details
Payroll,
Employee Payroll Details: Select the payroll tab from
the employee form to enter pay details. This screen is designed to record
the standard pay details, displayed are 2 grids one displays payments
the other deductions.
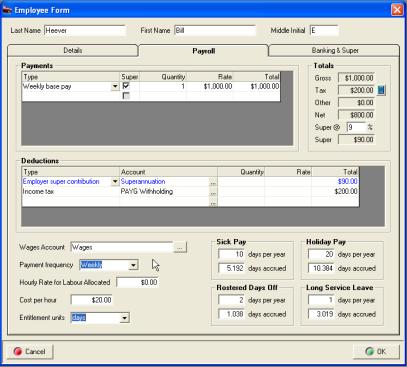
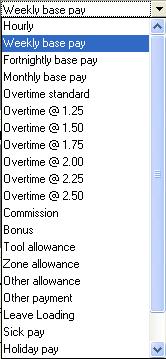
Fig 10.03 Employee Payroll Details
Fig 10.04 Payment Type
Payroll
Payments: To enter the type
of payment click on the arrow in the type field, double click on your
selection. Note: If you are paying a technician hourly based
on hours worked or charged it is not necessary to select a type, enter
the hourly rate in the hourly rate for labour allocated
field at the bottom of the form. After selecting the payment type point
and click in the quantity field if you are paying an employee on a weekly,
fortnightly or monthly basis you must enter a value in this field ie:
1 press enter your cursor moves to the rate field enter the hourly, weekly,
fortnightly or monthly value press enter the total value is now visible
in the total column, press enter to move to the next line.
Payroll,
Allowances: There are 3 Allowance options in the drop
down list – Tool, Zone and other selecting any of these options as a payment
type will display the payment separately on the pay slip and will not
be added to the taxable income. Any value allocated to allowances will
also be displayed separately on the payroll summary form.
Payroll,
Cost Per Hour: If you wish
to enter a calculated cost per hour complete the field provided, if you
wish to apply this value to the job profit report select from File
/ Settings / Database Settings the use employee cost per hour for job
profit report.
|

|
If a payment requires the employer to pay superannuation
point and click in the super check box |
Superannuation:
If a payment attracts an
employer superannuation liability, tick the super check box on the payment
line. To calculate the superannuation liability place a value in the super@
field located to the right of the payment grid.
|
|
The employer superannuation liability is calculated
and displayed in the super field. Flagging multiple entries as incurring
super will change this figure with the calculation based on the total
of all flagged payments. |

The total superannuation value is also displayed
in blue as the first entry in the deductions grid in the lower section
of the form. You will note that as you add deductions to the form the
employer superannuation value is NOT added to the total deductions.
Payroll
Deductions: Deduction types
are selected in the same way as payments, enter the type of deduction
click on the arrow in the type field, and double click on your selection.
Deductions vary from payments as they give you the option to nominate
the account posting. Note: Do not change the posting for
income tax this should always be Tax Payable / PAYGW.
To select an account to assign to a deduction type,
click on the button to the right of the account field displayed in the
deductions grid this will open your chart of accounts giving you access
to your liability and other current assets account.
Payroll,
Calculating Tax Deductions:
Enter the payments, next click on the calculator next to the tax value,
the tax deductible amount is entered and deducted from the taxable gross.
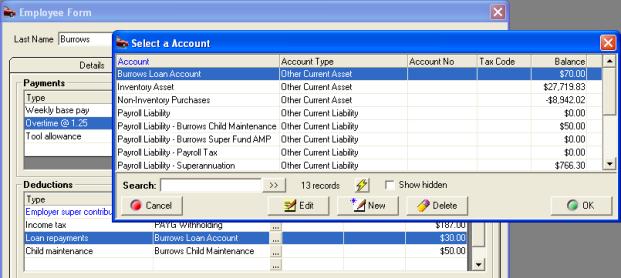
Fig. 10.04 Selecting A Posting Account From The
Deductions Grid
You can only post to account types Long Term Liabilities,
Other Current Liabilities and Other Current Assets. The reason for this
restriction is that deductions will either be for amounts your have to
pay in the future (liabilities) or amounts that have already been paid
(assets) a couple of examples are:
Loans – Imagine you advance your employee a loan
of $100.00 let’s look at how you would record the loan advance and the
subsequent payments through payroll.
To advance the loan transfer funds from the bank
account or Undeposited funds to a current asset account titled employees
loan. The amount is now recorded as $100.00 in the current asset account.
To pay back the loan and deduct the amount from the
employee’s wage, select loan repayment as the transaction type; select
the button to the right of the account field highlight the loan account
select OK. Enter the deduction (loan repayment) in the totals field on
processing you will notice the loan account has reduced by the loan repayment
value.

Child Maintenance – In this example we will assume
that you have to deduct $50.00 a week from your employee which is subsequently
paid to the dept. of social services for child maintenance.
Firstly set up a child maintenance account as a
sub account of payroll liabilities
Allocating a child maintenance deduction from payroll
requires you to select child maintenance from the transaction type list,
select the posting account as child maintenance (the liability account
you have already setup) enter the value of the payment into the totals
field. When processing the payroll transaction you will note that $50.00
has been added to the liability account – Child maintenance.
To pay the child maintenance when advised use the
pay other payroll liabilities option from the activities menu,
setup the dept as a supplier enter into the supplier field enter the date
you are paying to, tick the amount for payment (child maintenance record)
and process in the normal way.
Employee
Superannuation Contributions: Employee voluntary contributions
can be deducted directly from an employee’s wage. It is essential before
selecting this option you record the employee fund name, account number
and date joined in the banking & super section of the employee form.
The employees fund details will be printed on the pay advice only if this
information has been completed.
|
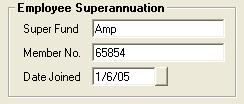
|
To process an employee’s super contribution select
this transaction type from the deductions list, enter the total value
of the contribution and press enter. The value will be added to the liability
account you setup for the posting. Note: Employees superannuation contribution
should always be posted to a liability account so payment for multiple
values can be made to the fund manger. |
Wages
Account: Auto
Easy allows you to create and select a specific account for each employee
or group, it is suggested that if you wish to record wages in this way
you set up a master wages account and add employees or employee group
as sub accounts. Using this method you will totalise wage payments on
your profit and loss – as an example:
|
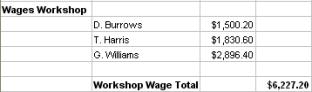
|

To assign a wages account to the employee select
the button to the right of the wages field, select the account from the
list and save with OK. |
Note: Wages can only be assigned
to expense or cost of goods sold account types
|
Payment
Frequency: It
is essential that you choose a payment frequency from the drop down list,
holiday and sick leave entitlements are calculated from this selection.
Nominating a pay period allows you to process payments at any time for
a period in the future; Auto Easy will also prevent you from processing
multiple transactions in a period for an employee. |
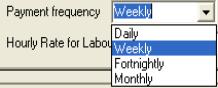
|
Hourly
Rate: Only
complete this field if you intend to pay a technician based on charged
or actual hours worked in a date range. If this is the chosen method of
payment do not enter a base payment into the payments grid.
 Only enter a value if paying
on an allocated labour basis
Only enter a value if paying
on an allocated labour basis
Payroll,
Tracking leave entitlements: For Auto Easy to calculate
holiday and sick leave entitlement it is essential that you select a payment
frequency and enter the annual entitlement in the correct fields. Any
accrued entitlements also require entering on the payroll form. Based
on these values the entitlement is calculated and printed on the pay advice
when a payroll transaction is processed.
|
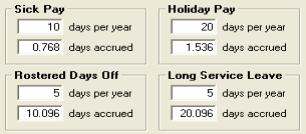
|
Auto Easy will allow you to calculate entitlement
in Days or hour. Enter the annual entitlement into the day / Hours fields
per year for sick pay, holidays, rostered days off and long service leave.
When recording for the first time enter the accrued
value to date into the days / Hours accrued fields. Auto Easy will calculate
entitlements as transactions are processed. |
|
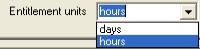
Fig 10.05 Recording Entitlements |
To change the entitlement display to hours or days
select the entitlement units option from the employee form. Note:
Whichever format you choose to record entitlements must be same when processing
payments. |
Payroll,
Employee Banking & Super: To enter the banking and
superannuation details of an employee click on the Banking / Super tab
of the employee form. You can enter bank account details for your reference
when paying employees direct and record the employer and employee’s superannuation
account details.
Payroll,
Salary Sacrifice: If an employee elects
to salary sacrifice into a superannuation fund select the salary sacrifice
option available from the employee / banking & super form. When this
option is selected the contribution is not taxed and the value does not
appear on the employee’s payroll summary.
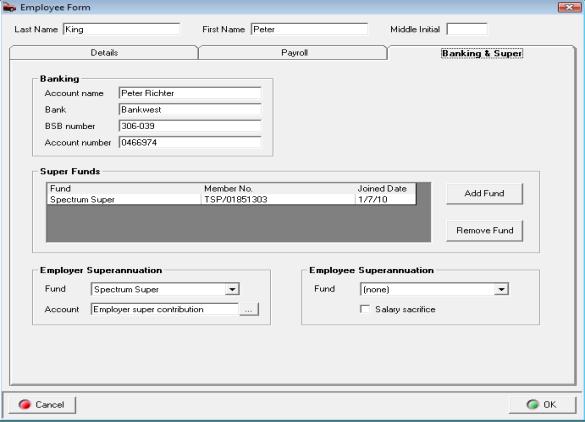
Fig 10.06 Employee Banking & Super Details
It is also possible from this form to select the
employer superannuation posting account, the default is an expense account
titled Employer Super Contribution. Selecting the button to the right
of the account field will give you access to expense and cost of goods
sold accounts you can setup a new entry and allocate the cost of superannuation
to either account type.
Hourly
Rates
Payroll,
Hourly Rates Overview:
Auto Easy allows you to pay technicians based on either hours charged
(invoiced to the customer) or actual hours logged against a jobs for a
set period. The hours charged to a customer are automatically calculated
when a job is closed, the total value can be split between multiple technicians.
You also have the option to record the actual hours worked as these may
vary from the hours charged, payroll allows you to then pay a technician
for a predetermined period by either hours worked or hours charged. You
can also run a productivity report that compares hours worked / charged
by job and technician making it simple to track the “true” productivity
of each technician.
Payroll,
Setting Labour Rates:
To set labour rates open the employee
form ensure the technician option is set to true in the details section
(default).
 Only employees that are set up as technicians will be
displayed in the labour allocation screen displayed when finalising a
job.
Only employees that are set up as technicians will be
displayed in the labour allocation screen displayed when finalising a
job.
 Next you need to enter
the hourly rate in the payroll section of the
employee form, this can be for either hours worked
or charged depending on your payment
method. Save with OK (F12).
Next you need to enter
the hourly rate in the payroll section of the
employee form, this can be for either hours worked
or charged depending on your payment
method. Save with OK (F12).
Note: For this feature to work
correctly it is essential you set up the correct labour rates in your
services file. You have the option to enter three level of charges standard,
wholesale and retail, labour allocated is calculated on the rate applied
to the job or invoice.
Fixed
price services calculate the hours charged on this basis:
(Service Charge) – (Parts value) = (Labour Value) /
(Retail Hourly Rate) = (Hours Charged)
Labour Allocation, Overview:
Auto Easy allows you to track hours charged or worked by technician. Entries
are made on the labour allocation form as a job is closed, labour can
be split between multiple technicians on an hourly or dollar value basis.
The labour allocation form also allows for entry of the actual hours worked
by technician. Labour entries can also be made from an open job card by
selecting the labour button.
Labour
Allocation, Posting: This
task is performed as the job card is closed or by clicking the labour
button from an open job card, the labour allocation form displays automatically
if auto close has been selected from the settings. If you are not using
auto close the labour allocation form needs to be opened by selecting
the labour button from the job update display, the labour allocation form
allows for the allocation of actual hours charged to a single or multiple
technicians. You also have the ability to record the actual hours worked.
If you wish to allocate the total hours to one technician
select with the mouse and click on allocate remainder. All the labour
has now been allocated to the technician selected. To enter multiple labour
allocations select a technician and type in the hours or dollar value
select allocate, repeat this procedure for any subsequent technicians
using allocate remainder on the final entry. When the task is completed
select OK (F12).
|

Fig
10.07 Labour Allocation Form |
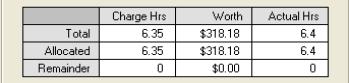
|
|
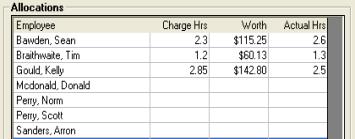
|
The table at the top of the form displays the total
and allocated hours when total hours are allocated the remainder is zero.
To allocate hours to the allocations section click in the charge hours
or worth fields, enter the value and enter. To complete the allocation
highlight the technician and select allocate remainder the unallocated
balance is now applied.
To allocate actual hours worked point and click
in the actual hours field and enter the value, to save your entries select
OK (F12).
Labour
Allocation, Viewing: You
may wish to view previously posted labour allocations, this can be displayed
from a closed job card by selecting the labour button located to the right
under the parts and labour section of the display.
 Labour can only be viewed from
closed and open (if allocated) job cards.
Labour can only be viewed from
closed and open (if allocated) job cards.
Labour
Allocation, Editing: Labour
allocations can be edited from a closed job card by selecting the labour
button; it is possible to reallocate labour as required. If you wish to
delete all previous allocations select the clear option from the allocation
form. Save your changes with OK (F12).
Labour
Allocation, Adding New Technicians:
From the top of the screen select lists / employees from the bottom of
the display select new, the employee form is now in view complete the
details, payroll, banking and super sections. Ensure the technician option
is selected and save with OK (F12).
Payroll
Transactions
Payroll,
Payments Overview: Auto Easy
gives you the option to process payroll payments on an hourly, weekly,
fortnightly or monthly basis. You can authorise payment from any bank
account or undeposited funds, Superannuation is automatically calculated
from the percentage rate entered in the employee record. Withholding tax
is calculated from the payroll transaction form using the ATO tax calculator;
payments of PAYGW are processed from the pay tax option. Payroll has the
ability to export a file in the format required to process EFT payments
through the National Australia Bank.
Payroll,
Accessing:
To open the payroll module click on the payroll icon located at the top
of the screen.
 Click on the payroll item to
process payments
Click on the payroll item to
process payments
The payroll screen includes a list of payroll payments
processed including the ability to filter by employee and date range.
You can edit, create new and delete payroll transactions from this screen
Note: It is not possible to edit or delete reconciled transactions.
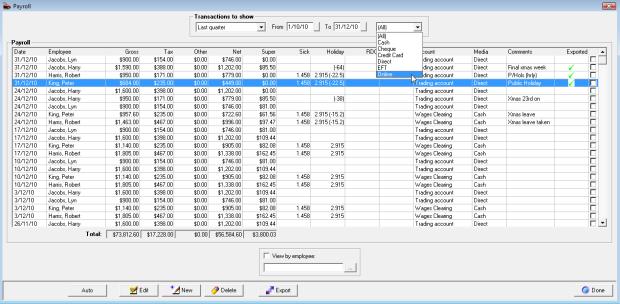
Fig 10.08 Payroll Display
Payroll,
Filtering By Employee:
To filter by employee from the payroll screen select the button to the
right of the employee field, the employee list is in view. Highlight the
record you wish to view, confirm with OK (F12) the employee name is now
displayed in the field. Point and click on the view by employee selection,
only transactions for the selected record are now displayed.
Payroll,
Filtering By Date Range: It
is possible to select another period by clicking on the button to the
right of the month to date field, from the drop down menu point and click
on the period you require. You can also select the - from to dates - by
either typing into the fields at the top of form in DD/MM/YY format or
selecting the button to the right of the - from / to - boxes and double
clicking on the date required. Today’s date is highlighted in red, to
move between months select the arrows at the top of the calendar form.
Payroll,
Filtering By Payment Type:
Option to view transactions by payment type
Payroll,
Editing Payments:
Highlight the transaction from the payroll screen, double click or select
edit (F2) from the bottom of the screen, make the changes and save with
OK (F12).
Payroll,
Exporting Data: Auto
Easy has the ability to create an export file in a format required by
the National Australia Bank to process wage payments electronically. For
this feature to work first process pays in the normal way, next point
and click in the check boxes to the right of the records you wish to export.

 Click on the export button at
the bottom of the display, from the save in screen select the folder in
which you wish to store the NAB.ABA file, click save to complete the process
a message is displayed confirming the file path, when a record is selected
for export a green tick is displayed in the exported column. Note:
Before passing this file onto your bank, please ensure the format meets
their requirements.
Click on the export button at
the bottom of the display, from the save in screen select the folder in
which you wish to store the NAB.ABA file, click save to complete the process
a message is displayed confirming the file path, when a record is selected
for export a green tick is displayed in the exported column. Note:
Before passing this file onto your bank, please ensure the format meets
their requirements.
Payments
Payroll payments can only be processed from the payroll
screen. Select the payroll icon and new from the bottom of the display
to view the payroll transaction form.
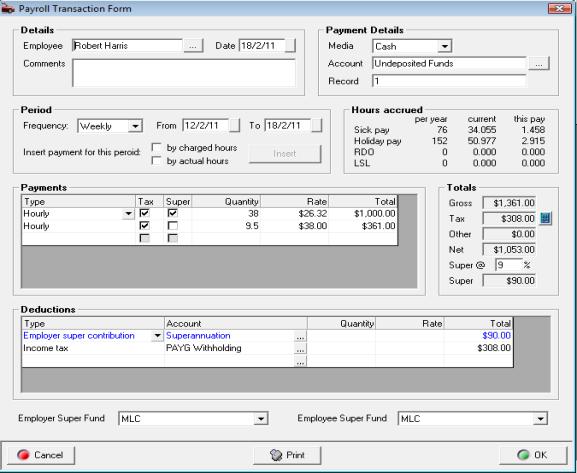
Fig 10.09 Payroll Transaction Form
Select the employee by clicking on the button to
the right of the employee field. If you are paying an employee that is
on a fixed wage or salary the details entered in the employee record will
automatically be entered in the amount section of the form.
If amounts vary or you wish to add extra payments
to the form point and click on the first empty line, from the drop down
menu select the payment type, press enter your cursor will move to the
quantity field if you are paying a set amount enter 1 press enter and
type the value into the rate field press enter twice to move through the
total field onto the next spare line.
To process payment by the hour enter hours in the
quantity field and the hourly value in the rate field, total payment is
automatically calculated and added to the total column. Ensure you flag
all items in the payment grid that attract employer superannuation liabilities.
Tax
Option: When selected the
payment will be taxed if left unchecked then the payment will be excluded
from the taxable gross income.
Payroll,
Paying Holiday & Leave Entitlements: When processing holiday or leave entitlements
it is essential that you choose the correct payment type from the drop
down list and enter into the quantity field the amount of days or hours
you wish to deduct from the total accrued to date. When paying leave loading
the value will automatically be entered based on 17.5% x holiday pay.
The value can be edited if required.
|
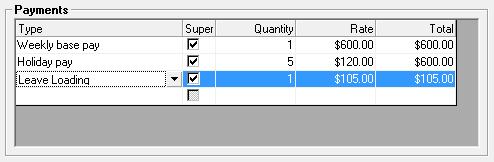
|
When processing holiday or sick leave payments you
must enter the amount of days you wish to deduct from the total accrued
into the quantity field |
Fig. 10.10 Processing Holiday Or Sick Leave Payments
Payroll,
Processing By Hourly Rates: To
pay a technician by hours worked or charged you first need to have the
employee set up as a technician and an hourly rate entered in the payroll
section of the employee form. Select the employee from the payroll transaction
form. Select whether you wish to pay the employee for the period displayed
(automatic entry based on pay frequency and last end of period date) on
a by charges or actual hours worked basis. Select insert, the total hours,
hourly rate and total value will be displayed in the payments grid.
|
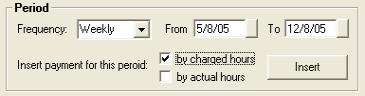
|
To pay a technician
on an hourly basis you must have an hourly rate recorded in the employee
form.

|
Note:
There are 3 Allowance options in the drop down list – Tool, Zone and other
selecting any of these options as a payment type will display the payment
separately on the pay slip and will not be added to the taxable income.
Payroll,
Multiple Payment Function: Selecting
the Auto option from the bottom of the payroll transaction listing initiates
an auto-run process for payroll payments. Select Auto from the bottom
of the screen a list of employees is displayed, point and click on the
check box to the right of the record to include employees you wish to
include in the payment run. Select OK, the transactions are processed
including pay slip printing.
|
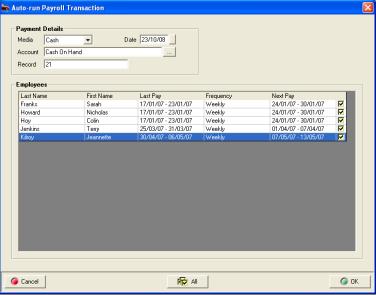
Fig
10.11 Processing multiple payroll payments |
Payroll Multiple Payments, Notes:
The auto feature can only be used if all payments
are being paid from the same account ie: payroll clearing, all payments
will have the same reference number allocated so if paying by each individual
by cheque you will have to edit the transaction to correct the reference,
this can easily be performed from the payroll transaction listing.
To be effective this feature also requires you to
be paying the amount recorded on the employee form; again values can be
altered if required after processing by accessing the payroll transaction
list.
If you wish to select all employees click on the
all option at the bottom of the screen. |
|
Default
Wage Payment Account: To
record a default wage account open settings from the file menu click on
the accounts tab. Select the payment media and account from the
drop down menu. Save your settings by exiting via OK or F12
|
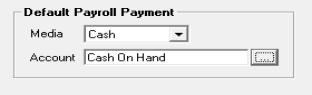
|
Deductions
Auto Easy provides you with the ability to calculate
income tax liabilities plus deduct employee superannuation contributions
and allocate other payments to liability or other current asset accounts.
Deductions are taken away from the gross payment with the net payment
being paid from your nominated account.
Payroll,
Calculating Income Tax:
When you load Auto Easy you are given the option to install the TWC program
if this is loaded you will be able to access the tax calculator directly
from the payroll transaction or employee form. To calculate the taxes
you are required to withhold select the TWC button to open the calculator.
You next need to enter the calculation criteria for your employee, once
the entries are complete select the calculate button to display the amount
you need to enter into the tax field of the payroll transaction form.
Payroll, Recording Other Deductions: Deduction
types are selected in the same way as payments, enter the type of deduction
click on the arrow in the type field, and double click on your selection.
Deductions vary from payments as they give you the option to nominate
the account posting. To select an account to assign to a deduction type,
click on the button to the right of the account field displayed in the
deductions grid this will open your chart of accounts giving you access
to your liability and other current assets account.

Fig. 10.12 Select An Account You Wish The Deduction
To Be Posted To.
You can only post to account types Long Term Liabilities,
Other Current Liabilities and Other Current Assets. The reason for this
restriction is that deductions will either be for amounts your have to
pay in the future (liabilities) or amounts that have already been paid
(assets)
|

|
Payroll,
Transaction Summary: The payroll
transaction summary is displayed to the right of the payments grid. Gross
is the total transaction (not including employer superannuation contribution)
deduct is the total deductions including income tax. Net represents the
actual amount to paid to the employee and deducted from the employer’s
nominated account. The super @ field displays the percentage at which
superannuation is calculated, this can be changed by pointing and clicking
in the field and overtyping the current value. The Super field records
the total employer superannuation contribution for the payroll transaction. |
Fig 10.13 Transaction Totals
|
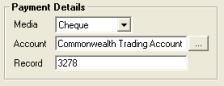
|
To finalise the transaction you need to nominate
the payment type, select button to the right of the
media field, selecting cheque will insert your default bank account and
the next cheque number. Selecting other media requires you to choose the
account that you are processing payment from. To record the transactions
select OK (F12). |
Fig 10.14 Payment Details
Reports
Overview:
Payroll provides the operator
with a comprehensive range of reports, including a detailed pay advice
and a selection of transaction reports. The pay advice is printed from
the payroll transaction form, payroll detail reports can be accessed from
the reports menu.
Payroll,
Printing A Pay Advice: Complete all the details on the
payroll transaction form as previously described, select the print button
located on the lower menu bar, your employees pay advice is displayed
on screen.
The advice is split into the following sections:
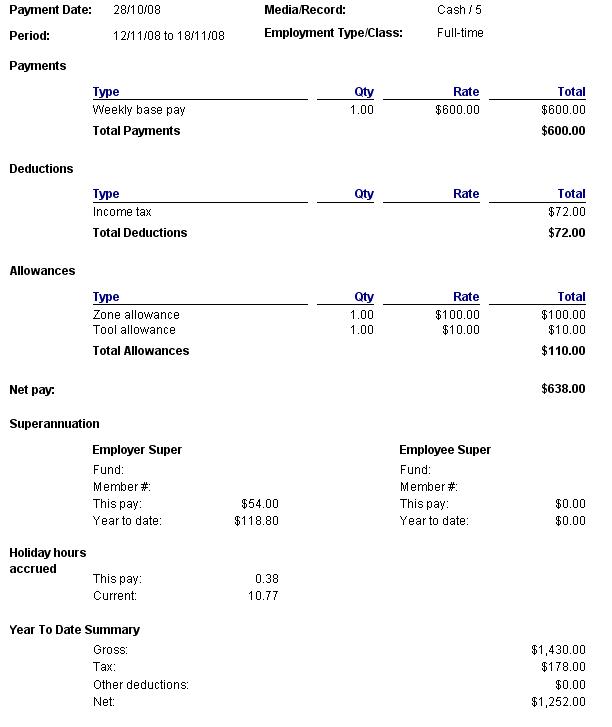
Note: It
is essential that you complete the fund details on the employee form for
this information to print on the pay advice
Holiday
Days / Hours Accrued To calculate
holiday days or hours accrued the days / hours per year field in the employee
form MUST contain a value. Any used holiday payments must be recorded
in the quantity field of the pay transaction in days or hours depending
on how you record your employee entitlements.
Reports,
Payroll:
Transaction reports are
accessed fro the reports menu in the payroll group
|
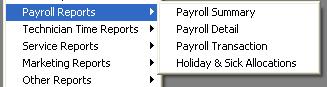
|
Click on the reports option at the top of screen,
move your cursor down to Payroll Reports, the sub menu is displayed. To
select a report point and double click on the descriptor. All reports
can be filtered by data range and employee. |
Fig 10.15 Accessing Payroll Reports
Payroll
Summary: Summarises all payments
made in a chosen date range by employee

Payroll
Detail: Provides details of
each pay transacted in a given period including the method and payment
reference.
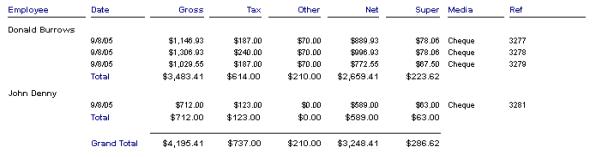
Payroll
Transaction: Displays details
of all payment and deduction types for a given period by employee
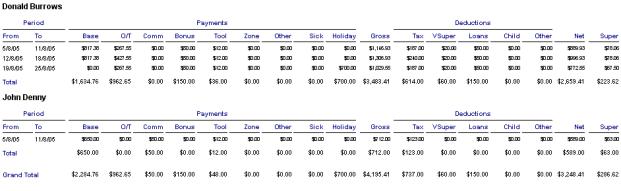
Holiday,
Sick, RDO & LSL Allocations :
Displays holiday and leave entitlements for each pay by employee, displaying
credits and debits for both entitlement types

Group
Certificate, Printing: To
print group certificates, select reports PAYG Payment Summaries
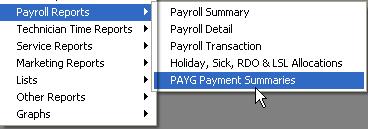
Select whether you wish to print certificates for
all employees or individuals, next enter the date range and proceed with
OK.
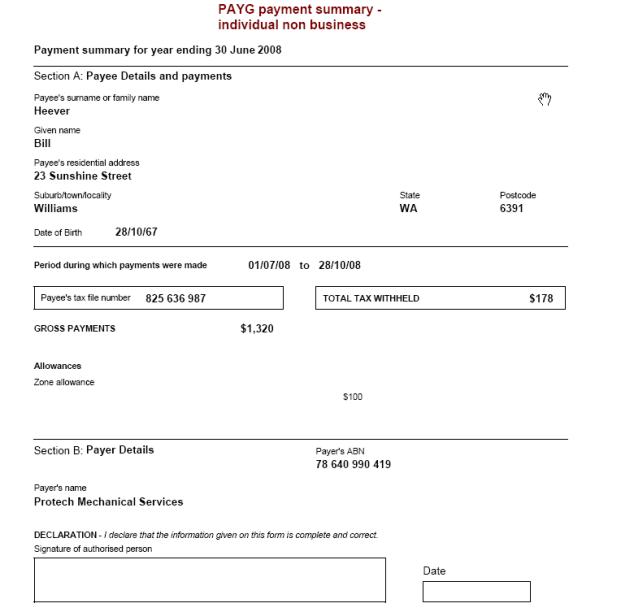
PAYG
Payment Summary – Report available
under payroll reports – PAYG Payment Summary Statement, the report displays
a summary of all group certificates for a specified period.
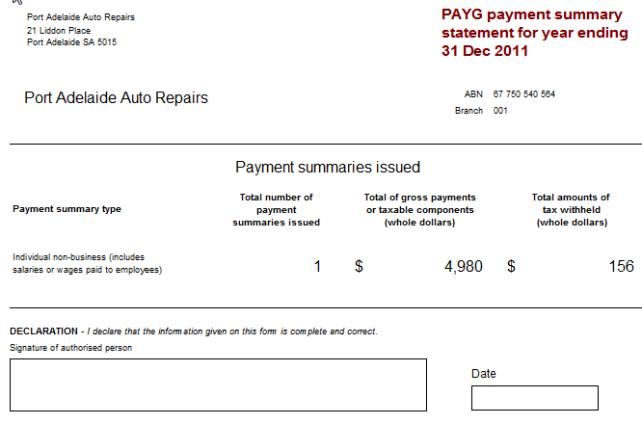
Other
Payroll Liability Payments
Overview:
All liabilities relating
to payroll payments must be setup under payroll liabilities, this way
the accounts can be viewed from the pay other payroll liabilities (option
from activities) for easy payment processing. Samples of the accounts
you would post to payroll liabilities include superannuation, child maintenance
deductions and employee voluntary superannuation payments.
One of the main advantages of using the pay other
payroll liabilities feature is the ability to view values as of a certain
date, as most of the liabilities incurred would be paid on a monthly or
quarterly basis it is easier to view and process payment as of a certain
date rather than subtracting from the current value.
Superannuation,
Payments: The
balance of the superannuation account is generated from the gross wages
paid over a selected period multiplied by the superannuation percentage
of each employee. You will probably pay this liability on a monthly basis,
Auto Easy allows you to process payment via a special Pay Superannuation
feature which operates in a similar way to the Pay tax function.
Superannuation,
Processing Payment:
Select Activities / Pay Superannuation from the top of the
screen. The superannuation payment form is in view, select the button
to the right of the supplier field, highlight the payee from the supplier
listing ie: AMP and confirm with OK (F12). Next select the show balances
as of date by clicking on the button to the right of the date field select
your “cut off” date from the calendar. Click on select all. The total
amount is entered in the amount field, select the payment media, account
and edit the record if required. Confirm the Superannuation payment by
selecting OK (F12). Note: Auto Easy allows you to have one superannuation
account which is automatically set up as a sub-account of payroll liabilities;
you can however process payments to different superannuation funds. In
these examples we are processing a payment to AMP. Our superannuation
balance is $1,231.49 as of the 31st. July 2004.
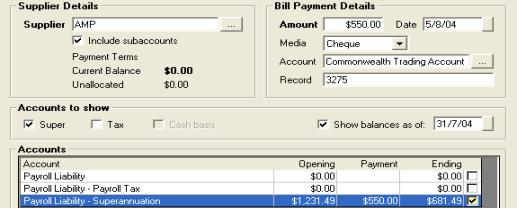
Fig
10.16 Paying Superannuation
In the previous
example we process a $550.00 payment to AMP leaving us an outstanding
balance of $681.49 to be paid to Mercantile Mutual. Confirm the payment
with OK (F12). Select pay superannuation from the activities menu the
superannuation form now displays a balance of $681.49 as of the 31st.
July 2004. Complete the bill payment details and process payment with
OK (F12). Closing balance of
your superannuation liability for 31st. July 2004 is now zero.
Superannuation,
Editing Payments:
Open bill payments from the accounts icon, highlight the record you wish
to edit open the superannuation payment form by double clicking on the
transaction or selecting edit (F2) from the bottom of the display. It
is now possible to select or de-select payment allocations by clicking
in the selection field aligned to the transaction; you can also alter
the payment amount. To save your changes select OK (F12).
Superannuation,
Deleting Payments:
Payments can be deleted from the bill payments display by highlighting
the record you wish to remove and selecting delete from the bottom of
the screen, confirm the deletion at the warning message. When a payment
is deleted superannuation payments are reversed. It is not possible
to delete a payment if it forms part of a reconciled transaction
Superannuation,
Viewing Payments:
Go to the bill payments screen, select the entity you pay to from the
supplier list by selecting the button to the right of the supplier field
and click the view by supplier option. Next select the period or enter
the date range for the transaction you wish to view. To view the details
of a transaction double click on the transaction or select edit (F2) from
the bottom of the display.
Other
Payroll Liability Payments: In
this example we will imagine that we have deducted child maintenance payments
from an employee’s salary and we have received notification from the Department
of Family Affairs to pay last months deductions – The process you would
follow is:
1)
Select child maintenance
as a deduction from the deductions grid of the payroll transaction form,
attach this deduction to a payroll liability account title child maintenance
payments.
2)
To pay the amount owing
firstly setup the Dept. Of Family Affairs as a supplier, next open the
Activities / Pay Other Payroll Liabilities Screen and select the Dept.
Of Family Affairs as the supplier.
3)
Tick the show balances
as of option, enter the date you wish to pay to and press enter the values
will recalculate in the form grid.
4)
Tick the value on the Child
Maintenance payments line, this amount will be posted to the amount field,
next enter the payment media, account and record.
5)
Select OK (F12) to process
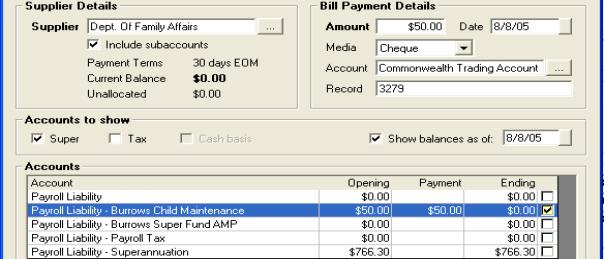
Fig. 10.17 Paying Other Payroll Liabilities
Any payroll liability can be paid in the same
way, it is also possible to tick multiple amounts for payment ie: employer
and employee superannuation payments if they are being paid to the same
fund manager.
Superannuation
Funds, Recording: On the employee
form you have the ability to record the superannuation fund both for the
employer and employee (they may be different) at the bottom of the payroll
/ payments form the super fund is displayed for both employer and employee
contributions. A superannuation contributions report can be run from reports
/ payroll which lists all contributions by employee and superannuation
fund.
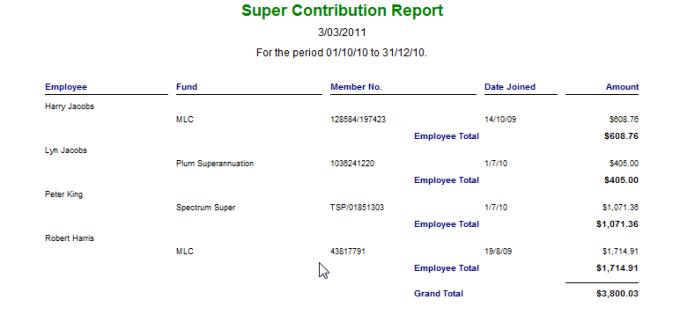
Super Contribution Report
Fleet
Management, Overview:
The fleet management module allows an operator to manage the service schedules
for multiple fleet companies based on the odometer reading. Functionality
includes the ability to import service schedules from existing vehicle
records. The dedicated management screen allows the fleet operator to
update current odometer readings by vehicle and create bookings / open
jobs directly from the service schedule display. It is also possible to
filter information from the display by vehicle, company or vehicles due
for service. This module allows the operator to run a fleet service report.
Data can be sorted by odometer range and service status including due,
booked, quote, work in progress and completed. Service status can be viewed
by single of multiple selections.
Fleet
Management, Registration:
To access the fleet management module you need a registration code from
Genesis Australasia, this is an extra module that is not opened by the
standard program code. To enter the code select File / Registration
from the top of the screen type the 16 alpha / numeric code into the appropriate
fields, if this is done correctly a green tick will replace the red cross
at the end of the row save your entry with OK (F12).
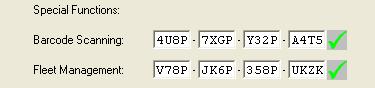
Fig
11.01 Fleet Management Registration
Fleet
Management, Vehicle Set Up: To set up a fleet vehicle
it is important you perform the following:
Open the vehicle listing from and select edit
for and existing vehicle or new to set up a new vehicle. Update the current
odometer reading; select the servicing tab next select fleet vehicle clicking
on the selection located between the service reminder and service schedule
buttons displayed on the vehicle form. Selecting this option will allow
the operator to access the service schedule option.
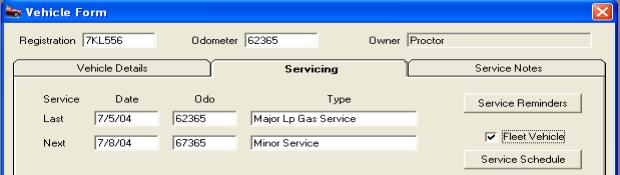
Fig
11.02 Selecting The Fleet Vehicle Option From The Vehicle Form
The service schedule button is not accessible
until the fleet vehicle check box is ticked
Note – The odometer must be
updated before the fleet flag is set to true, if this procedure is followed
correctly services due prior to the current odometer reading in
existing schedules
will be ignored.
Service
Schedules
Fleet
Management, Service Schedules: To access select the
service schedule button from the vehicle form, the service schedule form
is displayed. It is possible to create a new or import an existing schedule
from a fleet vehicle.
New
Service Schedules – Select
new from the bottom menu bar of the service schedule display, this action
opens the services file. Select the services you wish to add to the schedule,
if the services do not exist select new from the bottom menu bar of the
services list and add a service in the normal way. It is possible to select
single or multiple services to add to the service schedule. Confirm your
selections with OK (F12) from the select services screen. Next you need
to enter the kilometres each service is due at in the service schedule
entry form. Confirm your entries with the OK (F12).

Fig 11.03 Adding Multiple Services To A Service
Schedule
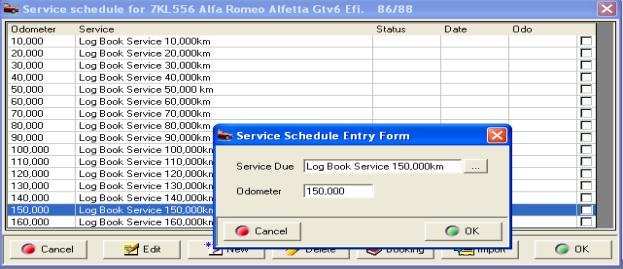
Fig 11.04 Linking An Odometer
Reading To a Service
It is important you enter the kilometers at which
the service is due, not the duration between services. If services are
due before the current odometer reading they will be ignored.
Service
Schedules, Importing - From
the bottom menu bar of the service schedule screen select import, this
action displays the select a fleet vehicle screen. This listing allows
for search functions exactly the same as the standard vehicle listing,
for example if you wish to search by vehicle model point and click on
the model column header, which will now display in blue. Type into the
search field Commodore, the first Commodore on the list is displayed;
it is also possible to search the list for other Commodores by selecting
the arrow to the right of the search field.
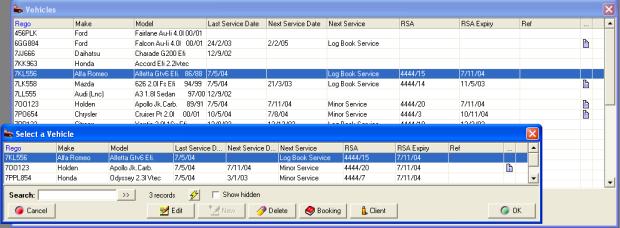
Fig 11.05 Selecting A Schedule For Import
When you have located a vehicle with a service schedule
you wish to import highlight the record and select OK. The service schedule
to be imported is displayed; save to the original vehicle by selecting
OK, if the schedule is incorrect select cancel, you will now be able to
search the fleet vehicle listing for an alternative
Fleet
Management, Service Schedules Deleting & Editing: It
is possible to delete or edit a service in the schedule by opening the
vehicle form, selecting service schedule and edit or delete from the lower
menu bar of the display.
Deleting – Highlight the record,
select delete and confirm your choice from the remove services message
box by selecting yes.
Editing – Highlight the record,
select edit to display the service schedule entry form, it is possible
to change the odometer entry or service. To change the odometer delete
the current value and re-enter, select the button to the right of the
service field to display the service listing, select the new service and
confirm with OK (F12)
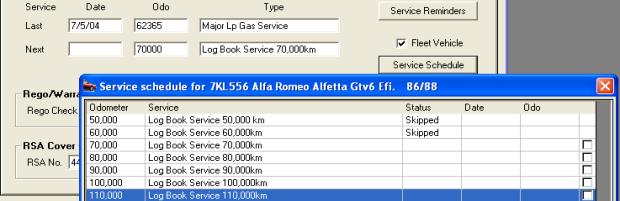
Fig 11.06 Viewing A Vehicle Service
Fleet Management Functions
Fleet
Management, Function Screen: To
access the fleet management screen select Management / Fleet Management
from the diary screen this selection will display the main fleet management
screen from which you can perform the following:
§
View
all fleet vehicles
§
Filtering
of fleet vehicles by client, vehicle registration or services due
§
Update
odometer readings
§
Addition
of new fleet vehicles from the current vehicle listing
§
Ability
to remove fleet vehicles
§
Create
a booking for vehicles with services due
§
View
service history
§
Run
a fleet service report based on service status and odometer range
Viewing
Fleet Vehicles - The fleet management screen
displays the following information:
ü
Client
/ Company =
Registered owner of the vehicle, this field is the index for the display
ü
Registration
= Vehicle registration
ü
Make
= Make ie: Holden,
Ford Mitsubishi
ü
Model
= Model ie: Commodore,
Falcon, Magna
ü
Odometer
= Free typing field
allowing entry of current odometer
ü
Last
Entered
= Last date the
odometer was updated
ü
Next
= Next scheduled
service due
ü
Odo
= Preset odometer
reading for the next service
ü
Last
Service
= Last service type
ü
Date
= Date of last service
ü
Odo
= Odometer reading
when the last service was performed
Records that have the next and Odo fields displayed
in red indicate a service is due for example: Kilometres entered 31,203
service is due at 30,000 the record will highlight in red.
Viewing
The Vehicle Record
- Highlight the record you wish to view and select the vehicle button
from the bottom menu bar, it is possible to edit the record or change
the vehicle owner at this point. Save the changes by selecting OK from
the bottom of the vehicle form.
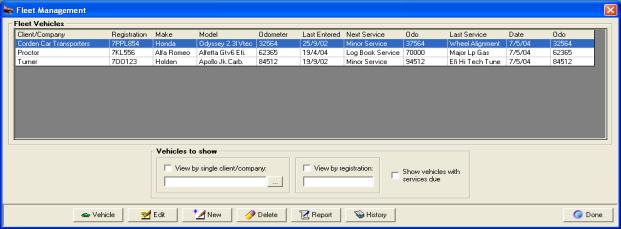
Fig 11.07 Fleet Management Display
Filtering
Records - It
is possible to filter displayed records in three ways, selections can
be single or multiple
View
vehicles by client
– Select the button to the right hand side of the field, the client listing
is displayed highlight the client and select OK from the bottom menu bar
of the client listing. The client name will be displayed in the field,
next point and click in the box provided. Only vehicle records that are
flagged fleet for the selected client are displayed.
View
by registration
– Enter the registration number into the field, select the box provided.
Only the selected vehicle will be displayed.
Viewing
vehicles due for service
– Select the box provided; only vehicles due for service are displayed.
It is possible to make multiple selections for example selecting a client
and services due will only display vehicles with a service due for that
fleet.
Updating
Odometer Readings - The
module allows for easy entry of current odometer readings. Point and click
in the odometer field of the record you wish to update, the cursor is
now positioned to the right of the current entry, type the new value.
Save by pressing enter (this will move the cursor to the next entry in
the list) or use the up / down arrow keys.
Note: As entries are made if
the vehicle is due for service the record will highlight in red
Adding
New Fleet vehicles - It is possible to add new
fleet vehicles from this screen by selecting new from the bottom menu
bar. The vehicle listing is displayed; highlight the record you wish to
add select OK from the vehicle listing. At the service schedule either
enter a new schedule by selecting new or select import to attach an existing
vehicle schedule to the new fleet vehicle. Select OK to save the displayed
schedule.
Removing
Fleet Vehicles - Highlight the record you
wish removed and select delete from the bottom menu bar, select yes from
the warning message. The vehicle now removed from the display.
Note: Only vehicles flagged
fleet will be displayed on from the fleet management screen, selecting
remove the fleet flag this function does not remove the vehicle from the
vehicle database.
Viewing
Vehicle History – Highlight
the vehicle record and select the history button from the bottom of the
display. This action opens the client form with transactions for the selected
vehicle displayed, to view details point and double click on a line item.
Bookings
Fleet
Management, Creating A Booking: From
the fleet management display point and double click on the vehicle record
you wish to create a booking for. Select a service / services you wish
to include in the booking by pointing and mouse clicking on the line item,
a tick is displayed in the box at the end of each row. When selection
is complete select booking from the lower menu bar of the display, this
will open the booking form. Create the booking in the normal way; selecting
OK from the booking form will display the service schedule form. The status
of selected jobs will have changed to booked or work in progress if the
job card has been created from the booking form.
Reporting
The fleet management module allows the operator
to filter information by the following criteria:
§
Odometer
Range
§
Service
Status
§
Fleet
Vehicles
Reports,
Fleet Management: To
run the report select report from the bottom menu bar of the fleet management
screen from the fleet service reports option display enter the criteria
you wish to search by. Selections can be singular or multiple.
Odometer
Range
– Any reports on all odometer ranges, specific allows for the entry of
a from / to value ie: 50,000 – 70,000.
Service
Status – The
operator can make singular or multiple choices from the selection ie:
Due and booked will only display vehicles that are due for service or
already have a current booking.
|
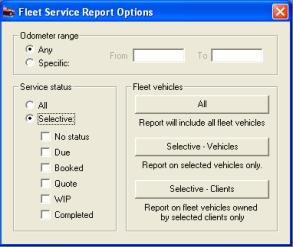
Fig 11.07 Fleet Service Report Options
|
Fleet
Services
– All selects all fleet vehicles. Selective vehicles allow the operator
to select specific vehicles from the fleet vehicle listing. Selective
clients open the client listing allowing for singular or multiple selections
of clients.
When filtering a report by fleet selection always
select the odometer and service status first if applicable.
|
Fig 11.08 Fleet Service Report
Task
Manager, Overview: Auto Easy incorporates a
powerful and yet user friendly task manager. This module allows the user
to set contact and local tasks, appointments and record organisation procedures.
Task functions are seamlessly linked to the marketing options within the
program ensuring that the operator follows through on any recorded contacts.
Tasks and appointments can be viewed on a daily or weekly basis, the status
of a task is icon flagged.
It is possible once security has been enabled
to set tasks for user groups, individuals or all operators. Once an operator
logs on only tasks and appointment relating to that operator will be displayed.
When tasks are completed the item is operator, date and time stamped providing
administrators with an audit trail of tasks.
Checklists can be created and attached to a task,
these can be printed and the individual checks ticked on completion. Notes
relating to the task can be made on the task form.
Integrating the task manager to marketing functions
allows you to operate your business more efficiently for instance you
are able to record a task directly from a marketing search. The item will
appear in your task list with an icon displaying the progress to date.
Authorised users have the ability to setup
reminders that “pop up” at a predetermined time ie: 30 minutes before
an appointment. This feature will be available to all users in February
2005.
Task Manager Functions
Task
Manager, Accessing: You access the task manager
from your diary screen, select the diary icon from the top tool bar, in
the top right hand corner of the diary screen you will see five icons,
the last one is a telephone; select this to view the diary screen of the
task manager.
|
|
Selecting the first icon and than the telephone
will display the task manager in day view. To change the display to week
view select the second icon with the eight squares. The screens automatically
default to today (day View) or this week (week View).
|
|
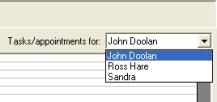
|
If a user has permission to set-up tasks for
other users set to true in security settings it is possible to select
a user from the drop down list located on the top right hand corner of
the diary screen and add tasks and appointments. Note: The
drop down list is only available to users with the correct permissions.
|
Task Manager, Changing The Date: To the right of the view
selection are your date selection controls, you can select a date using
the button to the right of the date field. From the calendar point and
double click on the date required your selection will be entered into
this field with the diary screen displaying records for the chosen date.
It is also possible to manually enter a date by highlighting the current day field,
selecting delete then typing the date you wish to move to in a DD/MM/YY
format.
 Positioned
to the right of the date field are the date controls
Positioned
to the right of the date field are the date controls
Date Field
1 2 3
4 5
v
1 = Back
one week
v
2 = Back
one day
v
3 = Always
selects today
v
4 = Forward
one day
v
5
= Forward one week
Multiple selections will move the date forward
or backwards a week or a day at a time depending on the control in use.
Task
Manager, Day View: Selecting
day view displays the screen split into two sections, tasks and appointments.
Tasks are listed with an icon indicating the task status – Icons represent
the following:
·
Clock –
A reminder has been set and the task is pending
·
Exclamation
Mark – Task is pending and overdue
·
Green Tick
– Indicates the task has been completed
Tasks have titles that are displayed in the
titles list, to create a new task select the last line which displays
the words < Create New Task >
Local tasks are displayed in blue, contact tasks
are coloured green
Fig 12.01 Task Manager Day View
To The right of the task manager screen is the
appointments list, appointments are set with a from / to time which is
displayed as a yellow block in the specified time cells. Appointments
can be made for any time frame in 15 minute intervals. Title of the entry
is displayed in the appropriate cell.
Task
Manager, Printing Tasks Appointments:
Auto Easy allows you to print a task or appointment log of all items displayed
on the screen. Select the print button at the top of the screen an option
to print either
the task or appointment log is displayed on selecting the items recorded
for the day assigned to the user will be printed. If the task has been
completed the date / time / user / notes are printed.
Task
Manager, Week View: You have
the option to view a week of tasks and appointments, to display the week
view select the second icon with eight squares positioned at the top of
the diary screen. The week view is split into 7 days recorded are the
appointments and tasks including the start and finish times.
Fig
12.02 Task Manager Week View
The eighth grid displays tasks for the week including
title and status, it is possible to enter new appointments and tasks by
selecting the < create new > option in the day or task cells.
Printing,
Weekly Appointments And Tasks: Selecting the print option in week view
displays an option to print either the tasks or appointments for the week.
Both the appointment and task log are displayed
on screen, to print select the print icon on the top right hand side of
the print screen.
Note:
Only tasks and appointments relating to the current user are displayed,
if a user is authorised to create tasks or appointment for other users
the created item will not be displayed on the current users screen. To
view these entries the user would have to log off, then log back on as
another user.
Task
Manager, Creating A New Appointment: Point
and double click on the time cell you wish the appointment to start at,
this action will open the appointment form.
|
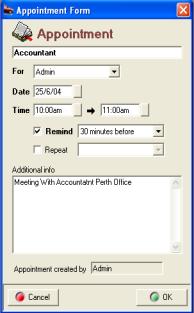
Fig 12.03 Appointment Form |
Enter a title for the appointment, next select
the arrow to the right of the for field. A list of options is displayed
including the ability to set the appointment for a specific user (if the
current user has the authority) The date will automatically default to
today in the date field, if you wish to change this select the button
to the right, point and double click on your selection; the date is entered
in the field. Next select the time you wish to perform the appointment
to commence and the finish time.
If you wish to be reminded (authorised users
only) select the remind option followed by the down arrow to the right
of the field displaying 30 minutes before, make your choice from the drop
down menu by double clicking. The reminder can also be repeated on a daily
/ weekly / fortnightly or monthly basis. Select repeat followed by the
field to the right of your selection
Finally you can enter notes relating to the purpose
of the appointment. |
Task
Manager, Viewing An Appointment: Details
of an appointment can be viewed from either the diary screen in week or
day view by pointing and clicking on the entry
Task
Manager, Editing An Appointment: To
edit an appointment go to diary day or week view, point and double click
on the appointment you wish to edit, make the changes and save using OK
(F12).
Task
Manager, Deleting An Appointment: If
you wish to delete an appointment open the task manager in day or week
view, highlight the entry you wish to delete and press the delete button
on you keyboard, confirm your action from the message box by selecting
yes.
Task
Manager, Creating A New Task:
To create a new task select and double click- create new task from the
task cell (week view) or the task list (day View). The local task form
is displayed.
|
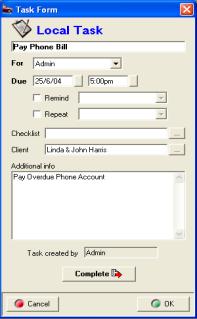
Fig 12.04 Task Form |
Enter a title for the task in the first field,
next select the arrow to the right of the for field. A list of options
is displayed including the ability to set the task for a specific user,
group or anyone. The date will automatically default to today in the due
field, if you wish to change this select the button to the right, point
and double click on your selection; the date is entered in the field.
Next select the time you wish to perform the task. If you wish to be reminded
(authorised users only) select the remind option followed by the
down arrow to the right of the field displaying 30 minutes before, make
your choice from the drop down menu by double clicking. The reminder can
also be repeated on a daily / weekly / fortnightly or monthly basis. Select
repeat followed by the field to the right of your selection.
Checklists can be attached to a local task, select
the button to the right of the checklist field. Stored checklists are
displayed, make your selection and press OK. The title of the checklist
is now visible. It is possible to link this task directly to a client
in which case it is converted from a local to a contact task. |
Task
Manger, Creating A Contact Task:
Select the button to the right of the client field this will open your
client listing, search for the client in the normal way, highlight and
select OK (F12) from the bottom of the client list. The client’s name
and contact details are inserted in the client and additional info fields.
|
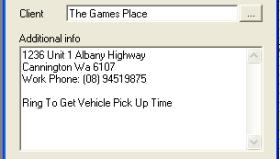
Fig 12.06 Creating A Contact Task |
The task is also recorded in the client form /
tasks section
The author of the task is recorded at the bottom
of the task form. This is an automated entry based on the current user.
To save the tasks select OK (F12) from the bottom
of the form. The record will now display on both the day and week views
of your diary screen. |
Viewing
A Task:
Details of a task can be
viewed from the diary screen in either week or day view by selecting the
entry. The task can also be accessed from the client form by searching
for the client highlighting the record and double clicking, select tasks
from the tabs at the top of the form, to display a task point and click.
Fig 12.07 Viewing A Task From The Client Form
Editing
A Task:
To edit a task go to diary
day or week view or the client form tasks option, point and double click
on the task you wish to edit, make the changes and save using OK (F12).
Task
Manager, Deleting A Task: If
you wish to delete a task open the task manager in day or week view, highlight
the entry you wish to delete and press the delete button on you keyboard,
confirm your action from the message box by selecting yes.
Task
Checklists, Adding: The
task manager allows you to add checklists to both local and contact tasks.
Checklists contain line items with a number assigned and checkboxes, each
component of a checklist can be individually flagged as completed this
is indicated by a tick in the checkbox at the beginning of the line. To
add checklists to a task perform the following:
1)
Open the task form by pointing
and clicking on a recorded task or < Create New Task > option.
2)
Click on the button to the
right of the checklist field
3)
Highlight the checklist you wish to add, attach by selecting OK(F12)
4)
Save your changes to the
task form by selecting OK(F12)
|
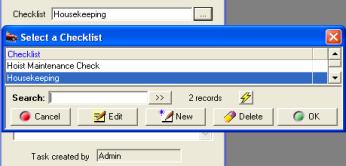
Fig 12.08 Selecting A Task |
From the select checklist display it is possible
to add new checklists, edit and delete by selecting the required function
from the bottom of the list.
You can search for a checklist by typing the title
in the search field. |
Task
Checklists, Creating: To
create a new checklist go to the select a checklist display and perform
the following:
1)
Select New from the
bottom of the list
2)
The checklist details form
is displayed, to add an item select Add
3)
Type the line text into the checklist item box and save with
OK(F12)
4)
Repeat item 3 for each line
of the checklist to save the checklist select OK(F12)
|
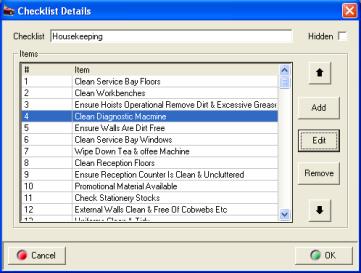
Fig 12.09 Checklist Details Display |
Checklists,
Editing & Moving Text: Edit
functions allow you to make changes to the checklist text by highlighting
the line and double clicking or selecting edit (F2) from the bottom of
the display. Make your changes to the text in the checklist item box and
save using OK (F12).
It is also possible to re-order the line items
by highlighting the check you wish to move and clicking on the up and
down arrows to the right of the display.
To delete a line highlight and select the remove
function. |
Tasks,
Completing:
To complete a task select the complete option from the bottom of the task
form, checklist (if attached) and completion notes are now visible.
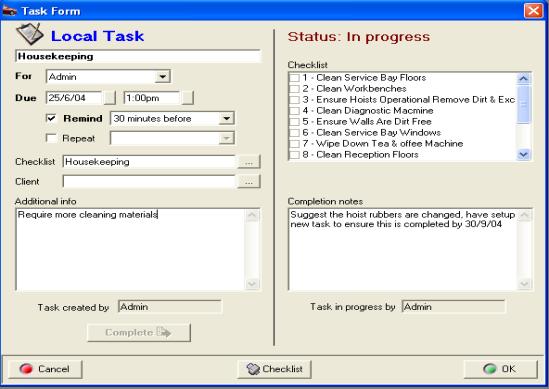
Fig 12.10 Completing A Task
|
|
The tt
To confirm completion of an item within a checklist
point and click on the line a tick will be displayed in the checkbox.
Enter your completion notes and save by selecting OK (F12).
Note:
The task will always be completed by the current logged on user, the date
and time is recorded as the form is saved.
Printing
A Task Checklist: Select
the print checklist option at the bottom of the screen.
Task
Reminders, Pop Ups: authorised
users can set tasks to display pop up reminders, these are messages that
are displayed at a set time before a task is due (set from the task form).
|
Fig 12.11 Task Reminder |
There are four options available from the task
reminder. Firstly you can reset the remind again period by pointing and
clicking on the arrow to the right on the field and selecting a new time
period from the list. |
Secondly you can select the snooze option that
will remove the reminder from the screen for the time displayed in the
remind again field. You can dismiss (cancel) the reminder by selecting
the dismiss option. Finally if you wish to view / edit the task details
select the details option.
Marketing
Tools
Marketing,
Overview:
Auto Easy Ultimate has been designed to maximise database-marketing opportunities
using functions that are easy to execute. Link to Microsoft Word 95 or
later versions to produce in house customer communications, or alternatively
Genesis can process records for you when they are automatically exported
via an Internet connection. Reports are also available displaying
services due or service reminders not responded to, the client form also
indicates whether a service reminder has been successful.
To assist you with your marketing activities
there is an in-built loyalty program and the ability to issue roadside
assistance to a client. You can also keep in touch via email through the
contact manager.
Demographic reporting is available allowing you
to view critical information on the client and vehicle database. This
report is designed to assist business operators with critical marketing
decisions on issues such as in which suburbs marketing campaigns should
be run. Information from this report will also assist when making decisions
on what parts should be stocked.
Loyalty Functions
Loyalty,
Function Overview:
Loyalty marketing helps you retain customers – which help you increase
profits. The typical business loses almost half its customer base every
five years. Businesses that understand the impact of this customer attrition
and take steps to stem losses can realize dramatic profit gains. Increased
profits result from reduced acquisition costs, increased cross-selling,
a high customer referral rate, decreased price sensitivity, and lower
operating costs.
On average, the cost of acquiring a new customer
is five to 10 times greater than the cost of retaining a current customer.
Do you know what share of your current customers’ business your business
has today? It’s not uncommon for very successful businesses to have less
than 50% of their current customers’ business.
Repairers that are
on the cutting edge of loyalty programs reap lasting benefits. Being the first repairer in your area to
launch a loyalty program pays real dividends. The first business has the
advantage in customer retention — and latecomers into mature loyalty environments
have little hope of gaining incremental business, or spend a great deal
trying to make inroads. Either way, being the first in is an advantage.
Customer loyalty
is different from customer satisfaction.
Between 65% and 85% of customers who defect report that they were satisfied
or very satisfied with the repairer from which they removed their business.
Customer satisfaction is extremely important but customer loyalty is the
key to repeat purchasing and long term success. Genesis has created strategies
that allow you to retain high levels of customer service and satisfaction
as well as achieving high levels of customer loyalty. Auto Easy can help
you do all of the above. The goal of every business is to improve the
bottom line. If you are interested in gaining and retaining customers
then please consider using the loyalty program.
Auto Easy Ultimate has the ability to allocate points
to a client reward account based on dollars spent. It is suggested these
points be redeemed for a free service, functionality allows for the entry
of a redemption value on the service record. A statement of points
to date is also printed on the invoice if the track loyalty point’s function
is set to true in the site settings.
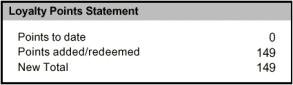 Auto Easy prints a loyalty
statement on the invoice
Auto Easy prints a loyalty
statement on the invoice
Loyalty,
Settings: Before you can use the
loyalty program the settings need to be correct for the feature to operate.
Select file
/ settings from the top of the screen go to the program options tab flag
track loyalty points to true, save with OK or F12. Next you need to decide
which services will initiate the loyalty program, how many points will
be allocated for each dollar spent on those services and which services
will have a redemption value and how much. Once these decisions have been
made you are ready to set your loyalty parameters for each service
|
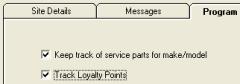
Fig12.12 Setting Loyalty Program Options |
Loyalty,
Establishing A Plan:
Select services from the diary screen, highlight the service you wish
to initialise the loyalty plan and select edit. Go to the section on the
service record titled loyalty, there are three fields When a service
with a trigger set to true is performed points will be accrued for each
subsequent service that is flagged to issue points. No reward statement
will be printed on the invoice if the loyalty program has not been initialised.
|
|
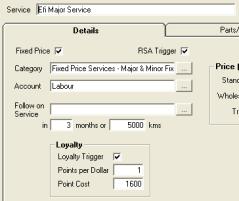
Fig 12.13 Setting Loyalty On The Service Form
|
Loyalty,
Redeeming A Reward Service – Enter the service onto
the job card in the normal way, select the service from the parts &
labour section of the job card by pointing an double clicking on the line
item. Flag the field use loyalty points to true, the clients reward account
will be checked to ensure there are enough points available to cover the
service if the account does not cover the point value a message will be
displayed. If the account contains enough points to cover the service
the points will be deducted from the total and the retail price of the
service is displayed as zero.
Note: The
service must be flagged with a redemption value to be used as a reward
service
|
|
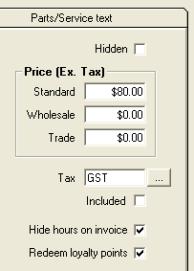
Fig12.14
Redeeming A Reward Service |
Loyalty,
Viewing Points Allocation:
To view the number of points allocated per service to a client open the
client listing, highlight the record you wish to view, double click or
select edit (F2) from the bottom of the list. The client form is now in
view select the history tab, click on the loyalty button to display allocations
by job.
Loyalty,
Adjusting Points:
Open the client listing; highlight the record you wish to view, double
click or select edit (F2) from the bottom of the list. The client form
is now in view select the profile tab, click on the loyalty points to
date (the number) double click a box is displayed with the number of loyalty
points entered in the amount field. Edit as required and save your changes
with OK (F12). |
|

|
Fig 12.15 Adjusting Loyalty Points
|
|
|
|
|
|
Roadside Assistance
Roadside
Assistance, Overview:
Genesis administers a national roadside assistance plan for Auto Easy
users. It is also possible to cover vehicles for roadside assistance (RSA)
by flagging the field trigger RSA on the service form. When a service
is performed with the choice set to true roadside assistance details will
be printed at the bottom of the invoice including contact phone number
and RSA membership number. Vehicles flagged for the issue of roadside
assistance can be exported using an Internet connection or setting up
the necessary form letter in Microsoft Word can produce membership cards
in house.
Roadside
Assistance, Settings:
You need to turn the roadside assistance functions on from the site settings.
Select file / settings from the top of the screen, click on the program
options, click on the track RSA option.
You need to setup the RSA parameters RSA option,
enter the service provider’s phone number and save your changes with OK
(F12).
Roadside
Assistance, Viewing Details Roadside assistance details
can be viewed from the vehicle record or vehicle listing, note the RSA
number is the site id followed by the customer number. The membership
details are also printed on the invoice.
|
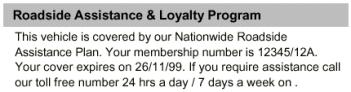
|
Details include the service phone number in the site
settings, membership number and the expiree date. The invoice acts as
interim membership as it takes up to 2 weeks to receive a membership card
|
Direct
Marketing
Marketing,
Selecting: To
access marketing functions open the diary by selecting the diary icon
from the top toolbar. Next select the tasks manager icon from the top
left hand side of the display, to view the marketing options select the
marketing button at the top of the task manager.


Fig 12.16 Accessing marketing functions
Selection opens the client data extraction screen;
from here you can select various filters to export the data you wish to
mail merge in your word processor. A list of all records within
the search criteria is displayed, from this screen you can deselect individual
records fro export, once the results have been edited the data can be
exported.
Auto Easy creates an export file named Extract.Txt
which is located in a letters sub directory of your program folder. If
you are using Microsoft Word you have the option to automatically open
the program displaying a letter of your choice.
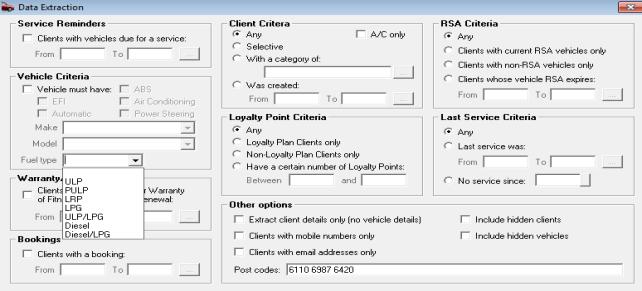
12.17 Data Extraction Screen
Marketing,
Exporting Data:
Auto Easy has the ability to filter customer and vehicle databases; export
data is in ASCII comma delimited format that can be mail merged into a
word processor document. The marketing module allows you to search databases
using the following criteria:
|
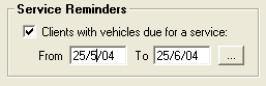
|
Clients
With Vehicles Due For A Service: Select
if you are searching for vehicle due for service From / To: Enter
a date range by free typing in DD/MM/YY format or use the button to the
right of the date fields to select from the calendar.
|
|
|
|
|
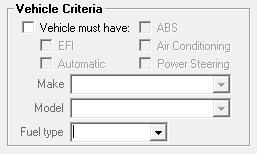
|
Vehicle
Criteria: Select if you are
exporting by vehicle criteria. EFI, Automatic, Air Conditioning, Power
Steering: Point
and click on your selection, your selections can be multiple ie: EFI &
Automatic will export all vehicles with EFI or Automatic as well as vehicles
with both. You can also narrow your search by selecting the make and model
from the vehicle list, plus fuel type click on the button to the right
of the field, point and double click on the appropriate record.
|
|
|
|
|
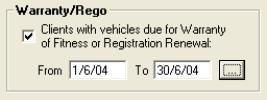
|
Clients
With Vehicles Due For Warranty Of Fitness Or Registration Renewal: Select if you are searching for vehicle
due for checks. From / To: Enter a date range by free typing in
DD/MM/YY format or use the button to the right of the date fields to select
from the calendar.
|
|
|
|
|
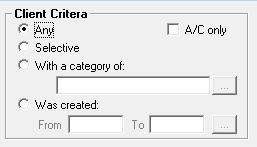
|
Any: Exports a list of all clients and vehicles
Selective: Displays the client listing allowing for single or multiple
selections. A/C only: Filters for account customers only. With
A Category Of: Select if you wish to export clients in a specific
category. Clicking on the button to the right of the field displays your
client category listing. Highlight the record confirm your selection with
OK (F12). Enter a from / to date (select from calendar) to view
/ export all clients created within a date range. |
|
|
|
|
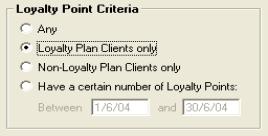
|
Any: Exports a list of all clients and vehicles
that have are members of your loyalty plan. Loyalty Plan Clients Only:
Exports a list of all clients and vehicles that have are members of your
loyalty plan. Non-Loyalty Plan Clients Only: Exports a list of
all clients and vehicles that are not members of your loyalty plan. Have
A Certain Number Of Loyalty Points: Option allows you select clients
with points within a certain range for export. |
|
|
|
|
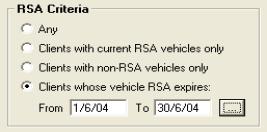
|
Any:
Exports any vehicle that
has had roadside assistance. Clients With Current RSA Vehicles Only: Selection will
export clients and vehicles with current roadside assistance Clients
With Non-RSA Vehicles Only: Clients and vehicles that have never had
roadside assistance issued. Clients Whose Vehicle RSA Expires:
Allows you to enter a date range for expirees.
|
|
|
|
|
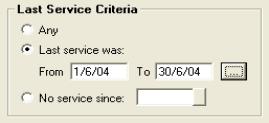
|
Any: Exports a list of all clients and vehicles
that have had a service. Had A Service: Option allows the entry
of a specific date range. Only clients serviced in that period are exported.
Selecting the button to the right of the date fields displays a calendar
for easy date entry Have Had No Service Since: Enter the required
date. Only customers that have no services recorded are exported. |
|
|
|
|
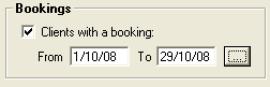
|
Allows the user to view clients / vehicles that have
current bookings in the system. This search criteria allows you to communicate
via letter or SMS to remind clients due for service within a specified
date range. |
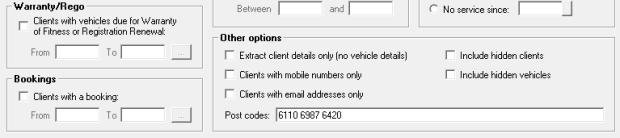
Client
Data Options: The data extraction
screen allows the operator to choose further search criteria:
Extract
Client Details Only (No Vehicle Details):
Selecting this option will display client details only with no duplications.
Include
Hidden Clients: By default
all search criteria excludes hidden (inactive) clients, selecting this
options allows you to override the default and include inactive clients.
Clients
With Mobile Numbers Only:
Select this option if you are sending a group SMS message so only clients
with mobile numbers are selected.
Include
Hidden Vehicle: The search
will include any vehicles that are inactive in your vehicle listing if
this selection is set to true.
Clients
With Email Addresses Only:
Select this option when using email as your communication media, only
clients with email address will populate your list.
Postcodes: multiple postcodes require a space between
each entry
Marketing,
Data Extraction: To
initialize the data extraction make your selection from the search criteria
screen and select OK (F12) the results of your data search are now in
view. All records are flagged for export by default, however if you choose
not to export a single or multiple records pointing and clicking on the
tick at the end of the line will deselect the entry.

Fig 12.18 Search Results Display
It is possible to view data and perform other functions
from this screen including establishing a new contact task for a client.
Options are:
 Opens the contact details
/ client form.
Opens the contact details
/ client form.
 Selection allows you
to make a booking for the client and vehicle.
Selection allows you
to make a booking for the client and vehicle.
 Displays the vehicle form associated
with the highlighted record.
Displays the vehicle form associated
with the highlighted record.
 Displays the note form – entering
text adds a note entry to the client task list.
Displays the note form – entering
text adds a note entry to the client task list.
 Opens a new task form - allowing
you setup a contact task for the highlighted client.
Opens a new task form - allowing
you setup a contact task for the highlighted client.
 Prints the results screen to
your report printer.
Prints the results screen to
your report printer.
 Initiates the data export
Marketing,
Extract Options: Auto Easy is provided with 4 standard
marketing and 1 credit collection letters in Microsoft Word format. The
menu on the right of the text export screen will not be accessible until
the link to Word document option is selected.
|
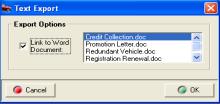
Fig 12.19 Text Export Options |
To initiate an export to Microsoft Word highlight
the required letter file name and select extract, Word will open displaying
your selection. To merge select the merge icon from the database tool
bar. This feature will work with Microsoft Word 6.0 or later
|
The letters and data can be used in other word processing
packages. However the operator will have to set up the mail merge facility
using the data that is exported from Auto Easy in ASCII format form the
file C:\[Your Working Folder]\Letters\Extract.txt. This file is
recreated each time a search is performed on the database.
Word documents that are loaded with the package can
be edited using the normal word processor functions. Ensure that any changes
are saved; you will also need to change the signatory on all the letters.

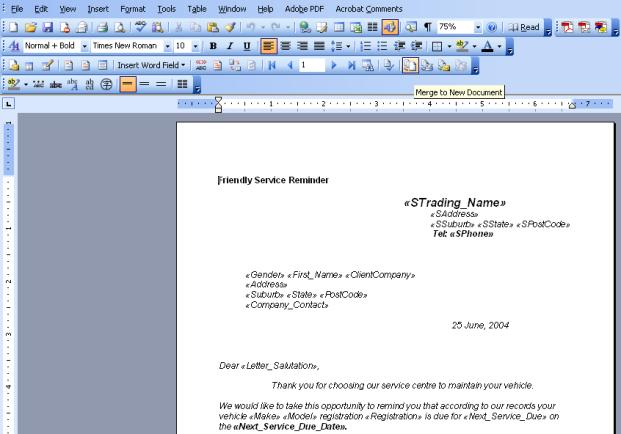
Fig 12.20 Merging Extracted Data In Word 2003
Vehicle
- Registration, Make, Model,
Type, Month, Year, Model Code, Odometer, Colour, EFI, Auto, AirCon, Power,
VIN Number, Cylinders, Tyre Sizes, Engine Capacity, Ignition Key, Last
Service Date, Next Service Due, Next Service Due Date, Rego Check Date,
Next Warrant Date, RSA Number, First RSA From Date, Current RSA From Date,
RSA Expiry Date,
Service Reminders
Marketing,
Adding Service Reminders: The
service reminder form can be accessed from the vehicle form or job update
screen as a job is finalised. To open from the vehicle record, select
vehicles from the icon menu bar, search for the record required, and highlight
double mouse click or select edit (F2) from the bottom of the list. Select
the services tab, click on the service reminder button to add, edit or
delete service reminders. To view the service reminder form from the job
update screen click on the service reminder button.
 Selecting the service reminder
option from either the vehicle form or job update screen will open the
service reminder form.
Selecting the service reminder
option from either the vehicle form or job update screen will open the
service reminder form.
Marketing,
Automating Follow On Service Records: Auto
Easy allows you to attach single or multiple follow on services to the
service form. Follow on services are entered to the service reminder form
automatically as the job is closed. To set up a follow on service, select
services from the icon menu at the top of the screen, search for the service
you wish to edit or add a new one. From the service form select the button
to the right of the follow on service field. The service listing
is displayed highlight the service you require, confirm with OK (F12).
The service is displayed in the follow on service field, enter the duration
between services in the month’s field and kilometers in the Kms field,
and select OK (F12) from the vehicle form to save.
Fig 12.21 Adding A Follow On Service
Marketing,
Service Reminder Form: The
service reminder form allows you to view, edit, add and delete service
reminders to add a service reminder select add from the bottom of the
form, this action opens the service listing. Select the service or services
required a tick is visible against each of your selections. When complete
select OK (F12) to save. Enter the distance to travel and duration between
services.
|
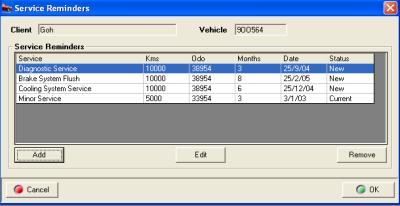
Fig 12.22 Service Reminder Form |
Service
Reminders, Deleting Existing:
Open the service reminder form; highlight the record, select remove from
the bottom of the display window.
Services are displayed in ascending date order (next
due at the top of the list)
|
Service
Reminders, Editing New: You
can edit new service reminders from the service reminder form by highlighting
the record, selecting edit and changing the distance / time until next
service fields.

Fig 12.23 Rego / Warrant reminders
Service
Reminders, Registration / Warrant Of Fitness Renewals: It
is possible to add registration and warrant of fitness renewals either
on the vehicle or booking form. Auto Easy also provides a 6 month or 12
month option between servicing. To select, simply point and click in the
required field. These options are also available from the booking form.
Auto Easy will automatically move the due date forward according to the
time selection when the next date of check is due.
Service
Reminders, Viewing:
Follow on services can be viewed form the vehicle listing, vehicle form,
client form and service reminder form you also have access to two service
reminder reports. Service reminders due showing all service reminders
due in the future and no response which displays a list of services not
performed.
Vehicle
listing: To view services
due from the vehicle listing select vehicles from the icon menu bar, the
grid displays next service type and date.

Fig 12.24 viewing Services
Due From The Vehicle Listing
Vehicle
Form: Select the vehicle
record you wish to view, double click or select edit (F2) from the bottom
of the listing, select the services tab to display the last service performed
and next service due.
|

|
For a more detailed view of services due click the
service reminder button to open the service reminders form.
|
Demographic Reporting
Demographic
Reporting, Overview: Auto
Easy allows you take a snap shot of your business for any period when
running a demographic analysis. This vital report analyses your data by
various criteria including where your customers are coming from, how they
heard of you, how many were male / female or counter sales, what type
of vehicles they drive and how much they spend.
Used correctly this report will give you the
information required on where you should run your next marketing campaign,
what parts you should carry and whether your average sale is increasing.
Demographic
Reporting, Compiling:
To run a demographic report select Reports / Marketing / Demographic Analysis
from the top of the screen, select a date range and confirm with OK (F12).
Demographic
Reporting, Format: The report is split into
the following sections:
Customer Analysis
Suburb – Where your customers
are coming from by suburb in numeric and graphical format.
Media – How customers came to hear of you by media type data is extracted
from the media
section of the client form.
Customer Type – Male, female and other (relates to business or cash
sales)
New Customers – New customers gained over the report period, existing
clients that purchased goods or services.
Vehicles
Make – Vehicle
makes serviced over the report period in numeric and graphical format.
Vehicle
Year – Year of manufacture for vehicles serviced.
Kilometres
– kilometres on each vehicle serviced
Vehicle
Type – Sedan, 4 wheel drive, hatch, coupe
Cylinders
– Amount of cylinders by vehicle serviced
Auto,
EFI, Pwr Steering, AirCon – How many had these features
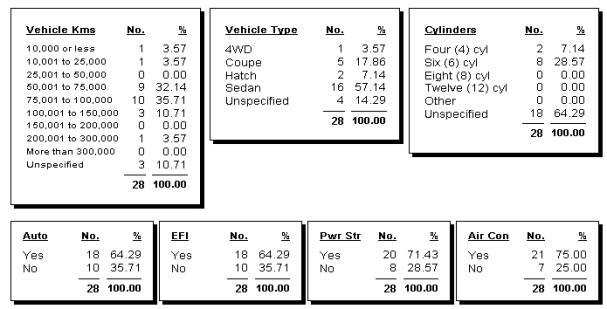
Fig
12.29 Vehicle Analysis
Job Analysis
Job
Start Day - Based
on the day of the week a job or invoice was created.
Total Value - Value of invoices over the report period
Gross Profit - Gross profit created from each sale
Labour – Dollar value and percentage of total labour invoice value
Job Gross – Gross profit by and as a percentage of total gross profit
Labour – Labour percentage as a total of the invoice value
Payment Method – Media types by number and as a percentage of total
transactions
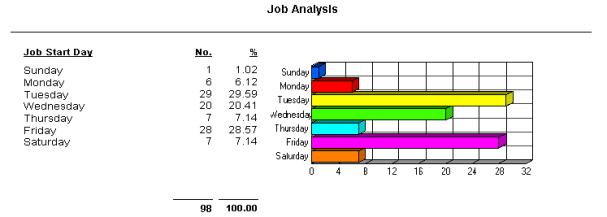
Fig 12.30 Job Analysis / Job Start Day
The report can be exported to Excel or Lotus
notes for further analysis, it is suggested you run this report on a regular
basis performing comparisons by report period.
Promotion
Response Tracking
Overview:
Auto Easy
Ultimate allows the operator to track responses from specified promotions
listed on the client intro report available from the marketing reports
group. To track promotion responses, promotions must be listed in the
promotions database, once recorded a promotion response can be selected
from the booking form or when prompted while using the step through booking
feature. The client intro report will display a summary of responses to
promotions in both statistical (number & %) and graphical formats.
A further report titled Promotion Responses displays the detail (Job,
sales value & profit) of recorded responses.
Promotions,
Adding To The Listing: To begin tracking promotion
responses you are first required to enter details into the promotions
listing. Select lists from the top of the screen from the drop down menu
select promotions this will open the promotions list, to add a new promotion
select new from the bottom of the display, enter the promotion name, code,
start and finish dates and save using OK (F12). The item is added to the
list.
|
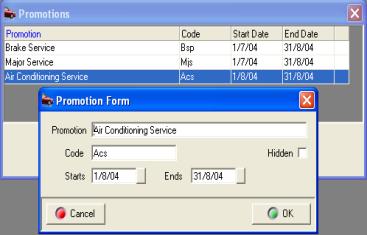
Fig 12.31Adding A New Promotion
To Your List |
Promotions,
Editing:
To edit the details of a promotion point and double click on the line
or highlight and select edit (F2) from the bottom of the list, make your
changes and save using OK (F12).
Promotions,
Deleting:
If you wish to delete a promotion highlight the entry and select delete
from the bottom of the listing. It is only possible to delete promotions
that have not yet been recoded during the booking process. If you no longer
wish to see a promotion that has been recorded in the list you can select
the hidden option on the promotion form. |
Promotions,
Recording Responses: Responses to promotions
can be tracked by selecting when prompted during the stepped booking process
or by making a selection from the booking form.
|
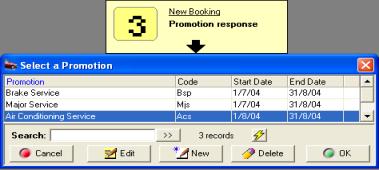
Fig 12.32 Selecting From
The Stepped Booking Process |
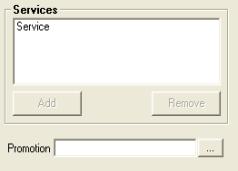
Fig 12.33 Selecting From The Booking Form |
It is possible to go back to the booking form
and change the promotion selection at anytime regardless of the booking
status.
Promotions,
Viewing Responses: To
view responses, select reports from the top of your screen from the drop
down menu select the sales group, to display / print the report point
and double click on the Promotion Response Report option, enter the date
range you wish to report on and select OK (F12).
It is also possible to view a summary of responses
from the marketing group of reports by selecting the client intro option
entering the date range and selecting OK. To print either of these reports
select the print icon in the top left hand corner of the display.
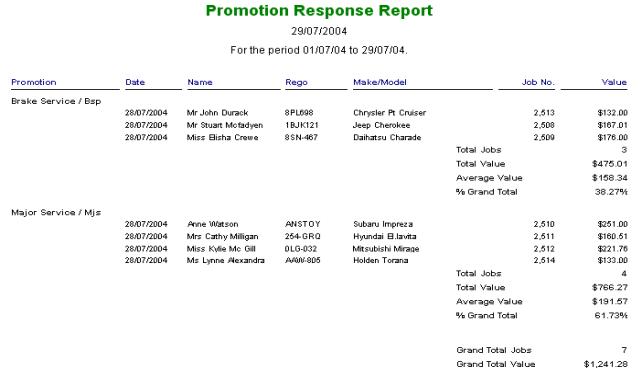
Fig 12.34 Promotion Response Report
Upsell
Reporting
Overview:
Auto Easys
allows the user to track service and profitability values for services
added to a job card after the original booking has been generated. The
statistics are then compared to give the operator an overview of the extra
work that is being sold in a specified period.
It is important that you understand how this
report is generated to gain maximum benefit from this feature. The report
is split into two sections, booked sales and up-sell sales, booked sales
relate to services that were originally added to the booking form, up-sell
sales records services that were added to the job card while the original
work was in progress.
Upsell
Report, Viewing And Printing: To view / print the Upsell
report select reports from the top of your screen, point and double click
on the sales reports group, select Upsell Report, enter your data range
or select a period, select OK (F12) to generate the report. If you wish
to print the display select the print icon in the top left hand corner
of the display.
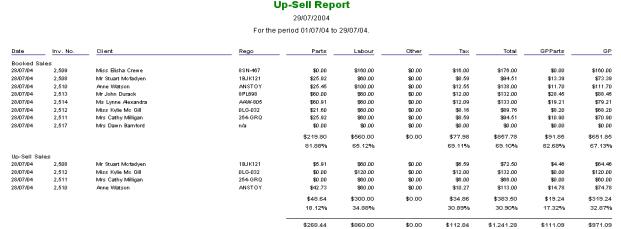
Fig 12.35 Up-Sell Report Format
Internet
Transfers
Internet,
Transfers Overview:
Genesis has developed a central marketing system which can mange all your
regular communications on – line including service reminders, registration
renewals and roadside assistance issues. To access this feature you first
need to be registered with Genesis, contact sales@microbse.com.au
or visit www.Genesis.com.au
for further information. Our web site can be accessed from the on – line
menu, from the home screen select services. You need a standard internet
connection to utilise this service and have access to a phone line. Auto
Easy Ultimate can prompt you to upload data on a predetermined day, the
program initialises a call connects to our server via your Internet service
provider, uploads vehicle and client records then requests you to hang
up. Service reminders and roadside assistance cards are dispatched by
Genesis to your clients; you receive a marketing report on a monthly basis.
Internet,
Transfers Setup: Auto
Easy gives you the option to display an export data prompt on a day of
your choice for a specified time range. To establish the day and times
select file / settings, from the settings form select the replication
tab, select enable replication on this machine. Next select automatic
or manual from the drop down box
|
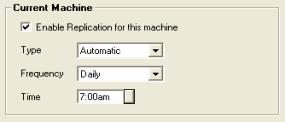
Fig 12.36 Setting Export Configuration |
In the example your machine will connect to the Genesis
server automatically (if your site is not connected to the internet Auto
Easy will initiate a dial-up) weekly on a Monday at 6.00am. If the first
attempt to connect is unsuccessful three further attempts will be initiated.
|
Internet,
Transferring Data: There
are two ways to replicate your data, either by setting the replication
process to automatic or manual. If manual is selected a prompt will be
displayed on the screen requesting you to upload on the day and time specified.
Alternatively a replication can be performed at anytime by selecting the
On-Line Menu from the top of screen, pointing and clicking on the replication
option, this action will initiate a connection to the internet server.
|
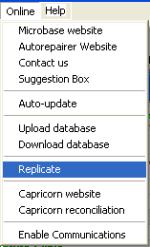
Fig 12.37 On-Line Menu |
On selecting yes
from the manual prompt or replicate from the on – line menu a file
transfer status box is displayed (please ensure your modem is turned on
and connected to a phone line before proceeding) the box displays the
export status. When the data transfer is complete a confirmation message
is displayed “Export Successful”.
Finally you will be prompted to hang up if you wish
to go off line select yes from the message box
Note:
You must have your machine set to enable replication for this function
to work.
|
Email
Functions
Email, Functions Overview:
Auto Easy has the ability to send emails directly from the client listing,
client card, job card or quotation form the subject matter and reference
is recorded in the task section with the ability to view the attachment
sent. All that is needed for you to access this function is a standard
Internet connection and your outgoing mail server details.
|
Email,
Set up:
Ensure
your email address is entered in the site settings / details form, next
click on the on-line tab and record your mail server address in the field
provided.
|
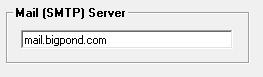 |
Email,
Client Direct: Complete the
email field on the client form; it is best to double check the entry as
just one character out of place will render the communication useless To email a single client highlight the
record from the listing. Select the email function at the bottom of the
client list. This action will take you directly to the note form with
email selected as the contact method, enter a title, type your text in
body of the form and select OK(F12) to send the email. The communication
is recorded in your task list.
|
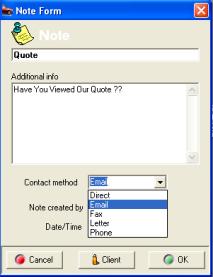
Fig 12.38 Creating An Email |
Select
OK (F12) to complete and
the message will be dispatched via your internet service provider.
It is essential you enter your server details before
sending your first email.
Email,
Viewing Sent Items: To
view sent emails, select the client from
the listing, double click or select
edit (F2) from the bottom of the list. Select the Task Tab point
and double click on the email contact entry.
Email,
Invoices, Quotes & Summaries: Firstly the client must
have an email address recorded on the client card. To send a form to the
client click on the email function displayed at the bottom of the job
card, an email is generated with the form being sent as an attachment.
|

|
Emails.
Viewing: All
communications with the client are listed in tasks view, emails are listed
as notes, if an attachment has been sent to a client a reference is displayed
in the item column. To view an email, point and double click on the line.
If an attachment has been sent it is possible to view the form by selecting
the icon. The form is displayed in PDF format this can be reprinted from
the viewer if required.
|
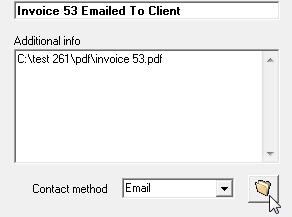
Fig
12.39 Viewing Sent Emails
|
Email,
Deleting Sent Items: To
delete an entry open the client form select Tasks Tab highlight
the record and select delete from the bottom of the form, confirm
your selection and the entry will be removed.
Email,
Marketing:
Auto Easy allows you to communicate marketing messages via email, to perform
this task open the marketing screen, select your search criteria and select
OK(F12). The results of your search are displayed, when using email also
select the clients with email addresses only option. Next you need to
select or create the email message, select the email option from the bottom
of the results page you are taken to a list of messages, from this screen
you can select an existing message or create a new one by selecting the
new option at the bottom of the display.
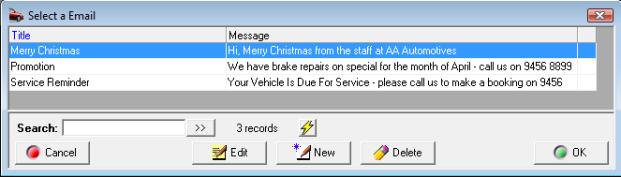
Fig 12.41 Selecting An Email Message
Highlight the message you wish to send and select
OK(F12) confirm from the display that you wish to proceed with the send,
a final message will confirm the send.
Email
Messages, Creating:
You can create and store email messages by selecting email messages from
the lists menu, alternatively create a message from the list as you proceed
through the sending option.
Enhanced
Email with Integrated Booking Function: As
a business owner you get inundated with communications every day, email,
letters, pamphlets and newspapers to name a just few, due to the sheer
volume of material we become extremely good at “media filtering”. Think
about this how many times have you received a communication possibly a
letter or email and thought you would deal with the content at a later
date, then completely forgotten to follow through? It happens. How much
easier would it be if there was an immediate call for action that simplifies
the response? You can send a plain text message to your client via the
marketing function which is in danger of ending up in the to do or even
worse the delete folder as it just does not present as anything that needs
your client’s attention.
To give you the best chance of an immediate response
Genesis has taken a different approach by implementing the following:
1) The email arrives as
a letter complete with mail merge, logo and power margin—Not just plain
text
2) There is a book now
option on the email, clicking this will simply require your client
to enter the
preferred
date and time they would like their vehicle serviced.
3) Booking is transferred
to the site and populates the diary, the site must then go through the
confirmation
process, this can be handled via a phone call (if an alternate date and
time is
suggested),
email or text message (to confirm the client’s request).
The management process will populate your booking
form automatically, no need to find the client, vehicle details or service
due, the only time you will need to edit a repeat booking is when an alternate
date / time is agreed. When the vehicle arrives simply open the booking
and create the job card.
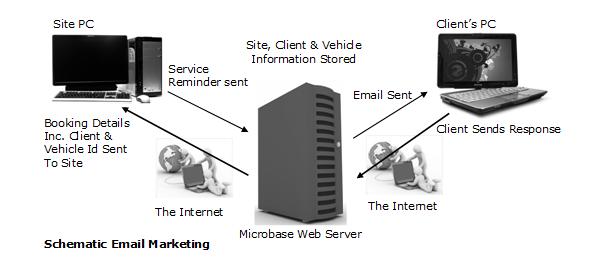
Fig 12.42 Enhanced email marketing
 Service
Costs: Genesis will incur
extra costs to provide this service to it’s client base, any site wishing
to send template emails and take advantage of the return booking feature
will be charged a flat fee, please contact Genesis for the current
charges, fees are not volume based.
Service
Costs: Genesis will incur
extra costs to provide this service to it’s client base, any site wishing
to send template emails and take advantage of the return booking feature
will be charged a flat fee, please contact Genesis for the current
charges, fees are not volume based.

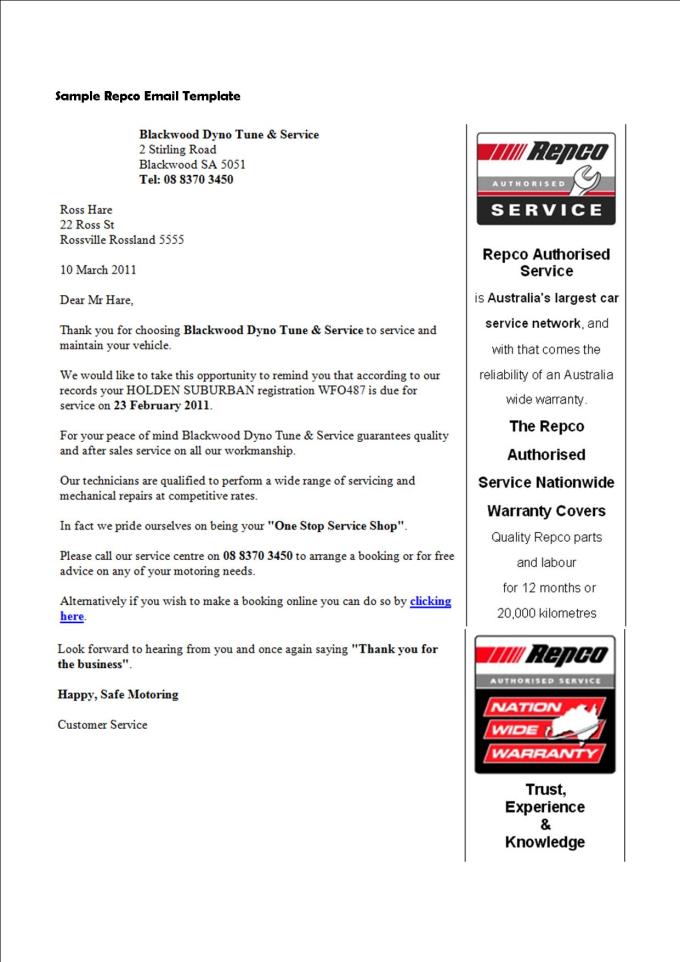


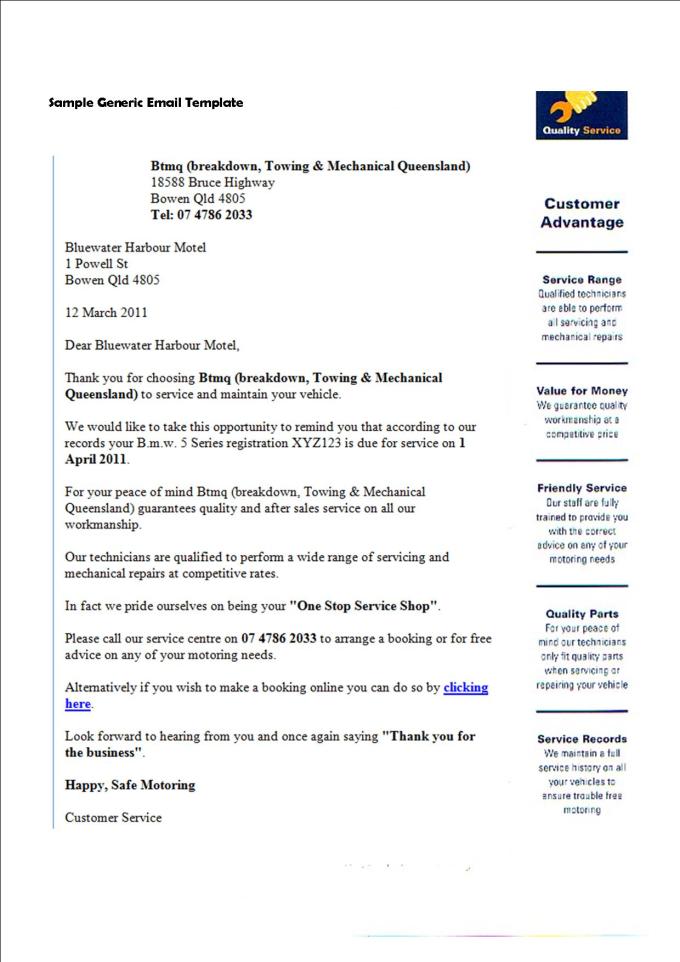
Enhanced
Emailing Function: If you wish
to use this service you will need to accept the terms and conditions of
service, these display the first time you select the enhanced email function
from marketing. Agree to these terms and you are a registered service
user.
Enhanced
Emailing, Service Reminder Search:
Go to marketing either from the diary task tool bar or the activities
menu; enter your search date range
|
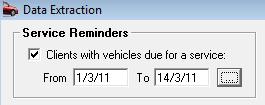
|
Select clients with email addresses only from other
options on the data extraction screen, select OK (F12) you are presented
with a list of clients with email addresses due for service in the selected
date range. If you do not with to send a reminder to a client deselect
the record by pointing and clicking in the check box at the end of the
line to clear the tick. |
|

|
Select the Enhanced email option from the lower
tool bar. |
|
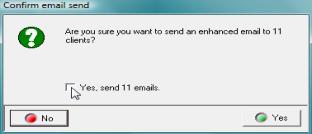
|
Next a confirmation screen is displayed to send the
emails simply select the Yes option on the bottom right hand side of the
screen. The emails are dispatched. A record of the communication is written
to the client card under the task tab. |
|
|
|
|
|
Service
Reminders, Client Function: The
client will receive an email from you titled friendly service reminder,
when the on-line booking option is selected the client is requested to
complete the date and time service is required and submit the request
to the site that generated the reminder.
|
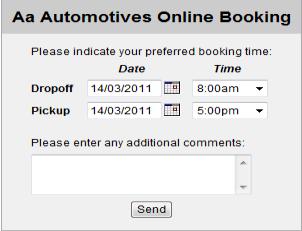
|
The client selects the click here option on the
letter. date and time service is required is displayed, the client can
free type the date or select from the on-line calendar. Completing the
function by selecting send will initiate the booking retrieval process
at the designated site. Genesis displays a confirmation message to the
client indicating the booking as been sent successfully.
The site PC is set to check for bookings every minute,
if a booking is logged on our server the site will be prompted to accept
the on-line booking. A confirmation is required, either via email, SMS
or phone, once confirmed select the OK option to import the booking. |
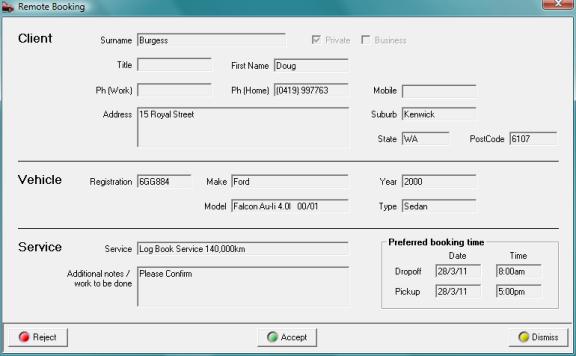
Fig 12.43 Remote booking form displaying reject,
accept and dismiss options
Bookings,
Receiving: The remote booking
form allows you to reject (cancel) the booking, accept or dismiss, if
you choose dismiss the form will reappear after 5 minutes. Accepting the
booking asks you to confirm client contact
|
|
Confirming the contact will take you to the booking
form, select the agreed date and time, OK (F12) will enter the booking
onto your diary, including client, vehicle and service details. Booking
will only be received on the nominated machine, this can be set by opening
file / settings / on-line and selecting the on-line booking function on
the bottom right hand side of the display. |
Editing
Enhanced Emails – It is possible
to edit the content of the standard enhanced email form. Select File /
Settings / On – Line on the bottom left hand side of the form are the
enhanced email settings to edit the email select the button to the right.
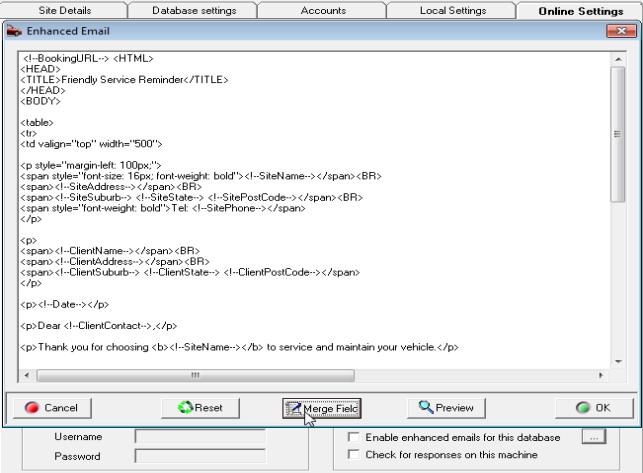
Fig 12.44 Editing The Enhanced Email Form
Text is displayed in HTML format, when editing
only change the body text unless you know HTML do not change any of the
symbols these ensure format is correct. If you wish to merge new fields
select the merge field option and select your requirements from the menu.
It is also possible to preview the results at anytime be selecting the
preview option. The reset function restores the form back to standard,
save your changes by selecting OK (F12).
SMS
Messaging
Overview:
Auto Easy allows you send
SMS messages to clients by utilising an internet gateway to a telecommunications
service provider. You are able to store multiple SMS messages, even select
a default message that you would like sent to clients as the job card
is closed. To access this service you must contact Genesis to set-up an
account, on acceptance you will be provided with a logon and password,
your location will be billed on a monthly basis for the amount of SMS
traffic generated.
SMS
Messaging, Set-up: If you wish to take advantage of this service
you will need an internet connection and account name and password. Contact
Genesis for your logon and password, when you receive this you will need
to enter the details into the program settings. Click on File / Settings,
from the settings screen select the online tab.

|
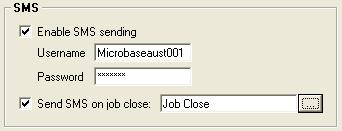
|
From the online screen select the Enable SMS sending
option, enter the user name and password into the fields provided. If
you wish to send a message on job close select the option. To choose a
default message click on the button to the right of the send SMS on job
close field, your SMS messages list will display, highlight the message
you wish to make the default, click OK (F12). |
SMS
Messaging, Managing Messages: Messages are managed from the Select an
SMS display, this is selected from either lists – SMS Messages – Settings
– Marketing. To add a new message to your list click on New (Insert) located
at the bottom of the list. Complete the SMS detail form and save with
OK (F12) highlight the message you wish to send and select OK (F12). To
delete a message highlight the entry and select delete from the bottom
menu bar. Editing requires you to once again highlight the record and
select Edit (F2) make your changes and save to file with OK (F12).

Fig
12.45 Selecting An SMS Message
SMS
Messaging, Sending: You can send SMS messages from either
the job card on job close (if a default message has been selected) or
you can use the search criteria in marketing to select single clients
or groups to send a message to.
Job Card – Job Close: This is an automated function that sends
an SMS to your client as you close the job card. For this to work you
must select the send SMS on job close function in settings / online. It is possible to choose an alternative
message as you close the job or send no message by selecting cancel from
the message display.
Marketing: You can use any of the search criteria
from marketing to create a list to SMS to, however be sure to select the
Clients with mobile number only option from the bottom of the data extraction
screen.

Choosing this option ensures only clients with
mobile numbers recorded on their client card are listed. Once you have
selected the criteria you wish to search by, select extract, the list
will be displayed. To send an SMS select the SMS option from the bottom
of the display

Your list of SMS messages will display, highlight
the message you wish to send and select OK (F12). A message box informs
you of how many SMS messages have been successfully sent.
Note:
You MUST have an active Internet connect for this function to work.
.
|
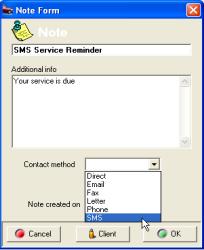
Fig. 12.46 SMS from
the client card |
SMS
Messaging, Client Card: If
you wish to send an SMS message to a single client, go to the client listing
highlight the record point and double click, select the task tab and from
the bottom of the screen point and click on note.
Enter a heading into the top field followed by the
message you wish to send in the additional info section. To send the message
select the arrow to the right of the contact method field and choose SMS
– Click OK to finalise.

The message is recorded in the task section of the
client card, to view send messages point and double click on the line
item. |
SMS
Messaging, Receiving: The
SMS gateway facilitates both sending and receiving of messages, a client
can reply to any message sent from Auto Easy, you will be notified of
any incoming messages via a prompt that will display at any point within
the application. The received message is logged in the task section of
the client card.
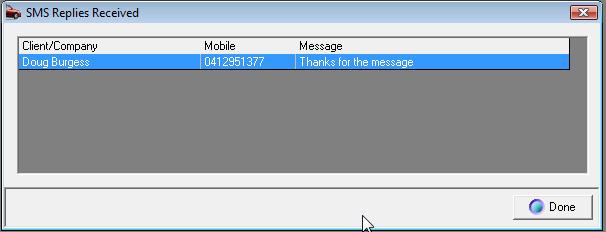
Fig. 12.47 Receiving SMS Messages
The client / company name and mobile number is displayed,
to read a message point and double click on the line.
SMS
Messaging, Logging: All SMS messages are recorded in a log
file, to view / print this select Reports / Other Reports / SMS Log, Select
the date range you wish to search and select OK. Messages are listed in
date order, with the number of messages recorded at the bottom of the
report.
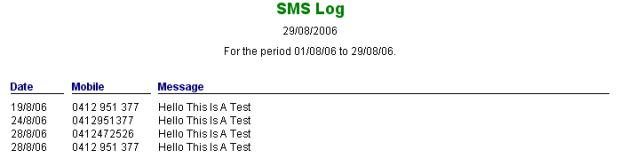
Reports,
Overview: Auto Easy Ultimate provides
an extensive suite of reports for all accounting and marketing functions.
Reports are accessed from a drop down menu listing the report types; a
further sub-menu displays the selection available. Our reporting module
gives you the ability to view on screen, print to your local or network
printer or even export into popular formats for display in programs such
as Excel and Lotus.
Selecting
A Report
|
Reports,
Accessing: Reports
are accessed by selecting the reports option from the top of the screen;
reports are grouped into the following types. To view the sub menu point
at the type of report required, pointing and clicking on the report name
will open the report.
|
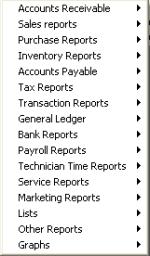
Fig 13.01 Reports Menu |
|
Accounts Receivable |
Sales Reports |
|
Purchasing Reports |
Inventory Reports |
|
Accounts Payable |
Tax Reports |
|
Transaction Reports |
General Ledger |
|
Bank Reports |
Payroll Reports |
|
Technician Time Reports |
Service Reports |
|
Marketing Reports |
Lists |
|
Other Reports |
Graphs |
|
Reports,
Selection: The reports available
consist on the following:
|
Accounts Receivable
|
|
|
Open Invoices By Customer |
Displays
a list of all invoices with outstanding balances, including sub total
by customer and a grand total. |
|
Receivables Aging Summary |
Displays a list of customers with an outstanding
balance listing in columns current, 30 days, 60 days, 90 days and 120
days plus
|
|
Invoice Summary |
This report can be run over any date range. It
displays a list of invoices by customer, vehicle and registration number
including a break down of parts, labour and gross profit with a grand
total on all data columns
|
|
Receipts Report |
The report can be run for any date range. Displays
all payments received including media, to assist with till balancing it
also contains details of any purchases processed during the report period
|
|
Client Activity |
Allows you to view the sales and payment history
by single client |
|
Sales
Reports |
|
|
Service Sales Summary |
The report is run on date range and displays performance
by service including number of services sold, labour, parts, gross profit
on parts and total gross profit by service. Sub total include fixed price
and mechanical work performed.
|
|
Item Sales Summary |
Summarises item sales over a chosen date range by
category |
|
Sales Detail By Invoice |
Allows for the selection of jobs and or invoices,
displays item detail including cost, retail, and gross profit both as
a dollar and percentage value. |
|
Sales Detail By Date |
Select a date range to view job and or invoice details
including cost, retail, and gross profit both as a dollar and percentage
value.
|
|
Job Summary Report |
Can run for any date range or period – displays parts,
labour sales by client category including value of sub-contract work sold |
|
Adjustments |
Reports on invoice and job re-openings and deletions.
Detail includes original and closing invoice value plus employee name.
|
|
Promotion Response Report |
Lists responses by promotion type including client
vehicle and sales value |
|
Upsell Report |
Itemises service sales based on whether they were
added to the booking form or directly onto the job card. Provides comparison
statistics in both dollar and percentage vales |
|
Exception Report |
Allows the operator to run a sales exception report
over any date range based on % of gross profit above / below a stated
value for parts or services. Matches also display the % variable value. |
|
Sales Performance |
Services sold on a daily basis includes average values
|
|
Client Spend |
Search by date range to view clients in order of
spend value |
|
Service detail Report |
Search by date range for job detail, includes services
sold, hours by service, parts and labour values.
|
|
Purchasing
Reports |
|
|
|
|
|
Item Purchase Detail |
Reports by item on purchases made over a selected
period including supplier, billing number and quantity purchased.
|
|
Supplier Purchase Detail |
Ability to select a single or multiple suppliers,
choose a date range and display all item purchase detail.
|
|
Supplier Purchase Summary |
Displays total purchases by supplier and month over
a pre-selected period. Ability to view all or choose single or multiple
suppliers.
|
|
Supplier Report By Item Category |
Displays a list of suppliers, providing purchase
summary data by category. Totalises the value of purchases by category
including a grand total of all category purchases.
|
|
Purchase Transaction Report |
Purchases by account and cost centre including supplier
and authorised person details. |
|
Purchases By Allocation |
Allows the user to view allocations of inventory
and buy-ins to jobs over a selected date range |
|
|
|
|
Inventory
Reports |
|
|
|
|
|
Inventory Valuation |
Ability to select single, multiple or all categories
Lists inventory items on hand including financial information by item.
Report includes sub totals by category and a grand total of the value
of all categories. |
|
|
|
|
Inventory Stock Status |
Displays inventory by category including quantities
on hand, minimum levels, items required for jobs and items on order |
|
|
|
|
Re-Order Report |
Can be run by category or supplier. The report
displays all items below the minimum order level calculating suggested
quantities based on the difference between stock on hand and maximum quantity
settings. |
|
|
|
|
Price List |
Displays the retail prices of all inventory / non-inventory
items by category selection or all. |
|
|
|
|
Barcode Print Out |
Only available once the barcode module is registered.
Prints barcode sheets & labels by selection or stock received.
|
|
Stock Adjustments |
Displays stock adjustments made including quantity,
total value and employee name. |
|
|
|
|
Item Detail |
The report can be filtered by category (view single
/ multiple or all) displays cost, retail, wholesale and trade prices including
GP and % for each price point.
|
|
Stock Movement |
The report can be filtered by category (view single
/ multiple or all) the information can be sorted by sales and purchase
quantity. The report has been written so you can identify slow moving
parts and reduce stock holding or eliminate the item from your stock holding.
|
|
Inventory Overstock |
Reports on all items in stock that are over the maximum
level – Lists by category |
|
Accounts
Payable |
|
|
|
|
|
Supplier Invoices |
Lists unpaid / paid invoices and Credits by all or
selected suppliers over any date range including totals owed to each supplier
and days exceeded trading terms. |
|
|
|
|
Supplier Aging Summary |
Displays suppliers with an outstanding balance listing
in columns current, 30 days, 60 days, 90 days and 120 days plus |
|
|
|
|
Tax
Reports |
|
|
|
|
|
Tax Detail |
Displays sales and purchases including tax component
by tax code for a pre-selected date range. Ability to run on a cash or
accrual basis. |
|
|
|
|
Tax Liability
BAS |
Can be run on a cash or accrual basis. Displays all
tax liabilities over a pre-selected date range.
Run on a cash or accrual basis for a specified date
range.
|
|
|
|
|
Transaction
Reports |
|
|
|
|
|
By Date |
Can be filtered by transaction type and date, detail
includes account and amount. |
|
|
|
|
By Account |
Lists transactions over a pre-selected date range
by account. Detail includes supplier or client name, amounts and indicates
if the transaction has been reconciled. |
|
|
|
|
General
Ledger |
|
|
|
|
|
Profit & Loss |
|
|
|
|
|
Balance Sheet |
A report that summarises the financial position of
your business. A balance sheet shows the value of your company's assets,
liabilities, and equity as of a particular day. It is called a balance
sheet because the value of the assets is always exactly equal to the combined
value of the liabilities and equity.
|
|
|
|
|
Trial Balance |
In traditional accounting, a document that adds up
all the debits and credits so that mistakes can be traced if debits don't
equal credits. |
|
|
|
|
Journals & Transfers |
Lists all journals and transfers between accounts
over a pre-selected date range. Includes a total of all transactions. |
|
|
|
|
Accountants Review |
Can be run on a cash or accrual basis, the report
consists of the detail of all transactions over a pre-selected period.
|
|
|
|
|
Profit & Loss Comparison |
Provides you with the ability to compare profit
& loss statements with the same period from the previous year. Displayed
is the dollar and % value of change between both set of financials.
|
|
Financial Summary |
The financial summary displays a “snap shot” of
your financials for a selected period, including your average daily operating
costs and daily average net profit. The report also totalises your key
asset and liability accounts as of the last day of the report period.
|
|
KPI Report |
Displays Profit and Loss, gross profit ratios and
productivity by technician |
|
|
|
|
Bank
Reports
|
|
|
Transaction Detail |
A listing that shows you your bank transactions both
credits and deposits. For example, a transaction history for a customer
payment shows the invoices to which you applied the payment and the bank
deposit.
|
|
Deposit Detail |
Details deposits you've entered. Initially, the report
covers this month-to-date, but you can change the period covered by choosing
a different date range from the date’s drop-down list. The Name column
lists the customers whose payments were included in the deposit. The Amount
column shows how much of each customer's payment was included in the deposit.
|
|
Payroll
Reports |
|
|
|
|
|
Payroll Summary |
Summarises payroll payments by employee for a pre-selected
date range. Details include tax and superannuation deductions. |
|
|
|
|
Payroll Detail |
Displays detail of payroll payments by single, multiple
or all employees. Details include payment media. |
|
|
|
|
Transaction Detail |
Details payment and deduction types by employee and
pay period over a selected data range |
|
|
|
|
Holiday & Sick Allocations |
Details holiday and sick allowances by employee over
a selected data range |
|
PAYG Payment Summary Statement
|
Allows you to print group certificates for a single
or multiple employees |
|
Employee Detail Report
|
Ability to print individual employee details |
|
Technician
Time Reports |
|
|
|
|
|
Total Hours |
Displays or prints the details of all time allocations
by job / technician plus there is a summary totaling actual hours worked
and charged and contribution by employee including percentage of the total. |
|
|
|
|
Incentive Report |
Prints the hours allocated for a single technician
by job, there is also the ability to enter a cut in point for a productivity
incentive payment based on the hours exceeding the incentive threshold.
Ie: report is run for 5 days with an incentive threshold of 30hours and
incentive of $10.00, total hours charged 38 hours above the threshold
equals 8 total incentive payable $80.00. |
|
|
|
|
Charged Verses Actual |
Ability to compare charges hours with actual hours
worked by technician and job / invoice over a pre-selected period. |
|
|
|
|
Labour Allocation |
View the charged and actual hours worked by day and
technicians, summarises the hours worked and charged for the pre-selected
month displaying the variation between values. |
|
|
|
|
Worksheet |
Allows you to print a worksheet for a selected period
by individual or multiple technicians |
|
|
|
|
Productivity |
Displays productivity for a selected day for all
technicians |
|
|
|
|
Service
Reports |
|
|
|
|
|
Client Service History |
Displays a list of work performed by client by
vehicle including a financial summary. |
|
|
|
|
Vehicle Service History |
Displays a list of services performed on a selected
vehicle including total invoice value |
|
|
|
|
Services Due |
Enter a date range in the future a list of services
/ registrations or warrants due over that period including customer contact
details is displayed to screen to print the report select the print icon
at the top of the display. |
|
|
|
|
No Response |
Enter a date range in the past a list of customers
and vehicles for which the service dates have not changed is displayed
to screen, details include clients phone numbers. |
|
|
|
|
Quotation Report |
Allows the operator to view all quotations that
have not been converted to jobs over any date range. Includes quotation
value. |
|
Marketing |
|
|
|
|
|
Demographic Report |
Run over any date range. The report contains
valuable client and vehicle and sales information including graphs. Selecting
the printer icon at the top of screen will print the report. |
|
|
|
|
Loyalty Report |
Displays current point status by client / vehicle
including points accrued by service, redemptions and totals. |
|
|
|
|
Loyalty Statement |
Prints loyalty statements for single or multiple
clients, shows points accrued by service and total to date. |
|
|
|
|
RSA Customer List |
Lists all customers and vehicles covered for roadside
assistance includes start and expiree dates. |
|
Client Intro Report |
Details how clients came to hear of the site, how
many were male / female and the level of response to promotions in both
stastical and graphical formats |
|
|
|
|
Lists |
|
|
|
|
|
Fault List |
Prints all text entered into the vehicle faults database. |
|
|
|
|
Work Done
Category List |
Prints all text entered into the work done database
Prints category listings by group
|
|
Client List |
Allows you to print a client list filtered by category
|
|
Supplier List |
Allows for the display / printing of a current supplier
listing including contact details, email and trading terms.
|
|
Account List |
Prints your chart of accounts with the ability to
filter by accounts with balances only. |
|
|
|
|
Supplier |
Prints a supplier list including addresses and phone
numbers |
|
|
|
|
Service |
Prints a list of services including stored parameters |
|
|
|
|
Other |
Prints a list of items allocated to other ie: expenses |
|
|
|
|
Other Reports |
|
|
|
|
|
New Client / Booking Form |
Prints a booking form that contains client, vehicle,
service, vehicle availability and work authorisation details.
|
|
|
|
|
Technician Barcodes |
Print bar codes for sites scanning technicians onto
jobs |
|
|
|
|
SMS Log |
Lists SMS messages sent for a selected period |
|
|
|
|
Graphs |
|
|
|
|
|
Income & Expenses |
Compares income and expenses in a graphic format
for a selected period. |
Printing
& Exporting Reports
Reports,
Printing Statements: Statements can be printed for all clients
with balances other than zero or for selected clients. Select the activities
/ create statements. Selecting outstanding will allow you to print statements
for all clients with an outstanding balance. Choosing the selective option
allows you to select individual or multiple clients you wish to print
statements for. Selecting outstanding will initiate the print run, when
selecting clients printing will initialise once the OK button is selected.
Reports,
Printing: All reports are displayed
to screen, to print double click on the print icon at the top of the screen.
There maybe a short time delay as the report is prepared for printing,
next select how many copies you wish to print from the windows print option.
Reports,
Saving to PDF:
Auto Easy allows you to save any report to a PDF File, when the report
is displayed a PDF option can be accessed from the tool bar.

Selecting this function allows you to name and
choose the location where you wish to store the file, it is then possible
to print or attach to an email.
Reports,
Export Function: All reports can be exported
to Microsoft Excel, Lotus 123, RTF or text coma delimited format. To perform
these tasks select the export function from the bottom of the report print
preview screen. Select the export file type; enter the name of the file
and destination directory. To view the export data open the appropriate
program and view the file.
 Selecting
this function from the top of the reports display allows you to export
the data in various commonly used formats.
Selecting
this function from the top of the reports display allows you to export
the data in various commonly used formats.
|
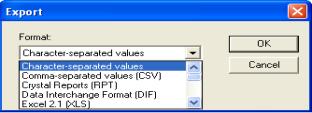
|
To select an export format, click on the button to
the right of the format field. Point and click on the required export
file type which will now display in the format field. Complete the export
process by selecting OK, naming your file and selecting the destination.
|
Fig13.02
Selecting The Export Format
Budgeting
Overview:
Auto Easy allows the operator
to forecast profit and loss account values by month for up to 12 months.
It is then possible to compare the forecast with actual values and view
the difference by account. It is suggested that operators wishing to use
this feature forecast on a financial year basis, a copy option makes it
easy to duplicate values for different periods.
Budgeting,
Opening: Move your cursor
to the top of the screen and select Admin, from the drop down menu point
and click on the budgeting option. The display lists your profit and loss
accounts, at the top of the budgeting screen are the following options:

Budgeting,
Entering A forecast: Firstly
select your starting month, next move to the year field point on the down
arrow and highlight the year, finally move across to the forecast months,
from the drop down selection choose the number of months you wish to include
in your forecast.
To allocate a forecast value, point and click in
the cell to the right of the account name, enter the value, use the down
arrow key to move to the next cell, enter a value then continue down the
column recording values against each account you wish to forecast.
Note:
If you wish to cancel a value, type 00 into the field
|
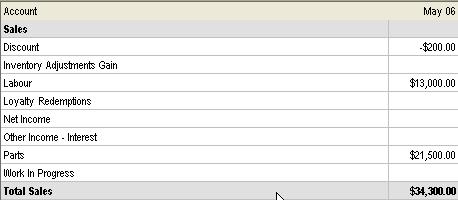
|
As you enter values the totals are updated with the
forecast net profit being adjusted accordingly.
Only profit and loss accounts are displayed, enter
values to accounts that you are posting to. The nil value accounts are
not displayed when reporting. |
Fig 13.03 Entering Forecast Values
Budgeting,
Copying And Pasting Values: You
may wish to copy one months forecast to another, to perform this task
point and click on the month title field of the values you wish to copy
the column will highlight go to the top of the display, select copy, next
highlight the column you wish to copy the data to and select paste, the
column is populated with the copied values.
Budgeting,
Reporting: Auto Easy allows
you to run two report formats, one displays forecast values only the other
compares forecast with actual values and variations, the other allows
you to view the forecast values only. To run a report select the report
option from the bottom of the screen.

The prompt requests whether you wish to display the
actual values, choosing no will display only the forecast values, selecting
yes prints the actual, forecast and variation values.
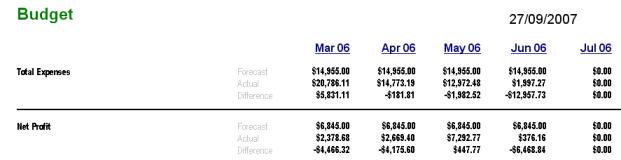
Fig 13.04 Comparing Actual and forecast results
To print the reports select the printer icon at the
top left hand corner of the report display screen.
Special
Functions, Overview: Auto Easy Ultimate provides
you with direct internet connectivity, you are able to log onto the Internet
from the on-line drop down menu. Once connected it is possible to upload
and download data for support purposes you can even access the Genesis
and Autorepairer web sites with a simple mouse click.
Connecting
To The Internet
Internet,
Accessing Functions: To access the Internet
select the on-line option from the top of screen, the drop down menu contains
the following options:
Genesis
Website:
Connects you directly to www.Genesis.com.au
Auto-repairer Web Site: Connects you directly to www.auto-repairer.com.au
Auto-update*: Genesis will advise you when program updates are available;
select this option to download the latest program from the Genesis server.
Upload Database*: Send your total database to Genesis if requested
by support personnel.
Download Database*: This selection allows for the import of your database
from Genesis support.
Replicate: Exports customer and vehicle records to the Genesis central
server for the generation of service reminders and roadside assistance
issues.
Capricorn Website: Connects you directly to www.capricorn.com.au
Capricorn Reconciliation: Initialises the Capricorn statement reconciliation
feature.
|
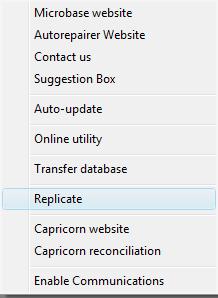
Fig 13.01 On-Line Menu |
Internet,
Connecting: When selecting
the Genesis, Autorepairer or Capricorn website options from the on-line
menu your computer will initialise the dial up process and connect to
your ISP. If however you are on-line when either of these options are
selected the home page of each site will be displayed without initializing
dial-up.
Internet,
Auto-update: If on support
you will be notified by Genesis when an update is available. Selecting
this option will initialise a download, on completion your program will
close and re-open in the new version.
Replicate: This feature allows you to send customer
and vehicle information to the central server. On selection you will be
connected to the Internet, your files zipped and transferred. If you wish
to close your connection select yes when requested to log off.
Enable
Communications: Allows Genesis
support to connect with your PC.
|
Uploading
/ Downloading Data
Internet,
Uploading / Downloading Database:
You maybe requested by Genesis to transfer your data, to upload the total
database select transfer database from the on-line menu. Your system will
connect to the internet, a line gradually progresses across the message
box indicating upload status. You are prompted when the upload is completed
successfully.
|
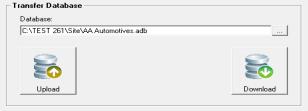
Fig
13.02 Transferring Data |
To download data, select download database from transfer
database, your system will connect to the internet and request you to
overwrite your current database – select yes from the prompt, the database
will download as a progress bar moves across the screen. On completion
your application will close and re-open in the downloaded database.
|
On-line
Support
Auto-Update,
Accessing: To access the auto-update
feature select the On-Line function from the top of screen, from the drop
down menu select Auto-Update, a box (first access) will request whether
you are updating via the Internet or from a directory on the LAN. If updating
a network download the update file, the program will close and reopen
in the new version. Perform the same procedure on each terminal except
select the APUpdate directory from the Internet machine as the path directory
which is APUpdate, Select Update now to complete the installation.
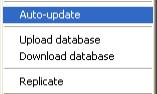
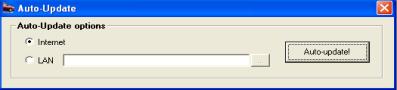
The auto-update feature allows you to update a single
machine or a network via the Internet
Support Messages: On
installation of 2.6.1 your site will be registered on the Genesis server
which allows our support staff to communicate directly with a site through
Auto Easy. This facility will primarily be used to enhance support procedures.
Receiving
a message: Auto Easy when
connected to the internet is constantly scanning for incoming messages,
when a message is received it will be displayed on your screen.
|
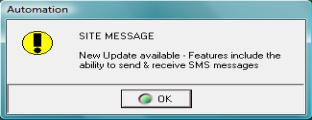
|
When the OK option is selected the message is saved
to the site messages list available from Lists / Site Messages. The stored
messages can be read by clicking on the line. To delete a message simply
highlight and select delete from the bottom of the list. |
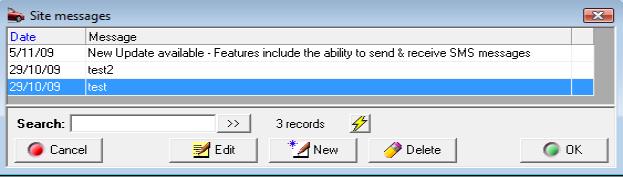
Fig 13.03 – Accessing Site Messages
Application
Support: Genesis
support staff may request you allow access to your PC, to achieve this
link Genesis uses a third party package – Cross Loop. The application
is available from the support pages on the Genesis web site. When this
application is loaded on selecting enable communications from the on-line
menu Auto Easy will search for the Cross Loop executable (this may take
a minute or two on the first use).
When
Cross Loop executes a screen requesting you to connect is displayed, select
this option in share mode and a second screen indicating that you are
connecting to the cross Loop internet server is in view, Genesis personnel
will request the access code so they can connect to your computer. When
the support session is complete select disconnect from the same menu.
Invoice
Retrieval -
Function
Overview: Genesis
in conjunction with Auto Parts have developed an on-line facility
that allows registered users to import bills directly to Auto Easy’s
purchasing module. Line items included in these imports can be allocated
to inventory or jobs as buy-ins. For this feature to operate you will
need an internet connection plus your account has to be activated
for data import via application to Auto Parts.
Set-up:
To
initialise your invoice retrieval feature select from the top menu
bar File / Setup, point and click on the on-line tab. The invoice
retrieval options are located on the bottom left hand side of the display.
Managing
Imported Invoices: Imported
bills are listed in your purchasing screen; the invoice number is displayed
in blue, and once the invoice has been opened and closed the invoice number
will be displayed in black indicting to the user that the transaction
has been processed. It is suggested from an operational perspective that
imported transactions are accessed and processed when the paper invoice
is received. All items will be received as inventory unless the part number
has already been allocated as a buy-in on the local system in which case
it will retain the previous allocation. Version 261D and later allow for
easy conversion of parts between buy-ins and inventory.
|
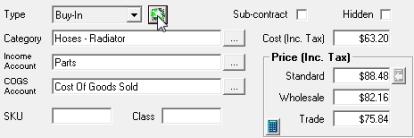
Fig 13.05 Switching Between Inventory
& Buy-Ins |
To convert an inventory item to a buy-in (or visa
versa) point and click on the line item, from the part form point and
click on the button to the right of the type field, select the conversion
option. Using the import process requires all buy-ins to be allocated
to jobs from the purchasing module. |
Function
Parameters Relating To Data Import: Catalogue
or new items will be allocated to inventory – when a catalogue part existed
before download the item is converted to inventory the cost is recorded
in the part form however the sell if originally zero will remain with
no value recorded..
When a duplicate reference number is found, the
user is prompted with three possibilities:
a) Replace existing (automatically backing out
previous data),
b) Keep existing and create a new record (with
automatically created different reference number)
c) Keep existing and ignore new data. There is
also a checkbox at the bottom of this form which you can check if you
want to use the option you select for all duplicates in the current download
(saving you from clicking the button for each and every invoice).
If a match is found from a new bill to an existing
PO (this field is in the data), the link is created and the outstanding/received
fields are populated accordingly.
Inventory items/Buy-ins can be interchanged from
the part details form by selecting the button to the right of the type
field.
Data
Maintenance
Data
Maintenance, Overview:
It is important that you understand how to maintain and backup your data.
We recommend that you back up your data at the end of each session.
If you have more than one hard disk drive; backup onto a different drive
from the one where you keep your working data. If you have only one hard
disk drive, backup onto a USB Flash Drive, CDRW or Zip Disk. Remember
that an important purpose for backing up data is to protect against a
hard disk failure.
1)
Each
day, back up onto a removable media (ie: CD or Flash Drive) to store away
from the office.
Note: The first time you
do a daily backup, we suggest that if you are using zip disks or CDRW’s
you make several sets of backup disks and label the each disk "Auto
Easy Backup Monday," "Auto Easy Backup Tuesday,"
2)
At
least once a month, make a backup copy to keep permanently off your premises.
Note: For your monthly
backups, you may want to alternate between two sets of media. If disaster
strikes your office, you'll want to have a reliable record of your data
to fall back on. Also, if one of the media items become damaged or fails
you'll have another data set to fall back on.
3)
At
the end of your financial year, make an archive copy of your data to keep
off your premises.
Data,
Backup:
Any program
that stores critical data backing up the databases is extremely important.
It is suggested that the data is backed up at least every working day
with back up files being written to both the hard and removable drives.
Floppy disks are not the most stable storage media for this reason it
is suggested you use other media types such as a USB flash disk or CDRW.
The removable media should be stored away from any electrical items or
devices containing magnets of any kind. In the event of a hardware or
software failure all data can be restored from the hard drive or backup
disk.
Data,
Backup Auto Selection: The automated backup
feature is set from Settings / Program options
|
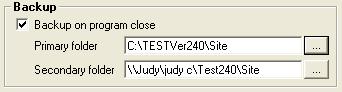
|
The backup process is automatically initialised
on exiting the program. When backing up from a network drive only choose
the option on the machine you wish to backup from, only the selected machine
will prompt the backup process as the program closes. |
This feature allows you to nominate 2 drives for
the backup to be written to. This is usually a directory on the hard drive
plus a removable drive ie: USB Flash Disk or CD ROM. To chose the backup
locations select the button to the right of the field; from the navigation
window select the drive you wish to write to and click on OK (F12). Perform
the same for the second location, when backing up to removable media you
must ensure the drive is available before selecting the back-up option.
Back-Up
Files: Auto Easy stores 5
back-up files in both the primary and secondary locations, the file names
have a numeric extension ie: 2,3,4 and 5 when the sixth back-up is performed
the least recent file is deleted. For those sites that have large databases
ensure that you have enough storage on your removable media to store 5
back-up files. Storing multiple back-ups is a fail way of ensuring
minimal data loss if your working data becomes corrupted and can’t be
repaired.
Data,
Backup Manual Selection:
To backup the data while working in the program select file from the top
of the screen. From the drop down menu select backup. Select the directory
you wish to backup to, if overwriting a previous backup file you will
be prompted to confirm your selection. A confirmation message follows
if the backup was successful.
Data,
Restoring:
To restore data select file from the top of the screen. From the drop
down menu select restore. Select the directory / file you wish to restore
from, you are prompted to confirm your selection, select yes to restore.
Optimising
Databases
Database,
Optimisation:
Over a
period of time the databases can become fragmented and you may notice
searches become a little slower. To overcome these problems it is suggested
you run the repair and compact option from the file menu on a weekly basis,
simply point and click on the selection to initialise. The utility will
run and display a message on completion.
Integrity
Check
This option is available from the file menu,
it should be run if you suspect transactions have been corrupted in any
way. Point and click on file from the drop down menu select Integrity
check. If a transaction is found to be out of balance a prompt is displayed
to fix the transaction select OK (F12).
Data Management
Data
Management, Creating A New Site: When
opening Auto Easy for the first time you are requested to create a new
or open an existing database. You are required to enter a site id (use
4 numerics, if you are on support Genesis will issue a unique number)
and your trading name – This will become the name of your data file for
that set of accounts. It is also possible to create a new site by selecting
file / New site from the top menu bar.
There are three checkboxes in the body of the
select database form; all are selected as a default. If you do not wish
to import the standard chart of accounts, service
or parts listing uncheck the appropriate box. Next
select the create new database option a window opens requesting the directory
in which you wish to store the database. On installation a sub directory
titled local is created we suggest you store all of your database files
in this directory.
Note:
Your database is named by the company you created ie: Delta Auto Repairs
creates a database file titled Delta Auto Repairs, adb (adb is the database
extension for all Auto Easy site files).
Database
Management, Opening An Existing Site: Auto
Easy is a multi-company program, which means you can manage multiple accounts
from the single program. To open an existing database select either the
open an existing database option from the select database form or click
on open site from the file menu at the top of screen. Point and double
click on the required site file, the program will load the selected database,
and you will also notice that the path at the top of screen display has
changed.

Fig 13.06 Database Path Indicating The
Sample Company Is Selected
Training
Data
Training,
Selecting Sample Company: When
loading Auto Easy Ultimate a Sample company is installed in the C:\Program
Files\Auto Easy Ultimate\Site directory it is suggested you select this
file to use for training purposes. Select open site from the file
menu, from the open site selection box point and click on AA Automotives
Pty Ltd. The header located at the top of the screen will now indicate
you are operating in the Sample Company.
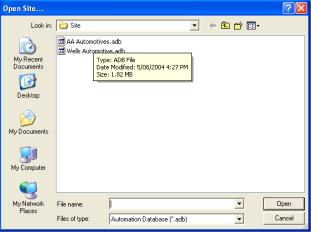
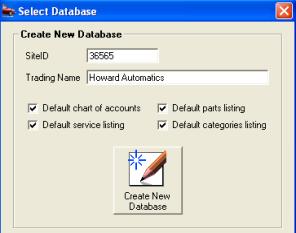
Fig 13.07 Selecting An Existing Site
Fig 13.04 Creating A New Site
Archiving
Data
Overview:
Over a
period of time your database will grow in size and you may begin to experience
a slow down in overall performance of the program. To restore processing
speed back to an acceptable level we suggest you use the archive option
provided. Before you process your data through this utility you must be
aware that certain transaction detail will no longer be available from
your working database, for instance transaction reports run for an archived
period will contain limited detail for this reason we suggest you give
serious consideration to the cut off date for archiving.
Auto Easy does not allow you to archive data
from the current financial year, your choices are limited to the last
day of each financial year for which the data is valid. For instance it
would not be advisable to archive data for the 2004 / 2005 financial year
on the 1st. July 2005 as you will still require transaction
detail to finalise your tax returns, once these are completed then you
would be safe to archive data in the previous tax year.
To ensure there is no data loss the archiving
process will automatically back-up your current data to an archive directory,
this can be restored at anytime by using the archive restore option. Be
aware that these archives will contain all data as it was up to the date
and time the archive was created. No post archive data is written to these
files.
Archiving
Process: Click
on File / Archiving
|
Fig 13.08 Archiving Selection
|
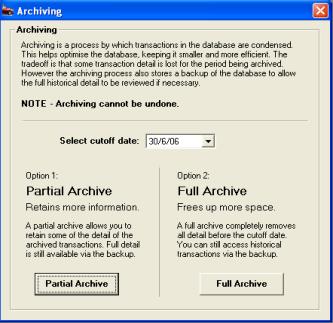
Fig 13.09 Selecting The Cut Off
Date |
Auto Easy will only allow you to select an end
of financial year date that is current for your data. Transactions after
that data will not be affected by running the process. Select the archive
button to run the utility
Before
continuing please read the message displayed as the process is irreversible.
|
When you have selected which archive you wish
to run you will be prompted to confirm your selection, point and click
in the yes box provided and click on the word yes located on the bottom
right hand side of the screen, processing will initialise. The time to
complete the process will vary according to the size of your database;
we display a red bar indicating the current status. On completion a message
box will summarise the results of the archive.
Partial Archive
A partial archive reduces the size of the transaction
data, all sales history is retained however after a partial archive it
is not possible to run detailed general ledger reports as this data no
longer exists. A partial archive will speed performance for small to medium
sized databases, however it maybe necessary to run a full archive to maximise
the performance of a large database
|

Fig 13.10 Archiving Complete
Message |
The message displays the path and file name of
the archive, how many transactions where affected and how many remain.
We also display a percentage reduction value ie: in the example 98.33%.
To finalise click on OK.
To summarise what processes have occurred:
1)
Your
pre archive data has been saved to an archive directory date and time
stamped – This can be restored and viewed at anytime.
2)
Transactions
been summarised and deleted from your data files to reduce the overall
size. Having less data will improve access speed. |
Full
Archive
It is suggested that to optimize performance
for a large database a full archive is performed, be aware that all data
prior to the archive date will be removed. Transactions are summarised
to maintain general ledger integrity. A full archive is only required
if data access times have become unacceptable.
Restoring
Archived Files: Auto
Easy gives you the option to restore archived files. This can only be
done by using the restore archive option in the file menu. On selection
you will be prompted to select the file you wish to view from the archive
directory. The files are date and time stamped. Select the file you wish
to restore and click on the open option, the file will automatically restore
to the archive directory.

Fig 13.08 Choosing The Archive
You Wish To Restore
On restoration you will notice that the name
of the file remains date and time stamped and always has an aar extension
so you do not confuse an archived database with your working data.

The restored data will have all transaction detail
in tact and you will be able to run reports to view detail.
To return to your working database click on open
site, select the site menu from the drop down selections, point and click
on your data file name and select open from the bottom of the screen.
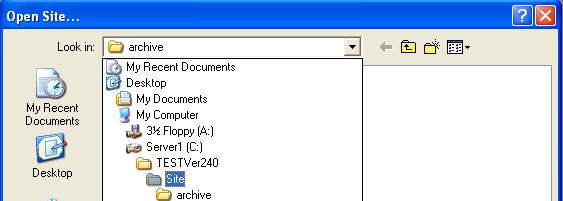
Fig 13.09 Selecting The Site Directory To Open
the Working Database
Set
Up Procedure
Overview:
Genesis
has developed a set-up procedure that loads specified data onto
the local machine enforcing category and vehicle management according
to standard databases provided. It is important that the operator uses
wherever possible the category, part and vehicle listings loaded by the
parent organisation to ensure data integrity is maintained. The
setting allows the local machine to replicate the database with a central
server via a direct SQL connection over the internet. Replication can
be set to either automatic or manual mode. The following documentation
gives an overview of how the features should be used.
Note: Do not select the option unless instructed
by Genesis or Personnel
Set-up
Procedure: When creating the new database
ensure you enter the correct site identification as provided by . Open
the program; select File / Settings from the top of the screen
the site detail form will be displayed select the button to the right
of the organisation field. Point and click on .
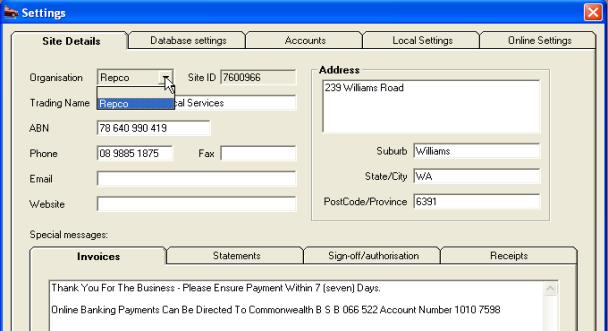
Fig 14.01 Selecting As The Organisation
 To save the new setting select
the OK button located on the bottom right hand corner of the display.
You will now be asked to confirm your selection, if you wish to continue
select the yes button from the bottom right hand corner of the message
box.
To save the new setting select
the OK button located on the bottom right hand corner of the display.
You will now be asked to confirm your selection, if you wish to continue
select the yes button from the bottom right hand corner of the message
box.
|
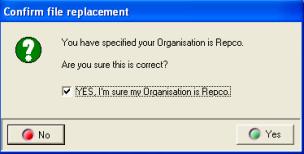
Fig 14.02 Confirmation Message |
Selecting yes from confirmation screen will connect
your PC to an internet server (if you are not on broadband your machine
will auto dial and connect to your service provider). When connection
is established the database will be downloaded to the local machine.
Status of the download is indicated by a progress bar. Once the files
have been downloaded successfully the program will automatically update
the local machine
|
The update process
performs four passes on the database, categories, services, suppliers
and parts. When the process is complete a message is displayed, if you
are using a dial up connection you are prompted to hang up select yes
if you wish to go off line.
To return to the program desktop select OK (F12) from the bottom right
hand corner of the settings display.
Category
Allocations
Categories,
Viewing: It
is suggested that you familiarise yourself with the categories that have
been loaded from the database. To view the list select lists / categories
from the top of screen, the categories are grouped into the following:
v
Parts
v
Services
v
Suppliers
|
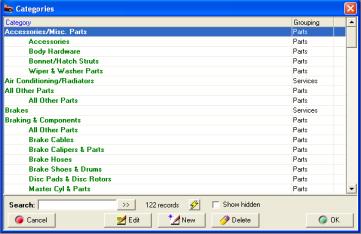
Fig 14.03 Viewing The Category Listing |
It
is not possible to edit the specific categories for any of the groups,
however new categories can be entered if required. It is suggested that
wherever possible you apply the category to parts, services and
suppliers. To search for a category select either the category or grouping
column by pointing and clicking on the header record. Enter text into
the search field; the cursor will highlight the required record. If you
are searching by keyword select the double arrows to the right of the
field the cursor will cycle through all fields with that entry.
|
Category Listing
|
Parts |
|
|
|
|
Accessories/Misc.
Parts |
|
|
|
|
|
Accessories |
|
Starter Motors & Parts |
|
|
Body Hardware |
|
Switches & Sensors |
|
|
Bonnet/hatch Struts |
Engines & Components |
|
|
|
Wiper & Washer Parts |
|
All Other Parts |
|
All Other
Parts |
|
|
Balancers & Oil Pumps |
|
|
All Other Parts |
|
Engine Bearings |
|
Braking
& Components |
|
|
Engine Mountings |
|
|
All Other Parts |
|
Gaskets & Seals |
|
|
Brake Cables |
|
Motors & Cylinder Heads |
|
|
Brake Calipers & Parts |
|
Oil Filters |
|
|
Brake Hoses |
|
Pistons & Rings |
|
|
Brake Shoes & Drums |
|
Timing Components |
|
|
Disc Pads & Disc Rotors |
|
Fast Parts |
|
|
Master Cyl & Parts |
|
Brake & Clutch |
|
|
Pedal Pads |
|
Service Parts |
|
|
Wheel Cyls & Parts |
|
Suspension/driveline |
|
|
Electrical Components |
|
Tune Up |
|
|
All Other Parts |
Fuel & Exhaust |
|
|
|
Alternators & Parts |
|
Air & Fuel Filters |
|
|
Batteries |
|
All Other Parts |
|
|
Distributors & Parts |
|
Carby & Efi Parts |
|
|
Flashers & Relays |
|
Exhaust Systems |
|
|
Globes & Lights |
|
Fuel Caps |
|
|
H/lamps,lights-lens |
|
Fuel Pumps & Parts |
|
|
Ignition Coil/e.c.units |
|
|
|
|
Spark Plug Leads |
|
|
|
|
Spark Plugs |
|
|
|
Heating & Cooling |
|
|
|
|
|
Air Cond & Heating |
|
Manual Gearbox Oil |
|
|
Fan Belts & Pulleys |
Susp,steering,drivel |
|
|
|
Fan Clutches & Fans |
|
All Other Parts |
|
|
Hoses: Radiator & Miscl. |
|
Diff & Hub Parts |
|
|
Miscellaneous Parts |
|
Oil Seals |
|
|
Radiators & Caps |
|
Shock Absorbers & Struts |
|
|
Temp.senders & Switch |
|
Steering Parts |
|
|
Thermostats & Housings |
|
Suspension Bushes |
|
|
Water Pumps & Parts |
|
Suspension Parts/springs |
|
Oil & Chemicals |
|
|
Uni`s/cv`s/centre Brgs |
|
|
Additives Oil/fuel |
|
Wheel Bearings/seals |
|
|
Additives Radiator |
Transmission & Clutch |
|
|
|
Additives Screen |
|
All Other Parts |
|
|
Adhesives |
|
Auto Transmission & Kits |
|
|
Brakes |
|
Auto Transmission Parts |
|
|
Grease |
|
Clutch Kits |
|
|
Lubricant/penetrant |
|
Clutch/spigot Bush/brgs |
|
|
Oil |
|
Covers Assy`s & Plates |
|
Oils,fluids,coolants |
|
|
Hydraulic Clutch Parts |
|
|
Auto Transmission Fluid |
|
Manual Gearbox & Kits |
|
|
Engine Coolant |
|
Manual Gearbox Parts |
|
|
Engine Oil |
|
Pedal Pads |
|
|
|
|
|
|
Services |
|
|
|
|
|
Airconditioning |
|
Labour |
|
|
Automatic Transmission |
|
Major Services |
|
|
Brake |
|
Minor & Lubrication |
|
|
Carbon Clean |
|
Log Book |
|
|
Surcharges |
|
Roadworthy Certificates |
|
|
EPA |
|
Roadside Assistance |
|
|
Cooling System |
|
Steering & Suspension |
|
|
Diagnostic |
|
Exhaust |
|
|
Tuning |
|
|
|
Suppliers |
|
|
|
|
|
Holden dealership |
|
Other dealership |
|
|
Ford dealership |
|
Spare parts supplier |
|
|
Toyota dealership |
|
Expense item supplier |
Categories,
Printing: It is possible to
print a list of categories from Auto Easy Ultimate by selecting Reports
/ Other Reports / Category list from the top of the screen. The report
lists all categories by part, supplier and service groups.
Categories,
Removing From View: You are
unable to delete or hide specified categories, however other records
can be hidden by opening the category form from the category list (point
and double click on the record or highlight and select edit (F2) from
the bottom of the display) and ticking the hidden box.
,
Applying Categories
Overview:
When your organisation has
been set to certain rules apply to the allocation of categories
for suppliers, parts and services. It is not possible to finalise a sale
without parts and services being allocated to a category. Once a category
has been assigned to a part or service record there is no need to re-allocate
the record. Your system contains over 3,000 parts from the catalogue
that have the correct categories already assigned it is suggested that
wherever possible these records should be used.
Categories,
Applying To Parts: From the
parts listing select the part you wish to assign a category to. Double
click on the line item or highlight and select edit (F2) from the bottom
of the list. Select the button to the right of the category field, your
category list is now in view, search for the required record highlight
and select OK(F12) to insert onto the part form. Select OK(F12) from the
bottom of the part form to save the record change.

Fig
22.04 Selecting A Category From The Part Form
Categories,
Applying To Parts From The Job Card: It
is possible to enter parts or services that have not been assigned a category
onto a job card, cash sale or charge invoice, however you will be prompted
to enter a category on finalising the entry. The assigned category is
recorded on the service and part forms and will not require any subsequent
assignment.
|
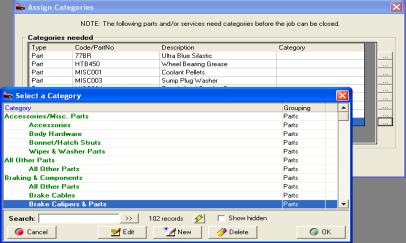
Fig 14.05 Applying A Category From The Job Card |
To assign a category select the button at the end
of the line item, the category list will display, search for the required
category, highlight and select OK(F12) the record is enter in the list.
Perform the same task for subsequent services or parts in the display,
when complete select the done button to save.
|
Categories,
Applying To Services: A
service listing has been loaded onto your machine the name, code and categories
are listed in the following table. It is however possible to create a
new service and apply a category. From the service listing select the
new button at the bottom of the display complete the fields as required
selecting the button to the right of the category field will display the
services category list, highlight the record you wish to apply and save
by selecting OK(F12) from the bottom of the category display.
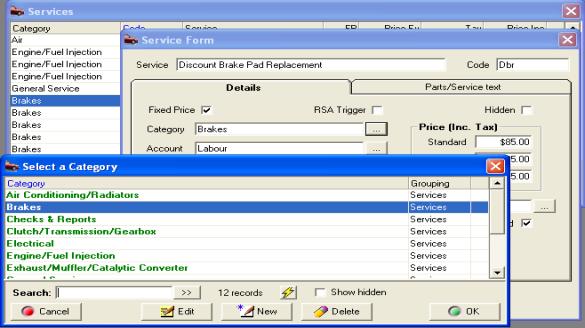
Fig 14.06 Apply A Category To The Service Form
If a service that has not been assigned a category
is applied to a job card a prompt will display requesting a category be
entered.
Standard Services
|
Service Name |
Code |
Category |
|
Air Conditioning Service |
ACS |
Airconditioning |
|
Automatic Transmission Flush |
ATF |
Automatic Transmission |
|
Disc Brake Service - Front |
DBSF |
Brake |
|
Drum Brake Service - Rear |
DRBSR |
Brake |
|
Brake System Flush |
BSF |
Brake |
|
Drum Brake Service - Front |
DRBSF |
Brake |
|
Disc Pad Replacement - Front |
DPRF |
Brake |
|
Brake Shoe Replacement |
BSR |
Brake |
|
Disc Brake Service - Rear |
DBSR |
Brake |
|
Brake Disc Machine |
BDM |
Brake |
|
Disc Pad Replacement - Rear |
DPRF |
Brake |
|
Wheel Cylinder Replacement |
WCR |
Brake |
|
Carbon Clean Fuel Injector Service |
CCFI |
Carbon Clean |
|
Carbon Clean Diesel Injector Service |
CCDI |
Carbon Clean |
|
Comm. Vehicle Surcharge |
CVS |
Surcharges |
|
Surcharge Fixed Price (specify) |
SUR |
Surcharges |
|
Cooling System Service |
CSS |
Cooling System |
|
Engine Diagnosis Carburettor |
EDC |
Diagnostic |
|
Efi Engine Diagnosis |
EFID |
Diagnostic |
|
Efi System Clean |
EFISC |
Tuning |
|
Hi-tech Tune 4 Cyl. |
CT4 |
Tuning |
|
Hi-tech Tune 6 Cyl. |
CT6 |
Tuning |
|
Hi-tech Tune 8 Cyl. |
CT8 |
Tuning |
|
Efi Hi Tech Tune 4 Cyl. |
EFIT4 |
Tuning |
|
Efi Hi Tech Tune 6 Cyl. |
EFIT6 |
Tuning |
|
Efi Hi Tech Tune 8 Cyl. |
EFIT8 |
Tuning |
|
Efi Major Service |
EFIMJ |
Major Services |
|
Major Service |
MJS |
Major Services |
|
Four Wheel Drive Major Service |
4WDMJ |
Major Services |
|
Minor Service |
MS |
Minor & Lubrication |
|
Efi Minor Service |
EFIMS |
Minor & Lubrication |
|
Lube Service & Filter Efi |
EFILUBE |
Minor & Lubrication |
|
Lubrication Service |
LUBE |
Minor & Lubrication |
|
Four Wheel Drive Minor Service |
4WDMS |
Minor & Lubrication |
|
Power Steering Flush |
PSF |
Minor & Lubrication |
|
Log Book Service 30,000km |
LB030K |
Log Book |
|
Log Book Service 150,000km |
LB150K |
Log Book |
|
Log Book Service 100,000km |
LB100K |
Log Book |
|
Log Book Service 10,000km |
LB010K |
Log Book |
|
Log Book Service 40,000km |
LB040K |
Log Book |
|
Log Book Service 80,000km |
LB080K |
Log Book |
|
Log Book Service 90,000km |
LB090K |
Log Book |
|
Log Book Service 20,000km |
LB020K |
Log Book |
|
Log Book Service 140,000km |
LB140K |
Log Book |
|
Log Book Service 120,000km |
LB120K |
Log Book |
|
Log Book Service 60,000km |
LB060K |
Log Book |
|
Log Book Service 70,000km |
LB070K |
Log Book |
|
Log Book Service 110,000km |
LB110K |
Log Book |
|
Log Book Service 130,000km |
LB130K |
Log Book |
|
Log Book Service 50,000 Km |
LB050K |
Log Book |
|
Log Book Service 15,000km |
LB015K |
Log Book |
|
Log Book Service 45,000km |
LB045K |
Log Book |
|
Log Book Service 160,000km |
LB160K |
Log Book |
|
Rego Check Passenger Vehicle |
REGOPV |
Roadworthy Certificates |
|
Rego Check Trailer No Brakes |
REGOT |
Roadworthy Certificates |
|
Rego Check Trailer Brakes |
REGOTB |
Roadworthy Certificates |
|
Lp Gas Certificate |
LGC |
Roadworthy Certificates |
|
Roadside Assistance Issue |
RSAISS |
Roadside Assistance |
|
Wheel Alignment |
WA |
Steering & Suspension |
|
Shock Absorber Replacement |
SAR |
Steering & Suspension |
|
Exhaust General Repairs |
EGR |
Exhaust |
|
Exhaust Muffler Replacement |
EMR |
Exhaust |
The operator should use wherever possible services
from the standard listing, if new services are created they should be
assigned to service categories as per the above table.
Categories,
Applying To Suppliers: Major
supplier names have been added to your supplier listing these include:
|
Coventry |
|
Motor
Traders |
|
Burson
Auto Parts |
|
Auto
One |
|
Auto
Pro |
|
Independent
Motor Mart |
|
Sprint
Auto Parts |
|
Rare
Spares |
|
There is no need to apply categories to these records
as they are pre-assigned. It is important that you select these suppliers
when purchasing parts, do not create suppliers with duplicate names (the
system will warn you if this is attempted). To add a supplier category
select the supplier from the list point and click to open the supplier
form or select edit (F2) from the bottom of the display. Select the button
to the right of the category field highlight the required record and save
by selecting OK(F12). Save the supplier record by selecting OK(F12) from
the bottom of the form. |
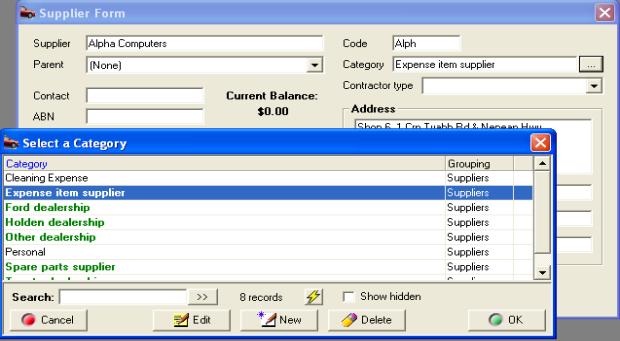
Fig 14.07 Applying A Category To A Supplier Record
Vehicle
Makes & Models
Overview:
A database
containing vehicle make / model / series / engine type and manufacture
dates has been loaded into your program. It is possible to add new vehicle
to the listing, however wherever practical the listing should be
used. Settings do not allow you to create a job card unless the make /
mode / series / engine type and manufacture date and year have been completed.
Auto Easy will prompt you to select the necessary records from the listings
provided.
Vehicle
Makes & Models, Viewing: To
view the make and model listing select Lists / Makes & Models from
the top of the screen.
Vehicle
Makes & Models, Adding To The Vehicle Record: Vehicles entered prior to
configuring the program to will be retained in the vehicle file
including the original make / model and manufacture dates. When creating
a booking you will be prompted to add the required information to the
vehicle form. New vehicle records the same rules apply the make / model
/ series / engine type and manufacture dates must be entered otherwise
you will be unable to save the record.
|
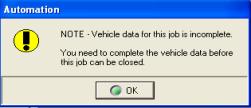
Fig 14.08 Vehicle Data Incomplete Warning |
A warning message is displayed when job cards are
created for vehicles that have incomplete details; selecting OK will open
the vehicle record with the required fields highlighted in yellow
|

Fig 14.09 Selecting Vehicle Details From The Vehicle
Form
Point and click on the button to the right hand
of the fields highlighted in yellow, select the make / model / series
/ engine type from the drop down box. The lists are indexed, typing COM
for instance will highlight commodore in the model list point and click
to insert. In the date and year fields select from the grid provided save
the vehicle record by selecting OK(F12) from the bottom of the form.
Make
& Model Adding To The Database: Adding
a new record to the make & model database can be performed in two
ways.
1)
Vehicle
Form – Type the make / model / series / engine type into the required
fields, select add a message will prompt you to confirm your selection,
the make / model form is displayed, complete the manufacture from / to
fields and save by selecting OK(F12).
2)
Make &
Model Listing – Select Lists / Make & Model from the top of the screen,
from the listing
select new to display the make & model form. Complete the details
and save by selecting OK(F12)
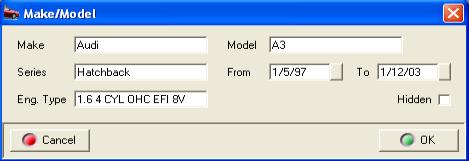
Fig 14.10 Make & Model Form
Exporting
Data
Overview:
Auto Easy
Ultimate has the ability to replicate with a central database via a dial-up
or broadband internet connection. require the local database
to be replicated on a daily basis, to simplify this process your program
can be set to perform this task automatically. It is suggested that you
are working on-line when the replication is initiated, however if this
is not possible Auto Easy will access your dial-up networking settings
and connect with your service provider.
Replication,
Enabling: To
enable replication select File / Settings from the top of the screen,
your site details are displayed. Point and click on the replication tab,
tick the box labeled Enable Replication On This Machine. Follow
these steps:
Select Automatic if you will be working
on-line when the replication is to occur. If you need to connect to the
internet select Manual.
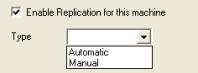 Click on the button to the right of the type field to
access the options
Click on the button to the right of the type field to
access the options
Fig 14.11 Selecting Replication Type
Automatic Set-up
|
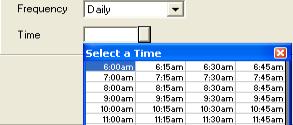
Fig 14.12 Automatic Replication Settings |
Frequency: Click on the button to the right of the
field and select daily from the options list.
Time: A time grid is displayed when the button
to the right of this field is selected, choose the time you wish the replication
process to occur each day by pointing and double clicking on the time. |
Manual Set-up
|
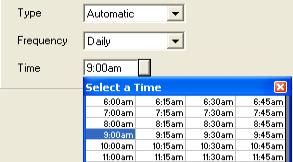
Fig
14.13 Manual Replication Settings |
Prompt:
Click on this selection,
a prompt will be displayed at the time requested including an option to
go on-line. Selection will initiate a dial-up to your service provider,
transfer data and prompt you to go off-line.
Frequency: Click on the button to the right of the
field and select daily from the options list.
Time: A time grid is displayed when the button
to the right of this field is selected, choose the time you wish the replication
process to occur each day by pointing and double clicking on the time.
|
To save your settings select OK(F12) from the bottom
right hand corner of the display. Genesis personnel will advise you on
how to set-up the replication process. It is suggested that once these
settings are entered that the operator does not make any changes unless
advised.
Equipment
Maintenance Register
Overview:
The equipment maintenance
register allows you to track scheduled equipment maintenance based on
a regular service cycle including the ability to record if the scheduled
task has occurred.
Auto Easy also allows you to record maintenance
check-lists for regular servicing, the register is linked to the task
manager giving you the ability to set reminders at a certain date and
time, once a service has been completed the next date of service is entered
automatically based on the cycle recorded.
The equipment maintenance register is accessible
from your chart of accounts by prompting whether you wish to add an item
being recorded as a fixed asset to the register with the ability to establish
a service cycle with check-lists and reminders if required.
Equipment
Maintenance Register, Accessing: To
access the maintenance register select Activities from the top
menu, point and double click on the Equipment Maintenance Register
option displayed on the drop down menu, the main screen listing all scheduled
maintenance is in view.
|
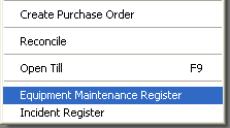
Fig 14.19 Selecting From Activities |
The register can also be accessed from your chart
of accounts. You will automatically be prompted to add an item to the
equipment maintenance register when recording an entry as a fixed asset.
If you wish to set a service schedule and reminders for the new plant
or equipment select yes when prompted to open the equipment form. On completion
the entry is automatically recorded in the register displaying the next
date of service and whether a task has been established. |
|
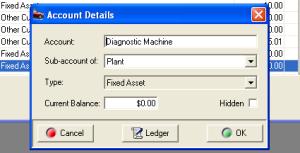
Fig 14.14 Entering A Fixed Asset |
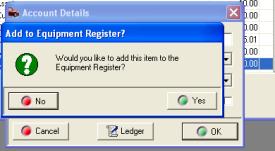
Fig 14.21 Selecting To Add An Item To The Register |
|
|
|
|
Equipment
Maintenance Register, Entering A New Item: A
new item can be entered by selecting yes when prompted from the
chart accounts or by selecting new from the bottom of the register
display. Both these selections will open the equipment form.
|
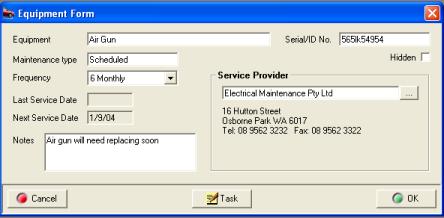
Fig 14.15 The Equipment Form |
The equipment form allows you enter the equipment
description ie: Tyre Changer, manufacturers serial number, the maintenance
type, frequency can be selected from a drop down menu, the next date of
service is automatically recorded based on last date service was completed
plus the frequency selected. |
Initially the next service date is established
by selecting the Task option from the bottom of the display. The
Maintenance Task form allows you to establish who is going to be reminded
of the task and when, enter any check-lists and make notes if applicable.
|
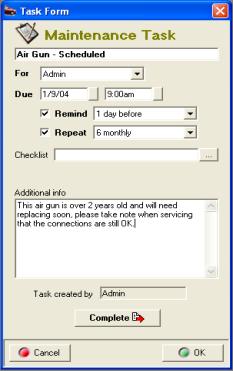
Fig 14.16 Maintenance Task |
To select the person user type you wish to be reminded
when the task is due point and click on the down arrow to the right of
the for field. A list of users and user types is displayed in the
drop down menu select the group or user by pointing and double clicking
on your selection. Enter the due date into the Due field by clicking
on the button to the right and selecting from the calendar displayed,
next select a time from the table. If you wish to be reminded point and
click in the check-box select the arrow to the right of the Remind
field point and double click on your selection from the drop down menu.
The repeat field will automatically display the service cycle entered
onto the equipment form. If this has not yet been recorded select the
arrow to the right of the Repeat field make your selection from
the drop down menu. If you wish to add a checklist to the maintenance
task select the button to the right of the Checklist field. |
|

Fig 14.24 Selecting The User |
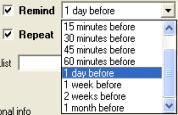
Fig 14.25 When To Be Reminded |
Maintenance
Task, Adding A Checklist: Auto
Easy allows you to store multiple checklists and attach a predetermined
list to a maintenance task. The checklist is accessed by selecting the
button to the right of the checklist field. You recorded checklist titles
are displayed, to attach a checklist to a task highlight the entry and
double click of select OK (F12) from the bottom of the list.
|
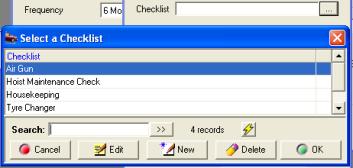
Fig 14.17 Adding A Checklist To The Maintenance
Task |
Checklists are made up of lines of text that are
numbered; when a checklist is selected it becomes part of the task. The
checks are displayed on the right hand of the task form when the Complete
option is selected. The individual checklist items can be ticked as completed
by pointing and clicking in the checkbox next to the text. It is also
possible to print the checklist by selecting the Checklist option from
the bottom of the form. |
|
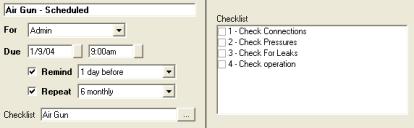
Fig 14.18 Checklist Display On The Task Form |
 Select this option if you wish to print
a checklist. It is also possible to make notes relating to the task in
the text window located under the checklist. Select this option if you wish to print
a checklist. It is also possible to make notes relating to the task in
the text window located under the checklist.
|
|
|
|
|
Equipment
Maintenance Register, Creating Checklists: To
create a new checklist go to the select a checklist display and perform
the following:
1)
Select New from the
bottom of the list
2)
The checklist details form
is displayed, to add an item select Add
3)
Type the line text into the checklist item box and save with
OK(F12)
4)
Repeat item 3 for each line
of the checklist to save the checklist select OK(F12)
|
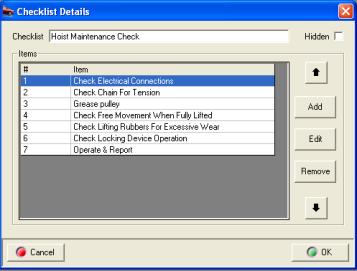
Fig 14.19 Checklist Details Display |
Checklists,
Editing & Moving Text: Edit
functions allow you to make changes to the checklist text by highlighting
the line and double clicking or selecting edit (F2) from the bottom of
the display. Make your changes to the text in the checklist item box and
save using OK (F12).
It is also possible to re-order the line items
by highlighting the check you wish to move and clicking on the up and
down arrows to the right of the display.
To delete a line highlight and select the remove
function. |
|
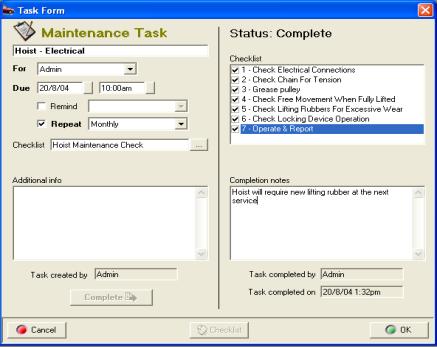
Fig 14.20
Completing A Task |
Tasks,
Completing: To complete a task select the complete
option from the bottom of the maintenance task form, checklist (if attached)
and completion notes are now visible.
Note:
Tasks can be selected from either the Maintenance register or directly
from the task manager. To open point and double click on the line entry.
Maintenance tasks are identified in the task list on the left hand side
of the task manager.
|
|
|
|
|
The tt
To confirm completion of an item within a checklist
point and click on the line a tick will be displayed in the checkbox.
Enter your completion notes and save by selecting OK (F12).
Note:
The task will always be completed by the current logged on user, the date
and time is recorded as the form is saved.
Task
Reminders, Pop Ups: authorised
users can set tasks to display pop up reminders, these are messages that
are displayed at a set time before a task is due (set from the task form).
|
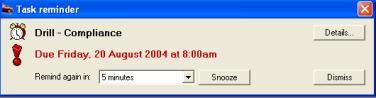
Fig 14.21 Task Reminder |
There are four options available from the task
reminder. Firstly you can reset the remind again period by pointing and
clicking on the arrow to the right on the field and selecting a new time
period from the list. |
Secondly you can select the snooze option that
will remove the reminder from the screen for the time displayed in the
remind again field. You can dismiss (cancel) the reminder by selecting
the dismiss option. Finally if you wish to view / edit the task details
select the details option.
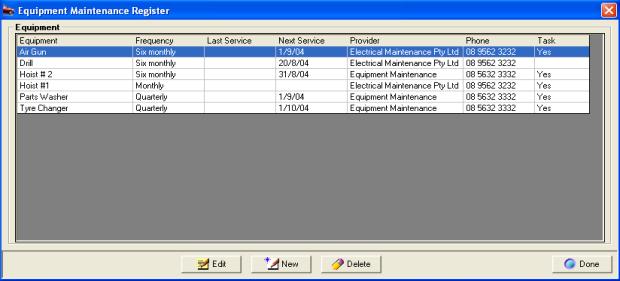
Fig 14.22 Equipment Maintenance Register Main Screen
Equipment
Maintenance Register, Editing An Entry: To edit a task go the equipment maintenance
register or task manager and select the task make the necessary changes
to the task and save with OK (F12)
Equipment
Maintenance Register, Deleting An Entry: The
task reminder can be deleted from the task manager by pointing and highlighting
the entry and selecting the delete key on your keyboard. If you wish to
delete an entry from the Equipment Maintenance screen highlight and select
the delete option from the bottom of the display.
Incident
Register
Overview:
The incident register allows
you to record of actions taken when an incident occurs, this could take
the form of an employee warning, vehicle accident, client complaint, environmental
issues or a client complaint. The register provides you with a detailed
report and the ability to attach actions in the form of notes or tasks
to an incident.
The incident register is linked to the task manager
so you can setup reminders for tasks relating to specified incidents to
ensuring they are performed. All entries in are date and time stamped,
an incident can be finalised and a detailed report produced giving the
incident details and a list of actions taken.
The module is extremely useful if you require
an audit tool that document actions relating to an incident in a logical
easily referenced format.
Incident
Register, Accessing: To
access the incident register select Activities from the top of
the screen, point and click on the Incident Register option displayed
on the bottom of the drop down menu. The main screen is displayed.
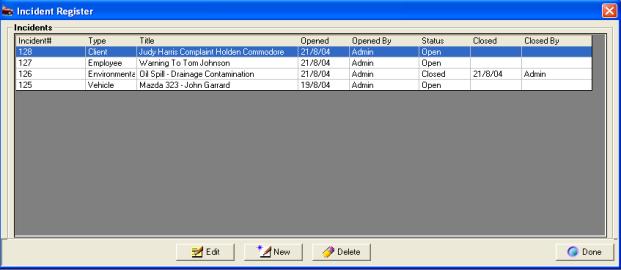
Fig 14.23 Incident Register
Incident,
Creating A New Entry: To open
a new incident click on the New option at the bottom of the display
window, the incident report form will open. It is advisable that you complete
all relevant details on this form; many of the options are checkboxes
to select these items point at the box and mouse click a tick is displayed.
|
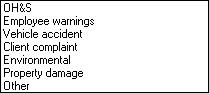
Fig 14.24 Selecting Incident Type |
The incident type field contains a drop down pick
list, to access point and click on the arrow to the right of the field.
Make your selection by pointing and clicking on the option required, your
choice is displayed in the incident type window. The incident type in
displayed in the main register screen. |
To save the
form select OK (F12) from the bottom of the form. The incident will is
displayed on your incident register screen with an open status. Selecting
the action plan option will take you back to the incident summary from
here you can create notes or a task.
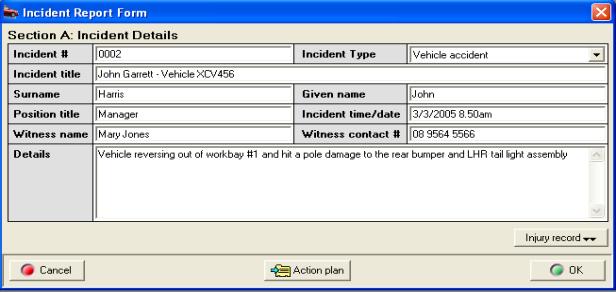
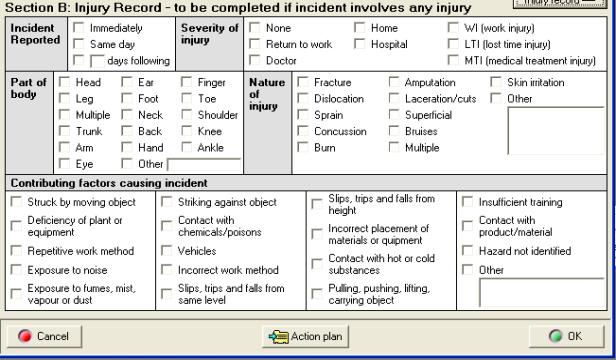
Fig 14.25 Incident Report Form
Incident
Register, Adding A Note: Point
and click on the line item from the register, the incident summary form
is in view, this form lists by date and time notes and tasks recorded
against the incident to add a note select the Note: Clicking on
the Action Plan button will open the incident summary from here you can
enter notes and tasks.
Fig 14.26 Adding A Note To An Incident
Give your note a title, enter your text into the
body of the form, select the arrow to the right of the contact method
field, point and click on the contact type ie: Letter. Save your note
by selecting OK (F12). The created by and created on fields will automatically
display today’s date and time and the identity of the logged on user.
Incident
Register, Adding A Task: Select the Task option from the
bottom of the incident summary list, this action displays the task form.
|
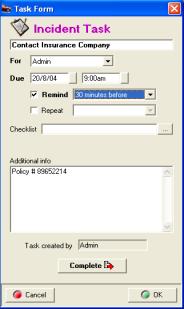
Fig 14.27 Incident Task |
To select the person user type you wish to be reminded
when the task is due point and click on the down arrow to the right of
the for field. A list of users and user types is displayed in the
drop down menu select the group or user by pointing and double clicking
on your selection. Enter the due date into the Due field by clicking
on the button to the right and selecting from the calendar displayed,
next select a time from the table. If you wish to be reminded point and
click in the check-box select the arrow to the right of the Remind
field point and double click on your selection from the drop down menu.
If you wish to repeat the task on a regular basis select the Repeat
option, select the arrow to the right of the field and make your selection
from the drop down menu.
To add a Checklist select the button to the
right of the Checklist field. This action opens your list of checks to
insert highlight the entry and confirm with OK (F12) the checklist title
is now displayed in the checklist field. To create a new checklist select
new from the bottom of the checklist display and add your line items,
adjust order if required and save with OK (F12). |
Incident
Register, Completing A Task:
To complete a task, selection can be made from either the Incident Summary
list or task list from the task manager. Point and click on the line item,
select the complete option, mark the individual checks as completed (if
attached) make your notes in the field provided and save with OK (F12).
Incident
Register, Editing a Task or Note: Tasks or notes can be edited from the
incident summary screen by pointing and clicking on the line item, executing
the changes and saving with OK (F12). An incident task can also be accessed
for editing from the task manager, again point and click on the line item,
make your changes and save with OK (F12).
Incident
Register, Deleting A Task Or Note:
To delete an item from the incident summary highlight the line item and
select delete from the bottom of the display, confirm your intention when
prompted. If you delete a task from the incident summary it will also
be removed from the task manager. To delete a task from the task manager
highlight and select the delete key on your keyboard, confirm your intent
when prompted. The task will also be deleted from the Incident summary.
Incidence
Register, Task Reminders:
There are four options available from the task reminder. Firstly you can
reset the remind again period by pointing and clicking on the arrow to
the right on the field and selecting a new time period from the list.
Secondly you can select the snooze option that will remove the reminder
from the screen for the time displayed in the remind again field.
|
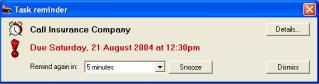
Fig 14.28 Task Reminder Generated From The Register |
You can dismiss (cancel) the reminder by selecting
the dismiss option. Finally if you wish to view / edit the task details
select the details option.
|
Incident
Register, Closing An Incident: When
all notes and tasks are completed for a particular incident it is necessary
to close the report. Highlight the incident; select the Close option
from the bottom of the Incident Summary display, confirm your action by
selecting yes from the close incident prompt.
|
Fig 14.29 Close Incident Prompt |
Note: Once closed no changes can be made to any
of the documentation related to the incident.
Security:
For a user to have access
to the incident register the option incident register option must be selected
in the security profile. |
Incident
Report, Printing: The incident report is printed from the
Incident Summary screen. Highlight the incident you wish to report on
and select the Print option from the bottom of the display.

In addition to the original details entered when
the incident was created a list of tasks and notes are printed.
Incident
Register, Deleting An Incident:
To delete an incident highlight the record from the Incident Register
screen, select Delete from the bottom of the display, confirm your intention
when prompted.


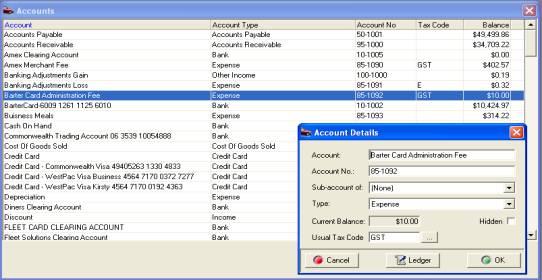


 Select this button from the
top of the screen to view the parts listing, alternatively select Lists/Parts.
The parts listing can also be opened from the job card, invoice or service
form. The display includes an allocated and available field, the values
displayed relate to inventory items only. Allocated quantities record
the total items allocated to open jobs, invoices or cash sales.
Select this button from the
top of the screen to view the parts listing, alternatively select Lists/Parts.
The parts listing can also be opened from the job card, invoice or service
form. The display includes an allocated and available field, the values
displayed relate to inventory items only. Allocated quantities record
the total items allocated to open jobs, invoices or cash sales.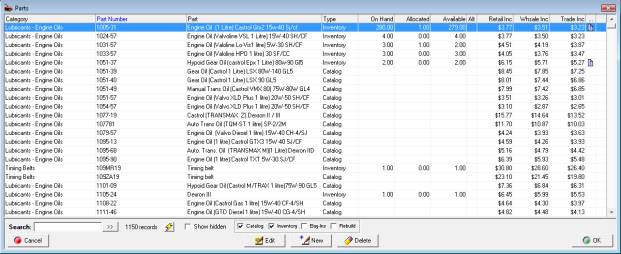
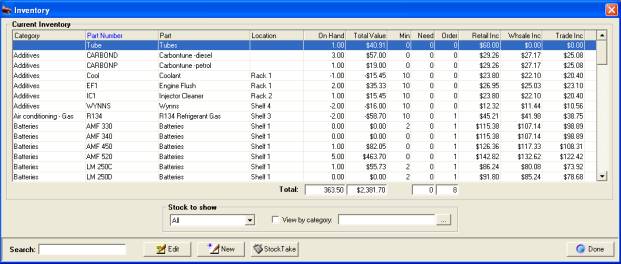
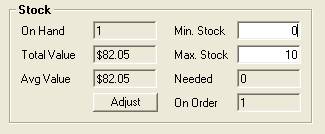
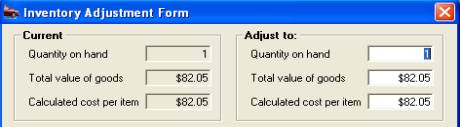
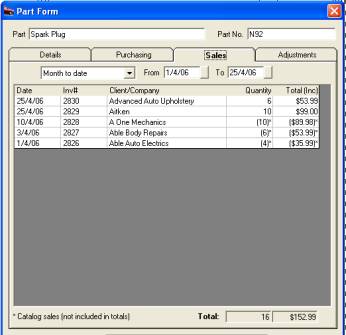
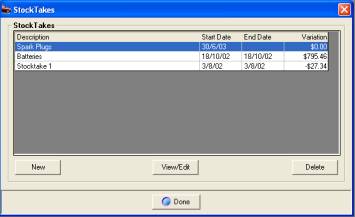
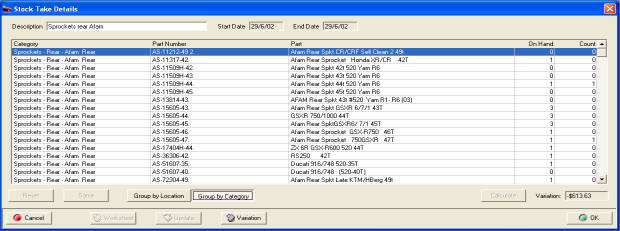

 It is possible to scan the bar
code directly onto the part form.
It is possible to scan the bar
code directly onto the part form.